Do you want to see where people are clicking on your website?
There are a couple of different ways to see which links and buttons are getting clicked on your website.
One of those options, called enhanced link attribution, doesn’t require adding any extra code to your buttons. That makes it a pretty great option for getting extra helpful data!
What exactly is enhanced link attribution, and how do you enable it and view your data? We’ll go over everything you need to know in this article.
What is Enhanced Link Attribution?
“Enhanced link attribution” isn’t exactly the easiest term to understand, so let’s break it down a little. To use terms that aren’t quite so mind-boggling, you could call it “extra link data”. That sounds better, right?
You can think of it sort of like a heatmap. While this feature doesn’t do everything that a heatmap can, it does help you see what areas of your website your users are clicking on the most.
Basically, this feature just tells Google Analytics to grab another bit of data whenever someone clicks a link on your site, so we can see which link they’re clicking.
For instance, let’s say you’re a nonprofit that accepts donations on your website. You have a big Donate button in your header, and you also have one in your sidebar on your blog. With enhanced link attribution enabled, Analytics can tell you how many times the header button was clicked vs. how many times the sidebar button was clicked, even though the two buttons lead to the same page.
With enhanced link attribution, you get to see the click-through rates (CTR) of different elements on your pages.
How to Enable Enhanced Link Attribution
- Install ExactMetrics
- Connect Google Analytics to Your WordPress Site
- Enable Enhanced Link Attribution
- View the Enhanced Link Attribution Reports
The easiest way to enable enhanced link attribution on your WordPress site is by using the ExactMetrics plugin.
ExactMetrics is the best premium WordPress analytics plugin. With ExactMetrics, you can quickly and easily track your website’s most valuable Google Analytics metrics and stats right in your WordPress dashboard.
The most popular features include:
- Top outbound and top affiliate links
- Site speed report
- GDPR compliance
- Scroll tracking
- Form tracking
- 1-click eCommerce tracking
- And lots more…
Get started with ExactMetrics now.
Step 1: Install ExactMetrics
First, you’ll need to install ExactMetrics on your WordPress website. To use the enhanced link attribution feature, download the Plus level license or above.
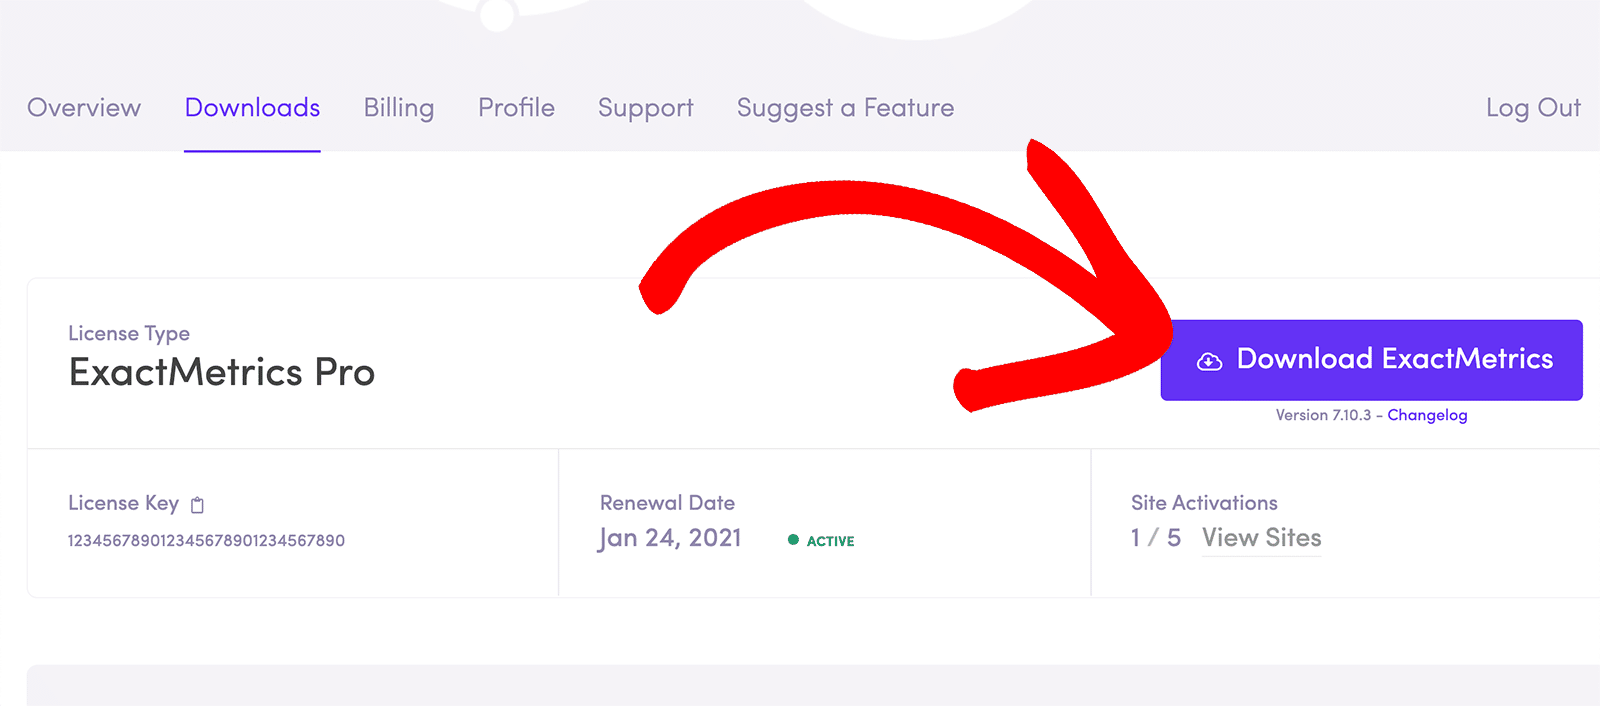
Then, download the ZIP file from your account area by navigating to the Downloads tab.
After that, upload the ZIP file to your WordPress website. You can do that by going to your WordPress admin area and clicking on Plugins » Add New » Upload Plugin.
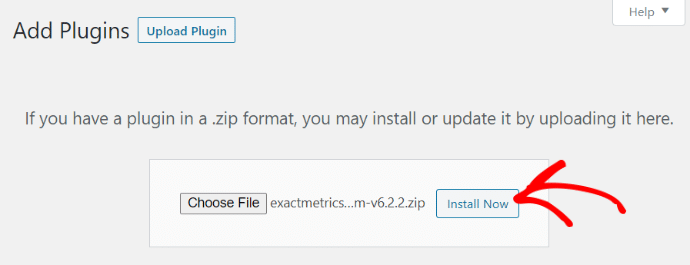
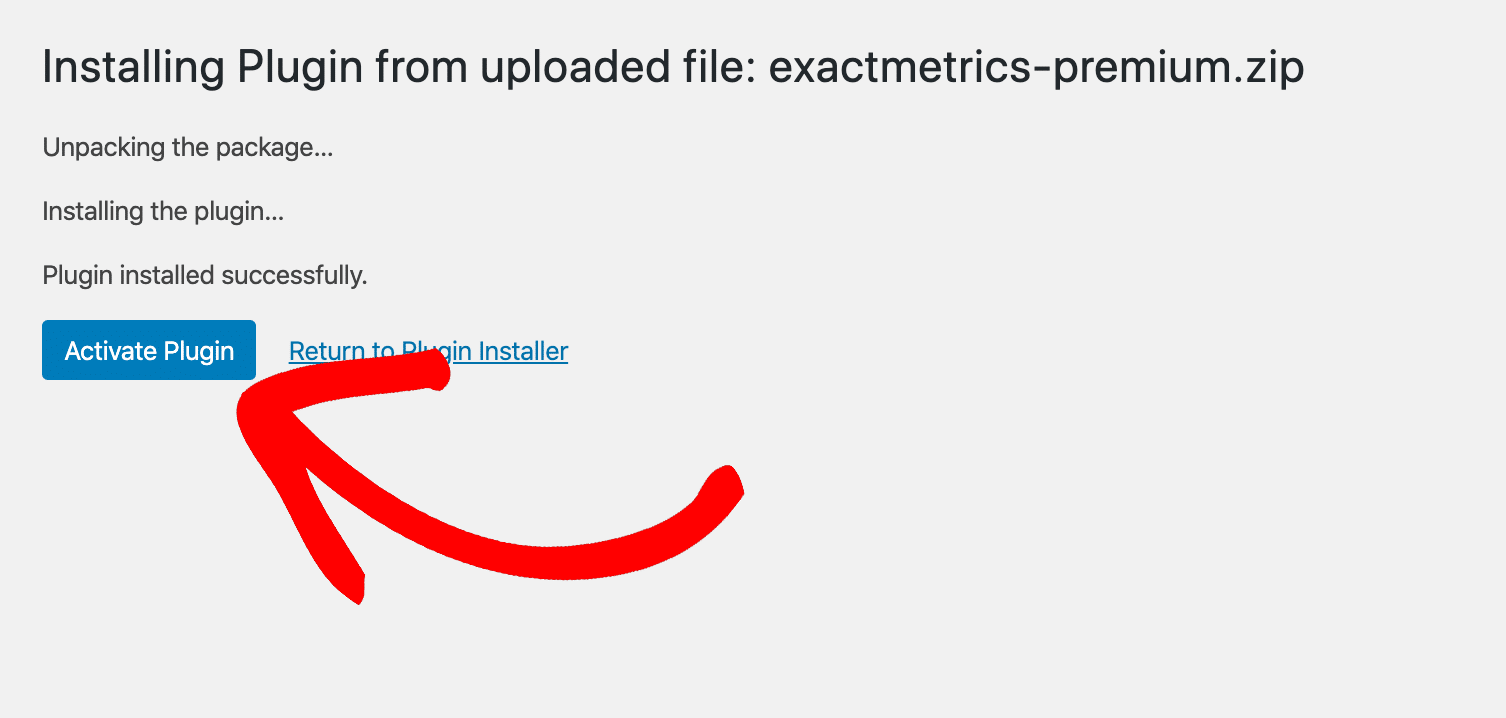
Once you upload the plugin, go ahead and install and activate it.
Step 2: Connect Google Analytics to Your WordPress Site
Now, you’ll have to set up Google Analytics on your WordPress website. Simple stuff with ExactMetrics!
The plugin adds Google Analytics tracking to your WordPress site without coding. Just follow the steps in the setup wizard to get started.
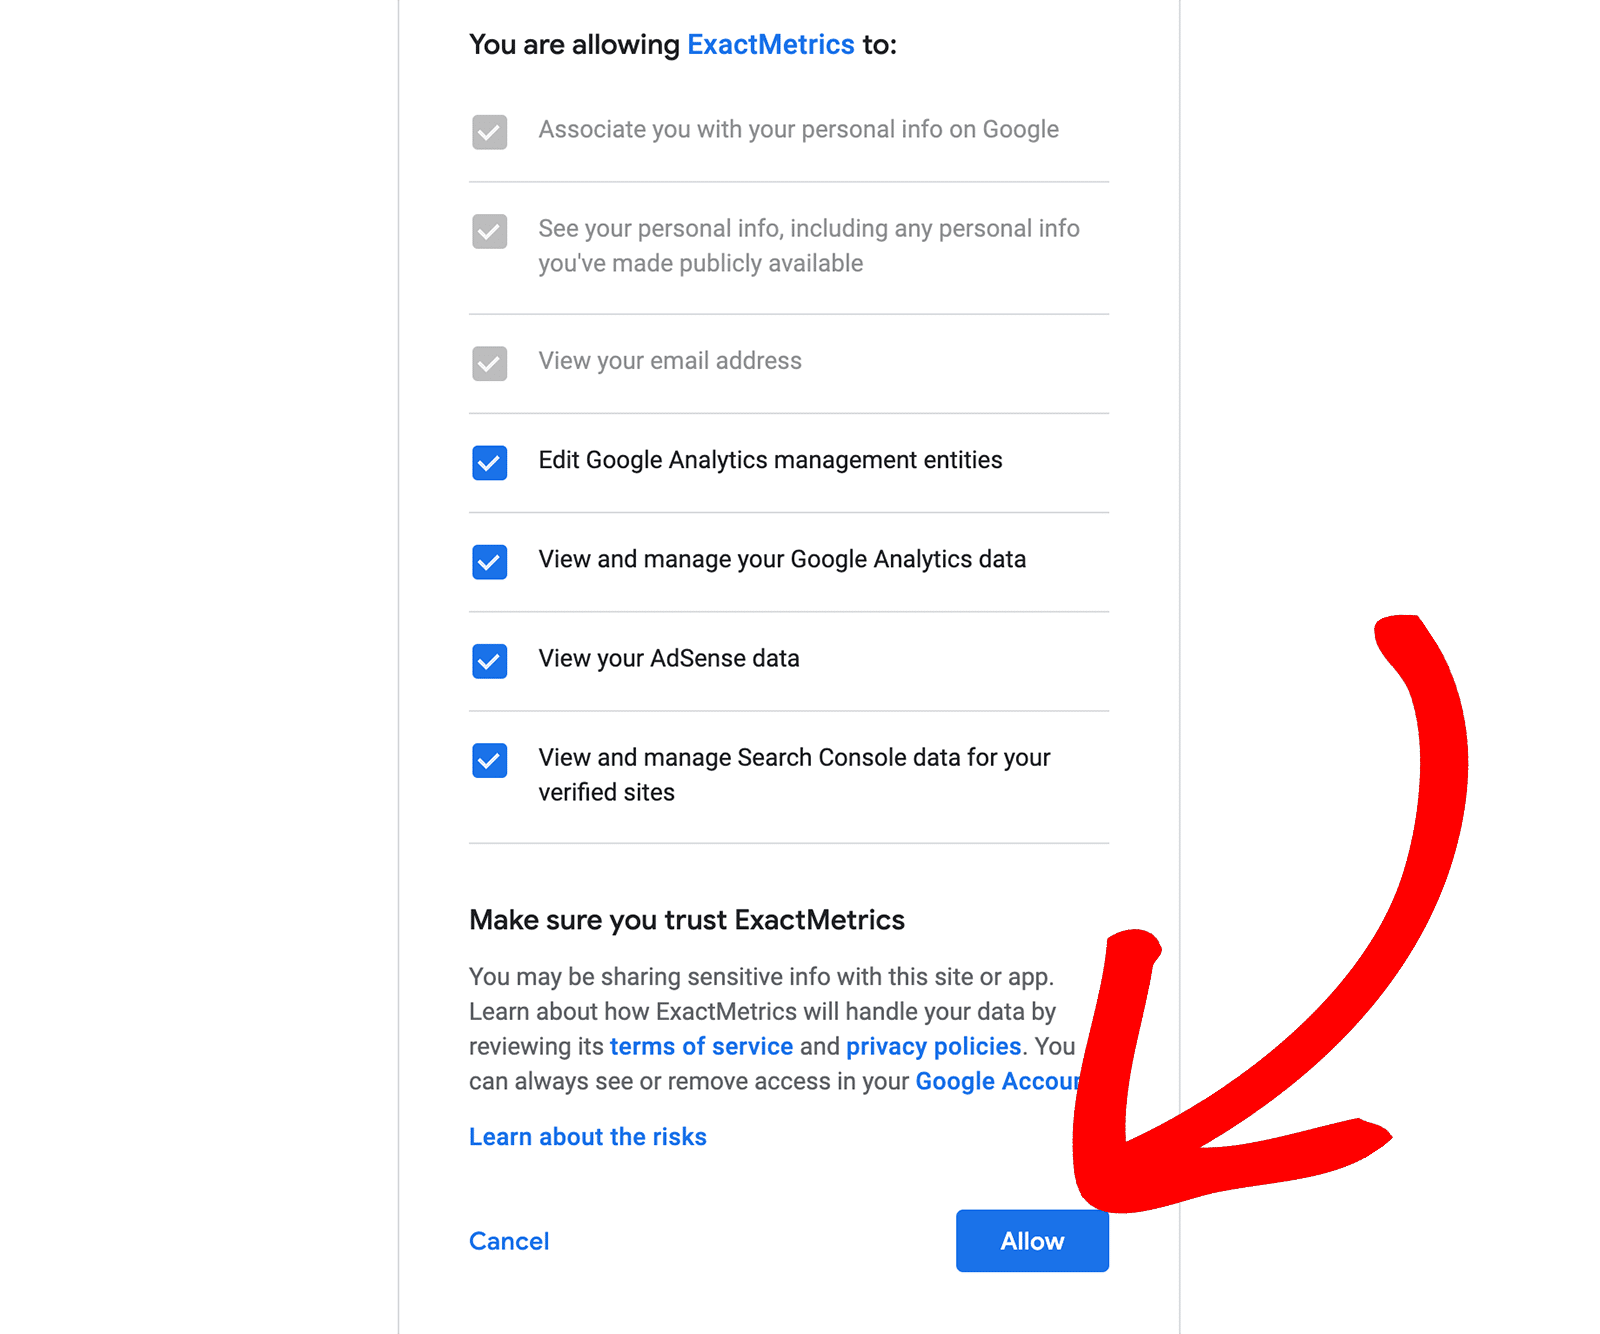
For more details on getting started, check out our guide on how to properly add Google Analytics to your WordPress website.
Step 3: Enable Enhanced Link Attribution
Head to ExactMetrics » Settings » Engagement. On that page, scroll down to Link Attribution.
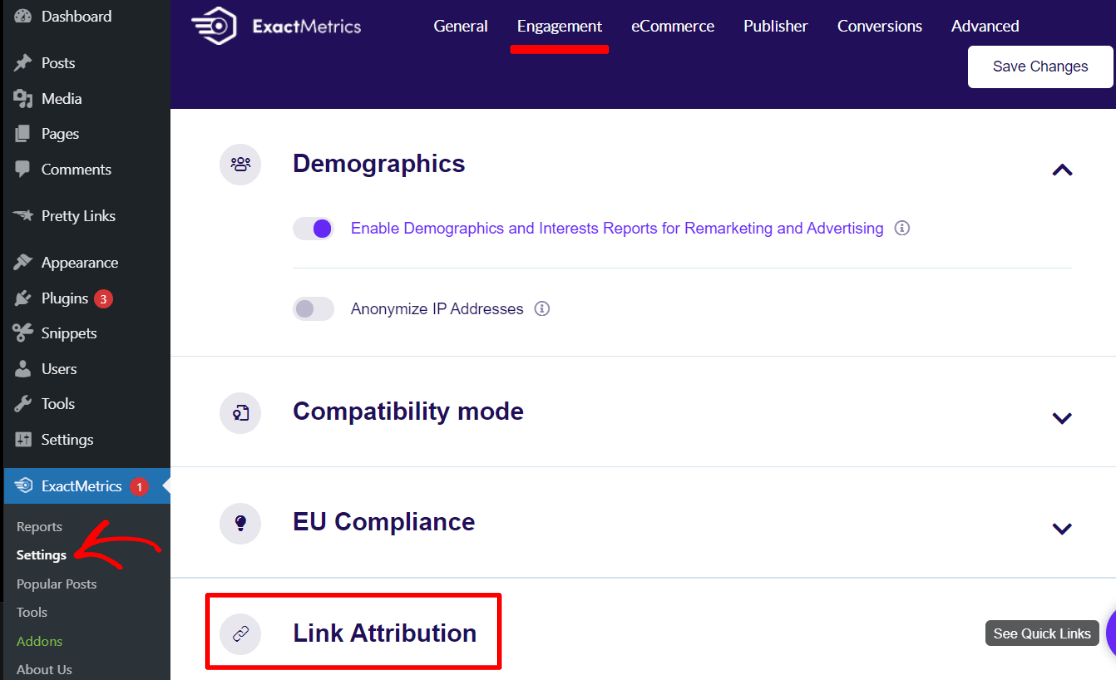
There, toggle the switch to the ON position. You don’t need any of the checkboxes checked. However, if you have a one-page website where you use anchor tags as your pages, this is where you can turn it on to track your anchor links as page views.
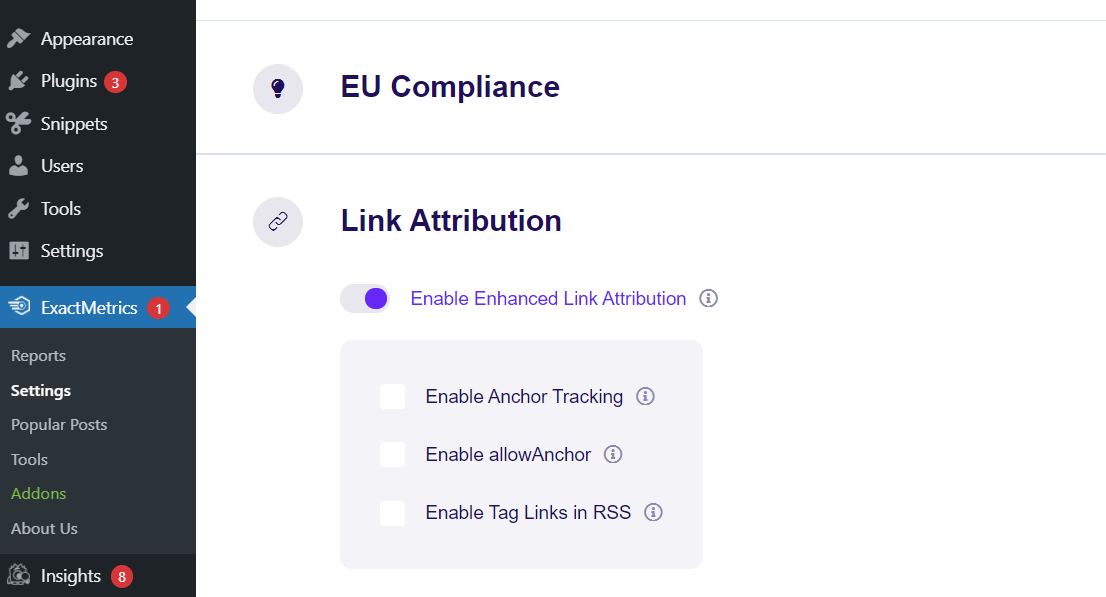
That’s it! You now have enhanced link attribution enabled and are ready to go.
Step 4: View the Enhanced Link Attribution Reports
These reports are different than other Google Analytics reports because, well, they’re not in Google Analytics. Instead, you’ll get to look at these numbers laid out on your site using an extension.
To start, you’ll need to be using Google Chrome. If you don’t currently have it, download it here.
Once you have Chrome installed, you’ll need the Page Analytics extension. Do note that the extension is no longer supported by Google, meaning it doesn’t get updates. But, it still works well for most users!
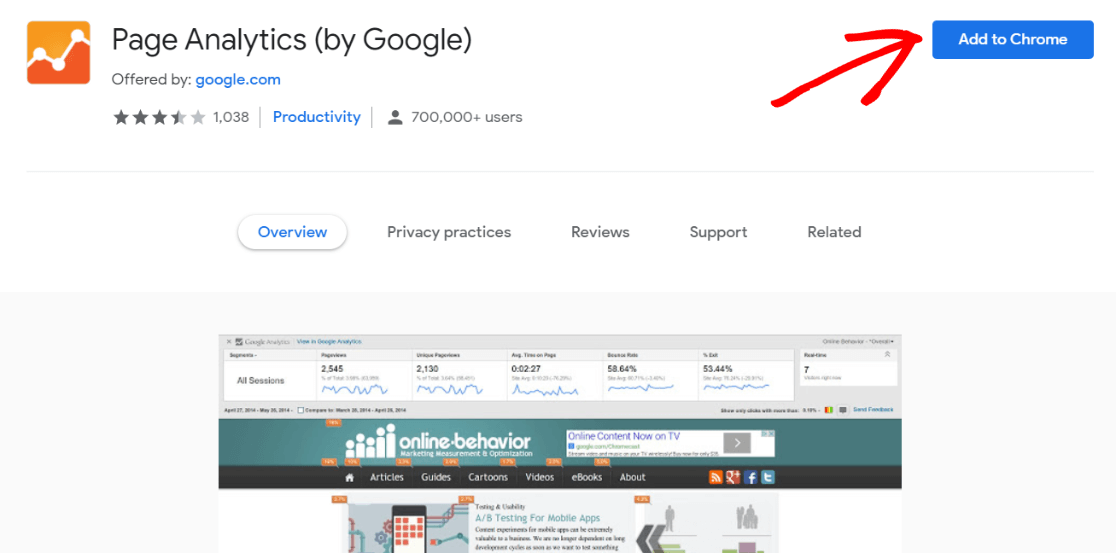
After the extension is installed, you can navigate to your site and click on the extension to open it up on the page you’re on.
The extension will add little orange flags to the elements on your site, so you can see what people were clicking in. For instance, you can see that 20% of the people in this snapshot clicked on the ExactMetrics pricing page:

The extension will also show you data about the page you’re on:

You can also click ExactMetrics in your toolbar while on any page of your site to see in-page analytics for specific pages quickly.

Using the ExactMetrics Enhanced Link Attribution feature combined with the Page Analytics extension will give you extra data that you can use to make decisions that’ll grow your business.
That’s it! If you’d like more “extra” data, check out Google Analytics Custom Dimensions: Complete Beginner’s Guide.
Don’t forget to follow us on Twitter and Facebook to see all the latest Google Analytics tutorials.


