Want to learn how to track GiveWP in Google Analytics?
Tracking donations with GiveWP and Google Analytics is the best way to keep an eye on your traffic, learn more about your audience, and increase your donations.
While eCommerce tracking in Google Analytics sounds intimidating, there’s actually a very easy way to set it up. Then you can track GiveWP donations right inside WordPress!
In this article, we’ll show you the easy way to track GiveWP in Google Analytics and see donation reports in WordPress.
WordPress Tutorial: Tracking GiveWP with Google Analytics
Ready to set up eCommerce tracking for GiveWP? Make sure you have GiveWP installed, then follow these easy steps to track GiveWP in Google Analytics.
Step 1: Install ExactMetrics
ExactMetrics is the most powerful Google Analytics plugin for WordPress, without the high costs. In addition to the eCommerce tracking we’re going to be setting up here, you’ll get a whole list of features that will help you grow your business with the help of analytics.
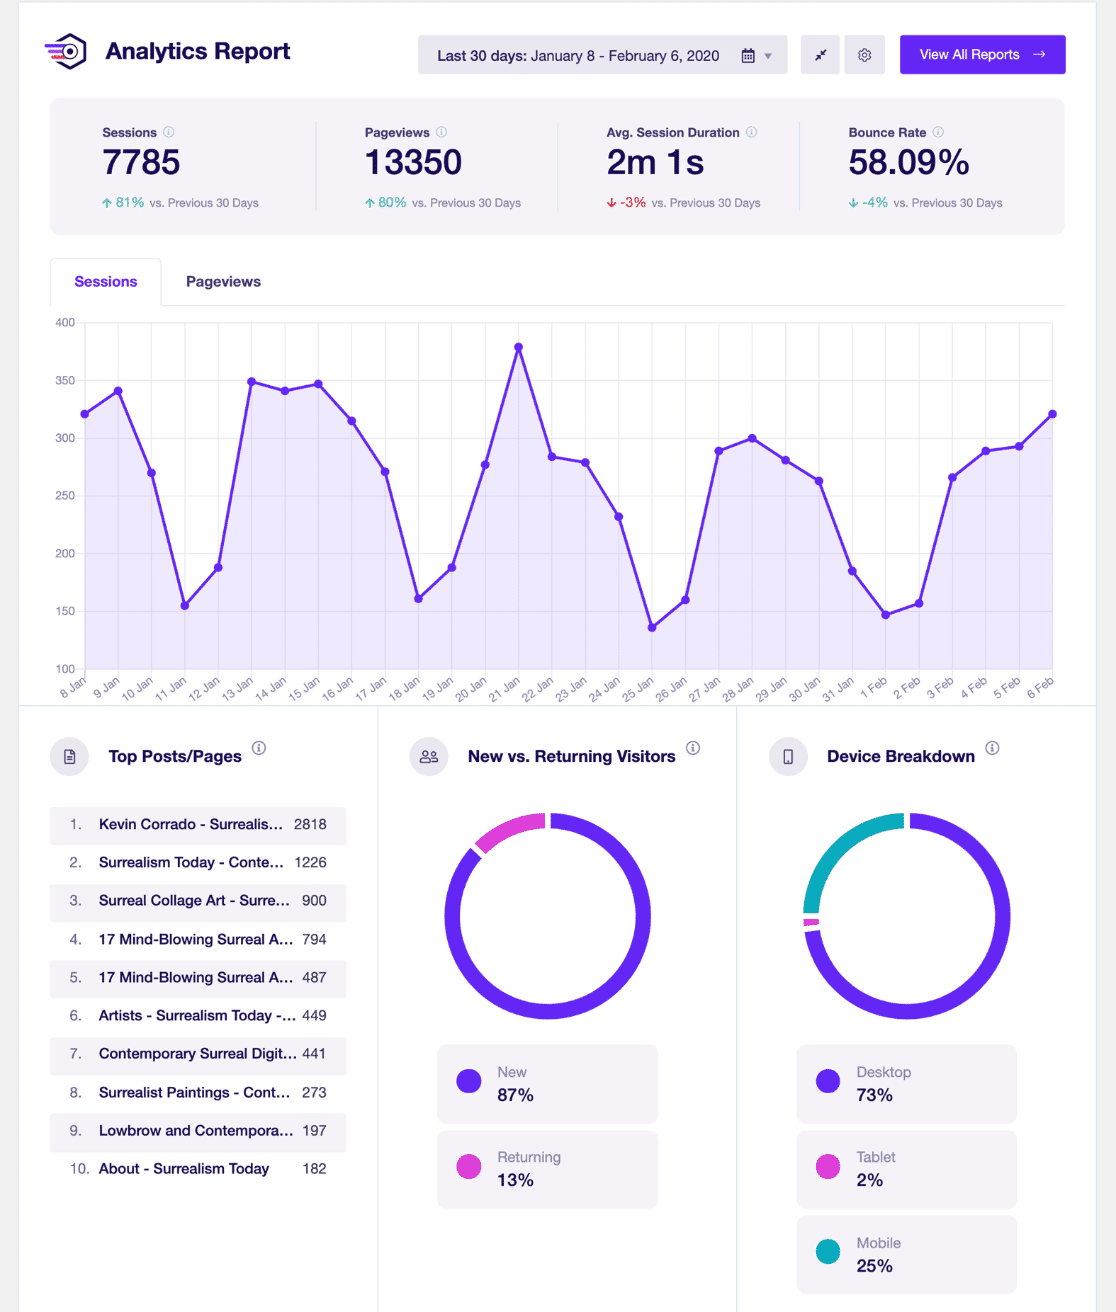
You get advanced tracking right out of the box with an extremely user-friendly interface and Google Analytics reports right inside your WordPress dashboard.
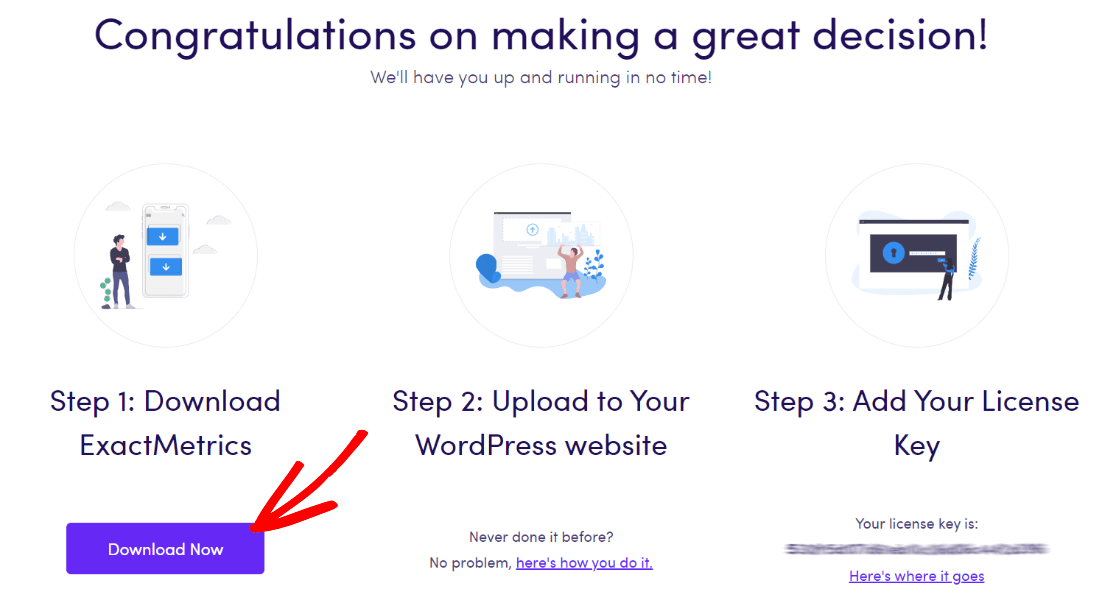
To get started with tracking GiveWP donations, head to the pricing page and grab ExactMetrics at the Pro level. Once you complete checkout, download the plugin.
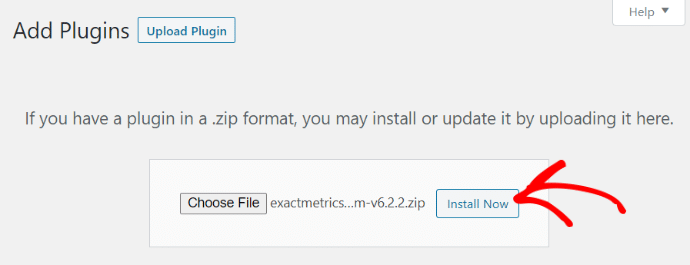
Next, upload it to your website.
Step 2: Add Your License Key and Connect to Google Analytics
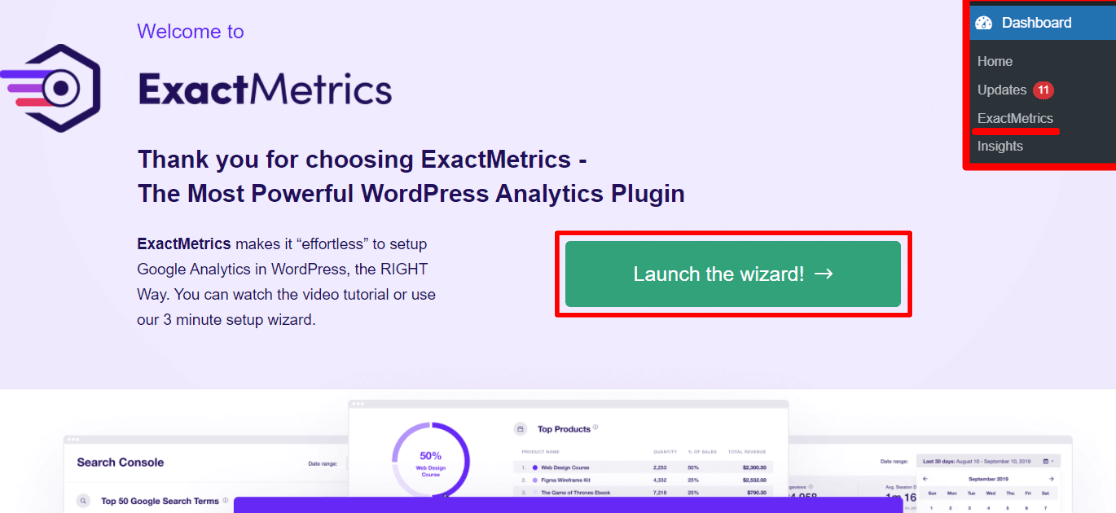
Now that you have ExactMetrics installed, you can add your license key and connect your Google Analytics account. To get set up, click on ExactMetrics under your WordPress Dashboard and click the big green Launch the wizard! button.
Once you’re in the wizard, you’ll get to this page where you can add your license key and connect with Google Analytics:
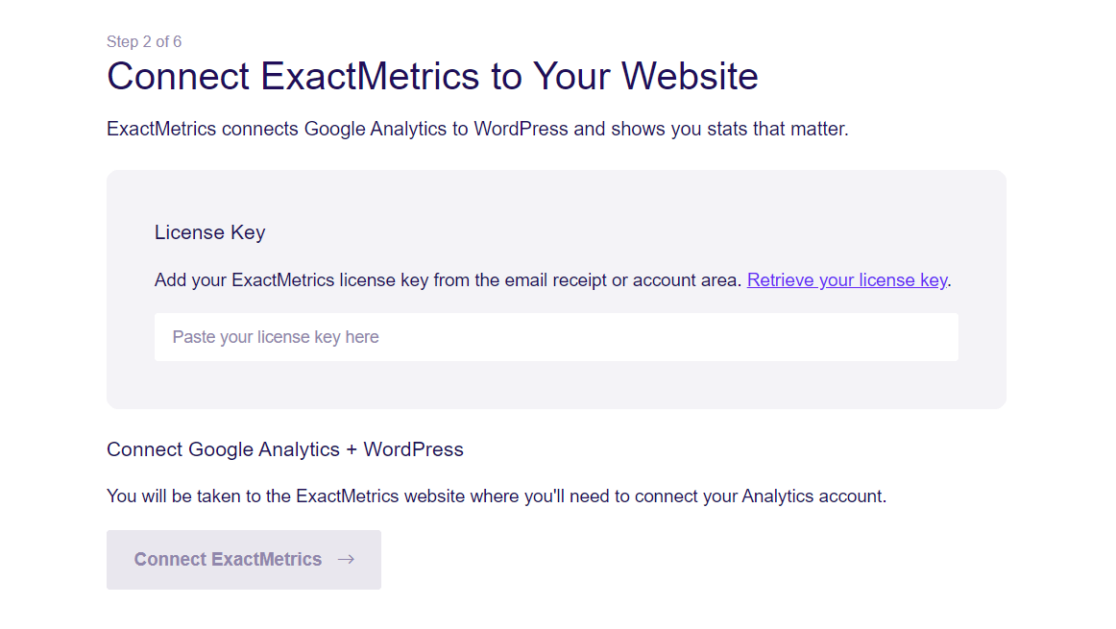
After that, just keep following the setup prompts, answering questions about your business, until setup is complete. Head to our tutorial if you need detailed instructions on adding Google Analytics and ExactMetrics to WordPress.
Step 3: Enable the ExactMetrics eCommerce Addon
The next step in setting up donation tracking is to install the eCommerce addon.
So, head to ExactMetrics » Addons in WordPress and press Install for the one titled eCommerce.
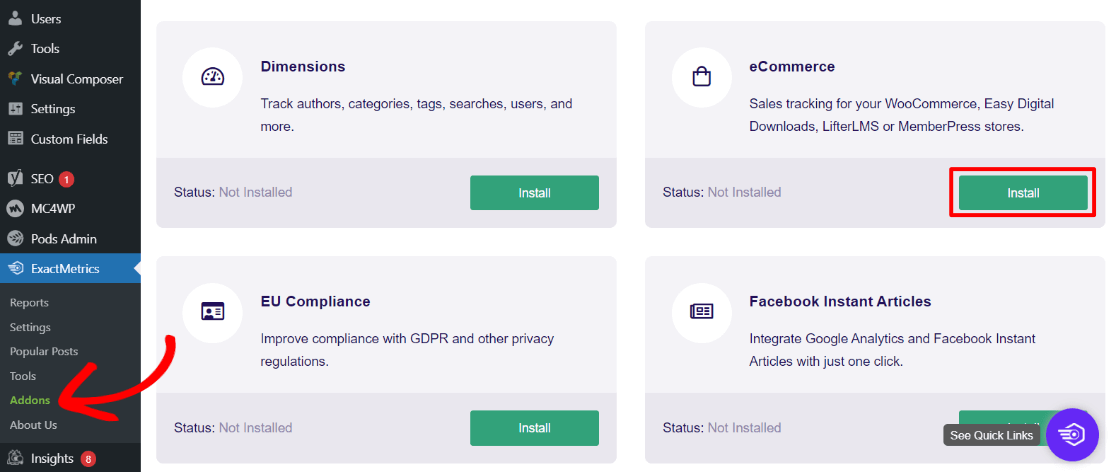
That’s it! The addon will activate as soon as it finishes installing and will start tracking your GiveWP donations.
If you go to Settings » eCommerce, you can scroll down to see that GiveWP has been automatically detected and is tracked:
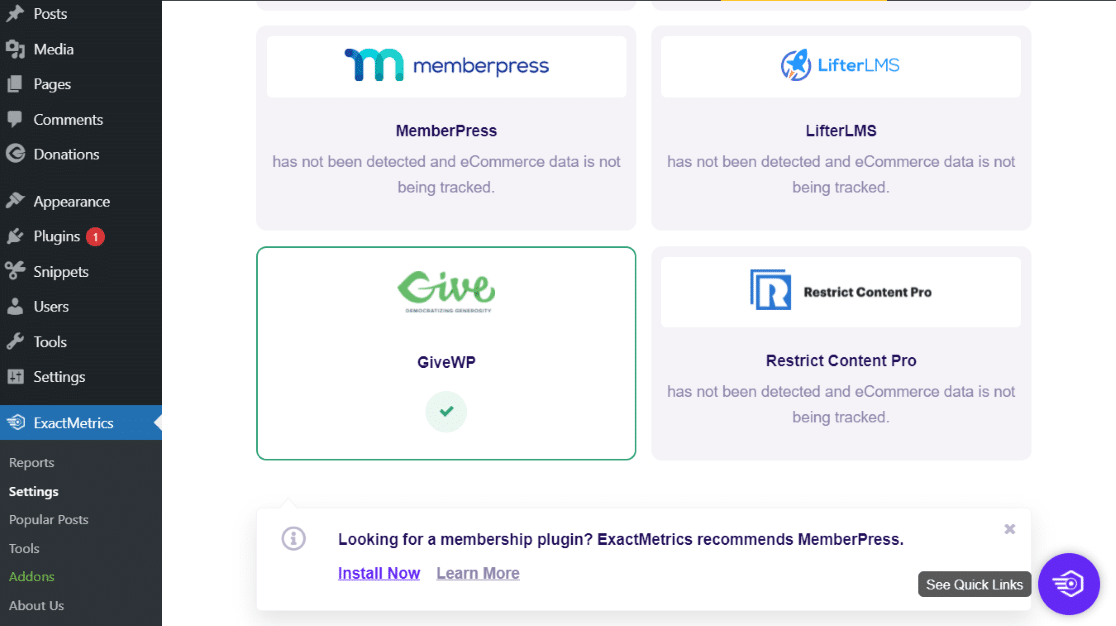
That’s it! You now have eCommerce reports enabled in both Google Analytics and ExactMetrics, GiveWP is connected, and you’re ready to get started with donation reporting.
To learn more about accessing your GiveWP reports in WordPress, head to this section of our donation tracking guide.
Need to set up a newsletter for your nonprofit? Check out How to Start a Nonprofit Newsletter (Mistakes, Best Practices & Examples).
Want more Google Analytics tips? Read Google Analytics Metrics Every Business Should Track.
For more tutorials and tips on analytics for WordPress, follow us on Facebook and Twitter.

