Want to keep visitors on your site longer, visiting more pages and continuing to interact with your site?
Adding links to popular posts within or at the end of your content can help site visitors navigate your site, see your most popular content, and increase the chance that they’ll convert.
Learn how to add popular posts to your WordPress site now to keep visitors clicking!
5 Steps to Add Most Popular Posts
The easiest way to show popular posts in WordPress is by using the ExactMetrics plugin.
ExactMetrics is the best premium WordPress analytics plugin. With ExactMetrics, you can quickly and easily track your website’s most valuable Google Analytics metrics and stats right in your WordPress dashboard.
The most popular features include:
- Top outbound link click tracking
- Top affiliate link click tracking
- Site speed report
- GDPR compliance
- Scroll tracking
- A lot more!
Get started with ExactMetrics now.
Step 1: Install ExactMetrics
First, you’ll need to install ExactMetrics on your WordPress website. To use all the features of our Popular Posts tool, download the Plus level license or above.
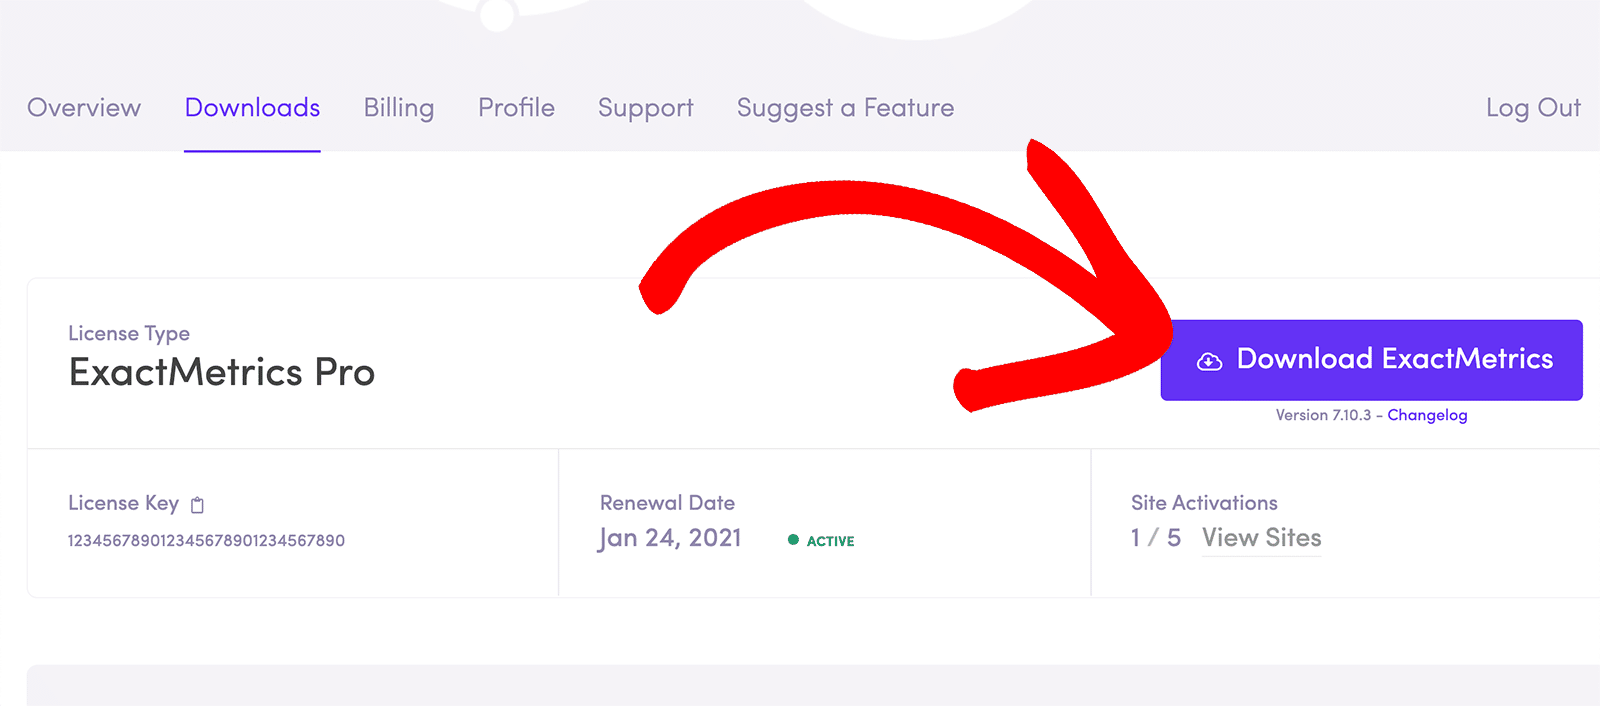
Then, download the ZIP file from your account area by navigating to the Downloads tab.
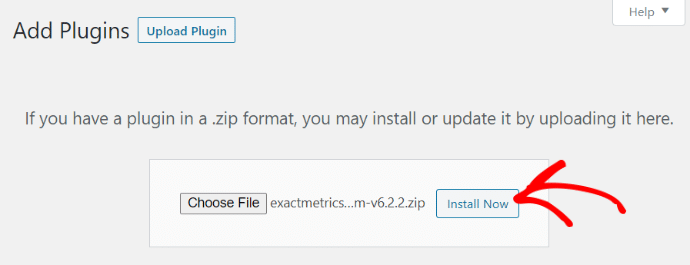
After that, upload the ZIP file to your WordPress website. You can do that by going to your WordPress admin area and clicking on Plugins » Add New » Upload Plugin.
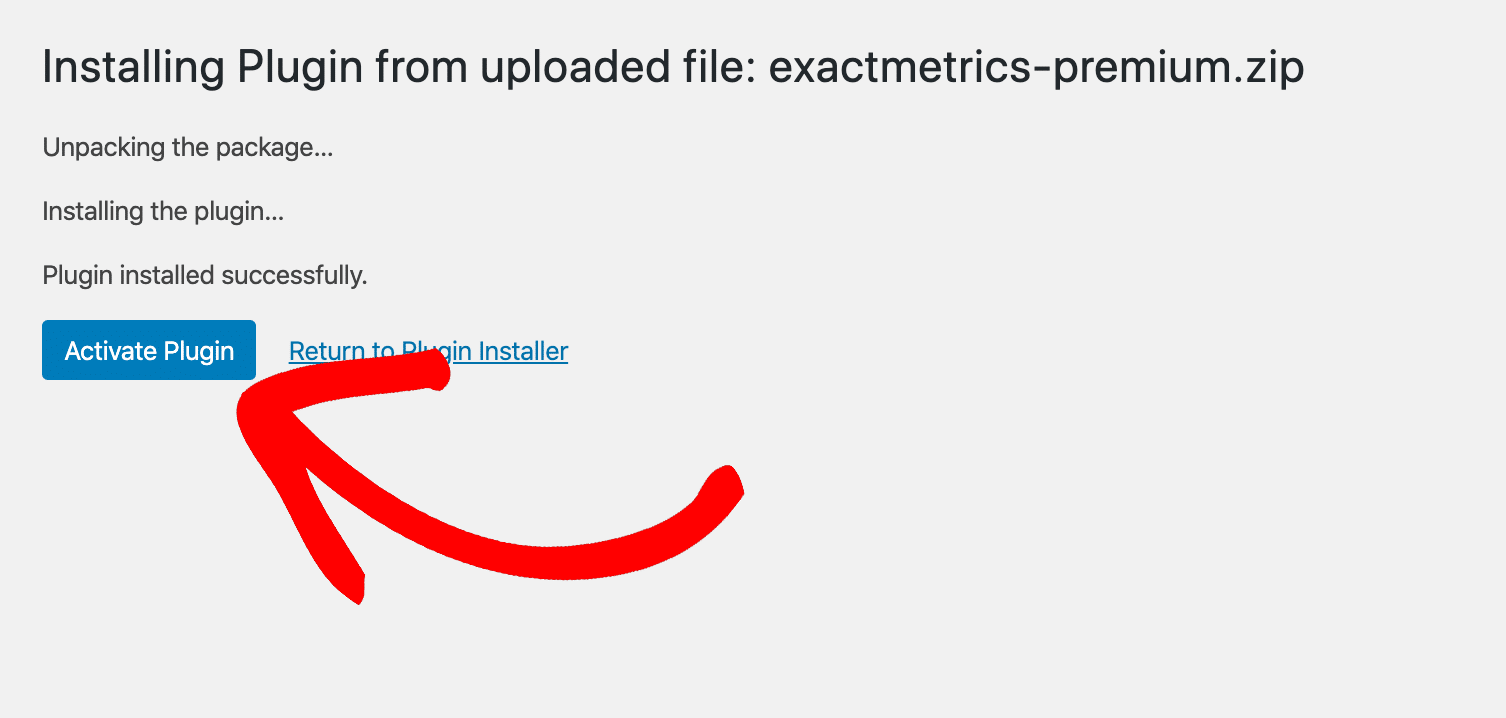
Once you upload the plugin, go ahead and install and activate it.
Step 2: Connect Google Analytics to Your WordPress Site
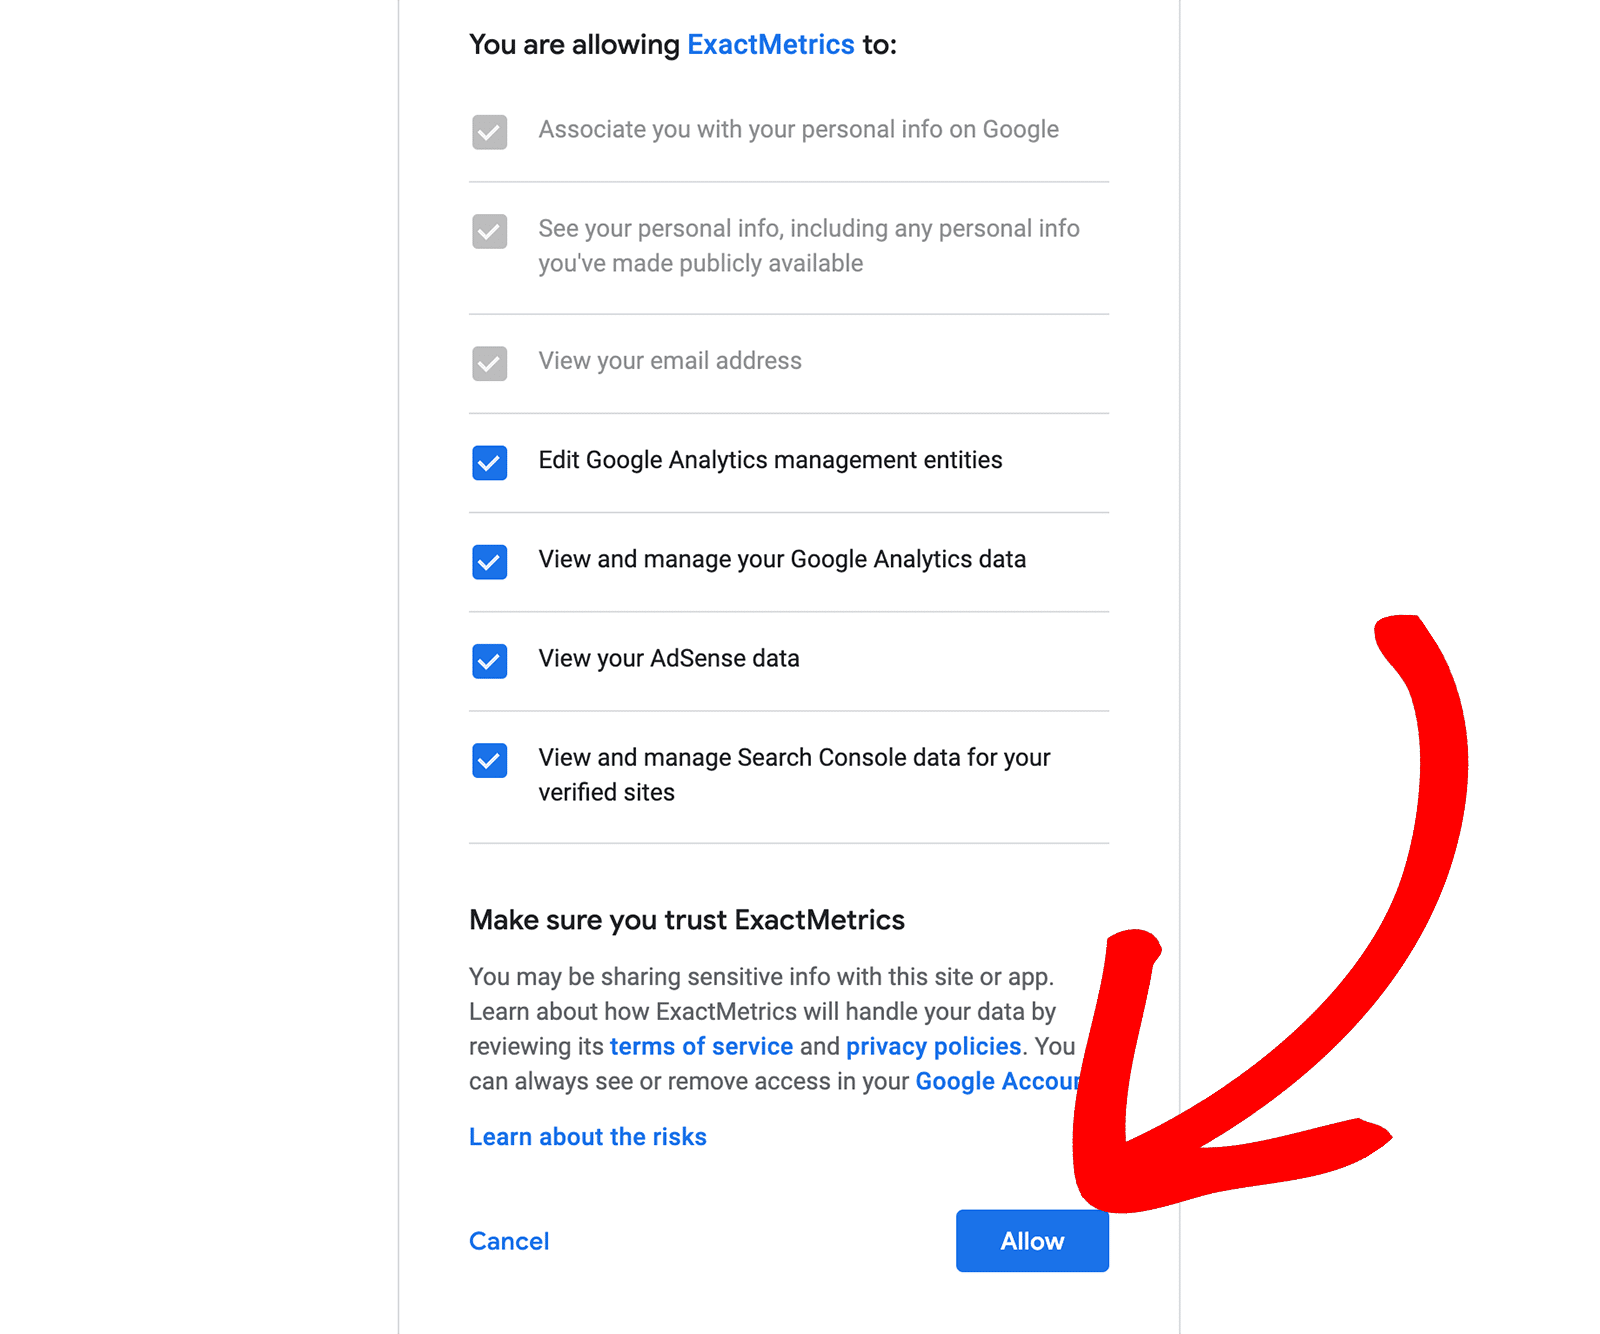
Now, you’ll have to set up Google Analytics on your WordPress website. It’s really simple with ExactMetrics!
The plugin adds Google Analytics tracking to your WordPress site without coding. Just follow the steps in the setup wizard to get started.
For more details, check out our guide on how to properly add Google Analytics to your WordPress website.
Step 3: Choose Your Post Type
Navigate to ExactMetrics » Popular Posts in your WordPress sidebar.
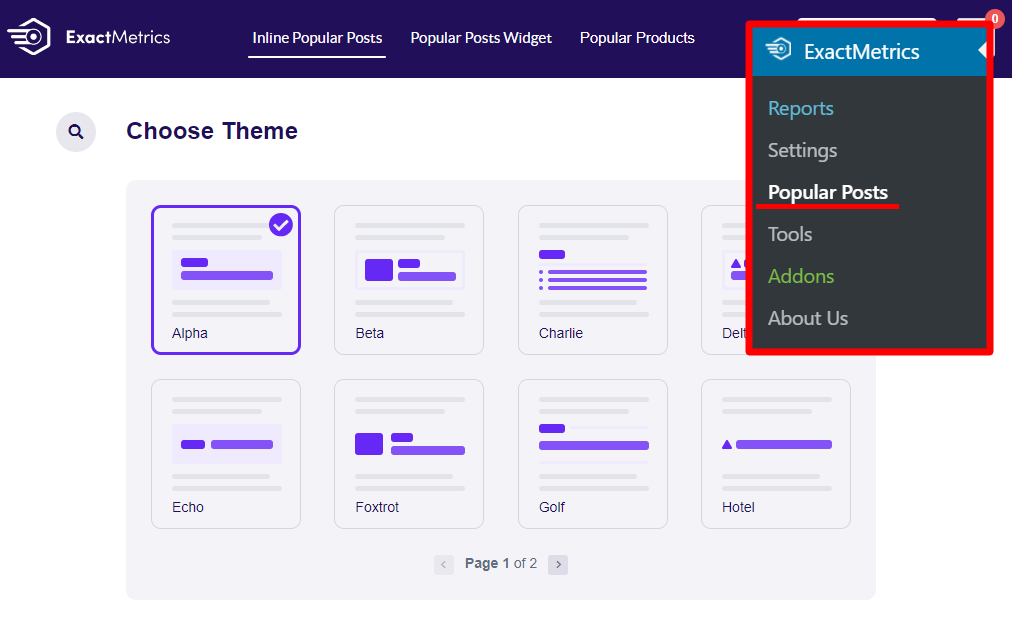
Now, you’ll automatically land on Inline Popular Posts, but notice in the top navigation that you can also click over to the Popular Posts Widget tab.
What’s the difference between inline and widget?
Inline popular posts are usually displayed as one post at a time within your content. So, they’re easy to put at a few places within your content to help people find the most popular content on your site.

A widget, on the other hand, is something you might want to put at the very end of your articles or in the sidebar. It typically showcases more than one piece of content in a grid, so someone can see several popular articles at a glance.

Step 4: Customize Your Posts
Once you’ve decided if you want inline posts or the widget, scroll through all the customization options to choose how you want your posts to look and function. You’ll pick:
- A theme
- Colors
- Layout options
- Number of posts
- Whether author and date are shown
- Sort (how posts will be chosen)
- Post types to include/exclude
- How and where to place your widget or inline posts
Step 5: Display Your Popular Posts
Both the inline option and the widget option have different choices for placing them on your site. Both have an automated option, so the popular posts will be inserted into your content for you. Both of them also have options for inserting them in your WordPress editor (Gutenberg) or via shortcode.
So for the inline posts, you’ll see these options:
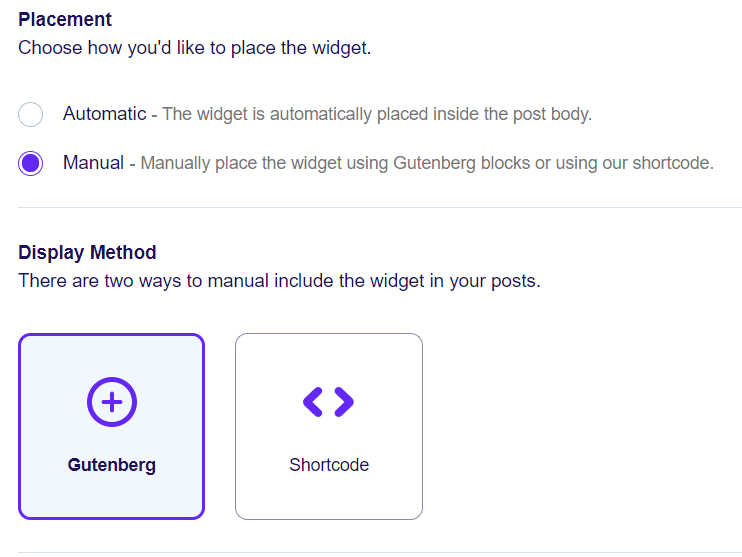
Each option comes with instructions when you click on it, so click around on the options to see how to make them work for you.
That’s it! You’ve gone through all the options, chosen how to display your posts, and you now have them set up and ready to go.
Now, do you want to track which of your authors are getting the most views? Check out How to Set Up Author Tracking in WordPress (The Easy Way).
Don’t forget to follow us on Twitter and Facebook to see all the latest Google Analytics tutorials and growth tips.

