Do you want to learn how to set up conversion tracking for your website’s online store? Setting up WooCommerce Google Ads conversion tracking allows you to measure your ad performance and see if you see if your advertising investments are paying off.
We’re going to show you how to set up eCommerce tracking to monitor Google Ads for a WordPress site that uses the WooCommerce plugin OR Easy Digital Downloads, MemberPress, LifterLMS, or GiveWP.
Before we jump into the tutorial for WooCommerce Google Ads tracking in WordPress…
What Are Conversions in Google Ads?
Conversions in Google Ads are actions that visitors take after clicking on your ad. When you set up tracking for Google Ads, previously known as AdWords tracking, you’re able to see if someone who clicks on your ad actually does something valuable on your website such as:
- Buying a product
- Signing up for a newsletter
- Submitting a form
- Downloading content
What Can Conversion Tracking for WooCommerce Google Ads Meaure?
By collecting conversion tracking data, you can track your eCommerce conversion rate to get your return on investment (ROI) and determine if your ads are making a profit. Tracking your website’s traffic is important, but it only gives you half the picture. Just because an ad produces traffic, doesn’t necessarily mean it increases your conversions and sales.
That’s why you need to use conversion tracking for your ads to determine if traffic from them is actually producing revenue.
Adding Google conversion tracking code to your WooCommerce website (or Easy Digital Downloads, MemberPress, LifterLMS, or GiveWP) and tracking conversion actions helps you make data-driven decisions to optimize your advertising campaigns and marketing strategy.
We’ll show you how to set up a conversion tracking tag for your WordPress WooCommerce store in the easiest way possible.
How to Track Google Ads Conversions for WooCommerce
In this tutorial, we’ll use ExactMetrics to track Google Ads conversions for WordPress eCommerce sites. It’s the best and easiest WooCommerce Google Ads conversion tracking plugin, which also works seamlessly for Easy Digital Downloads, MemberPress, LifterLMS, and GiveWP eCommerce.

Before we get started with the conversions tutorial in your Google Ads account, let’s take a look at ExactMetrics and why it’s the best Google Ads plugin for eCommerce conversion tracking.
ExactMetrics is the best premium WordPress Analytics plugin, allowing you to easily set up Google Analytics without editing any code or needing a complicated tool like Google Tag Manager. You get advanced tracking right out of the box with an extremely user-friendly interface and Google Analytics reports right inside your WordPress dashboard.
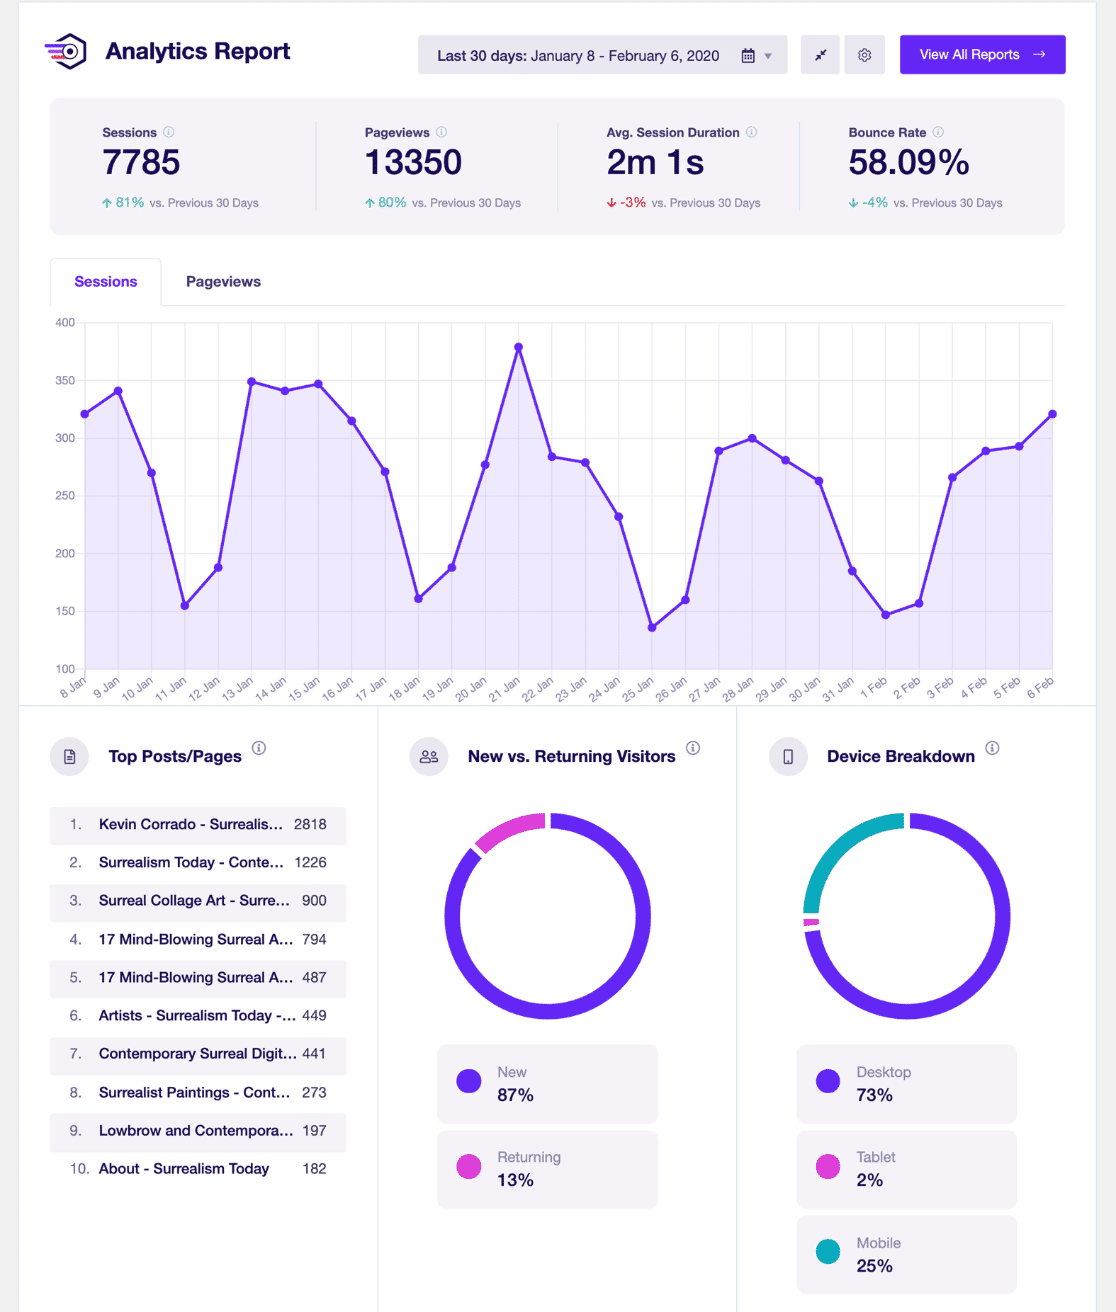
ExactMetrics also makes it incredibly easy to set up advanced Google Analytics tracking with only a few mouse clicks, such as eCommerce tracking, custom dimensions, media tracking, form tracking, and much more.
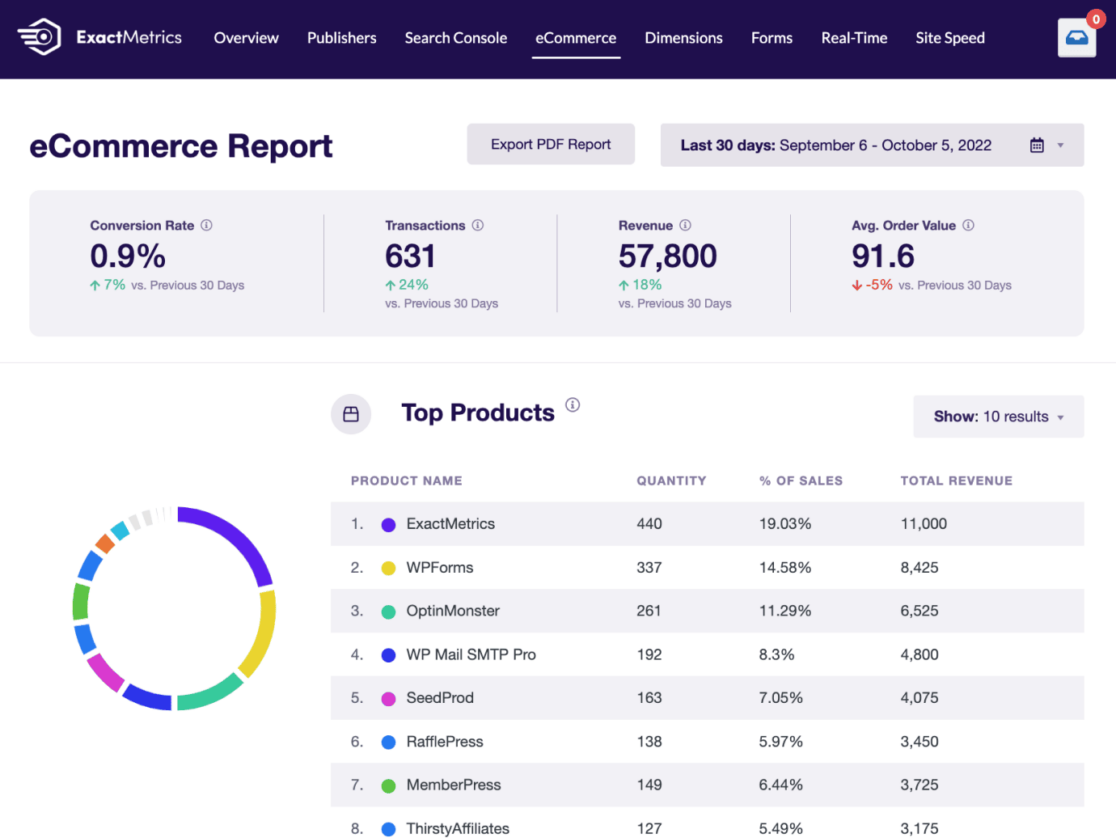
The best part about using ExactMetrics for Google Ads and setting up conversion tracking? ExactMetrics allows you to connect Google Ads with WooCommerce, Easy Digital Downloads, MemberPress, LifterLMS, and GiveWP without any code. Easily use Google Ad tracking for eCommerce conversion actions like:
- Number of transactions
- Revenue
- Top products
- Average order value
- Add to cart or remove from cart events
- And more…
If you set up conversion actions in Google Ads but aren’t using ExactMetrics, you’d need to set up your Google tag by installing the code in your site header. Then, after you’ve successfully installed a conversion tag on your website, you’d need to add the eCommerce conversion event snippet to the landing page where your ad points. Luckily, ExactMetrics provides a much easier method.
If you’re not already using ExactMetrics, head to How to Add Google Analytics to Your WordPress Site for instructions on getting set up.
Next, you’ll need to install the ExactMetrics eCommerce addon and the ExactMetrics PPC Tracking addon to enable automatic tracking and Google Ads enhanced conversions for WooCommerce, Easy Digital Downloads, MemberPress, LifterLMS, and GiveWP.
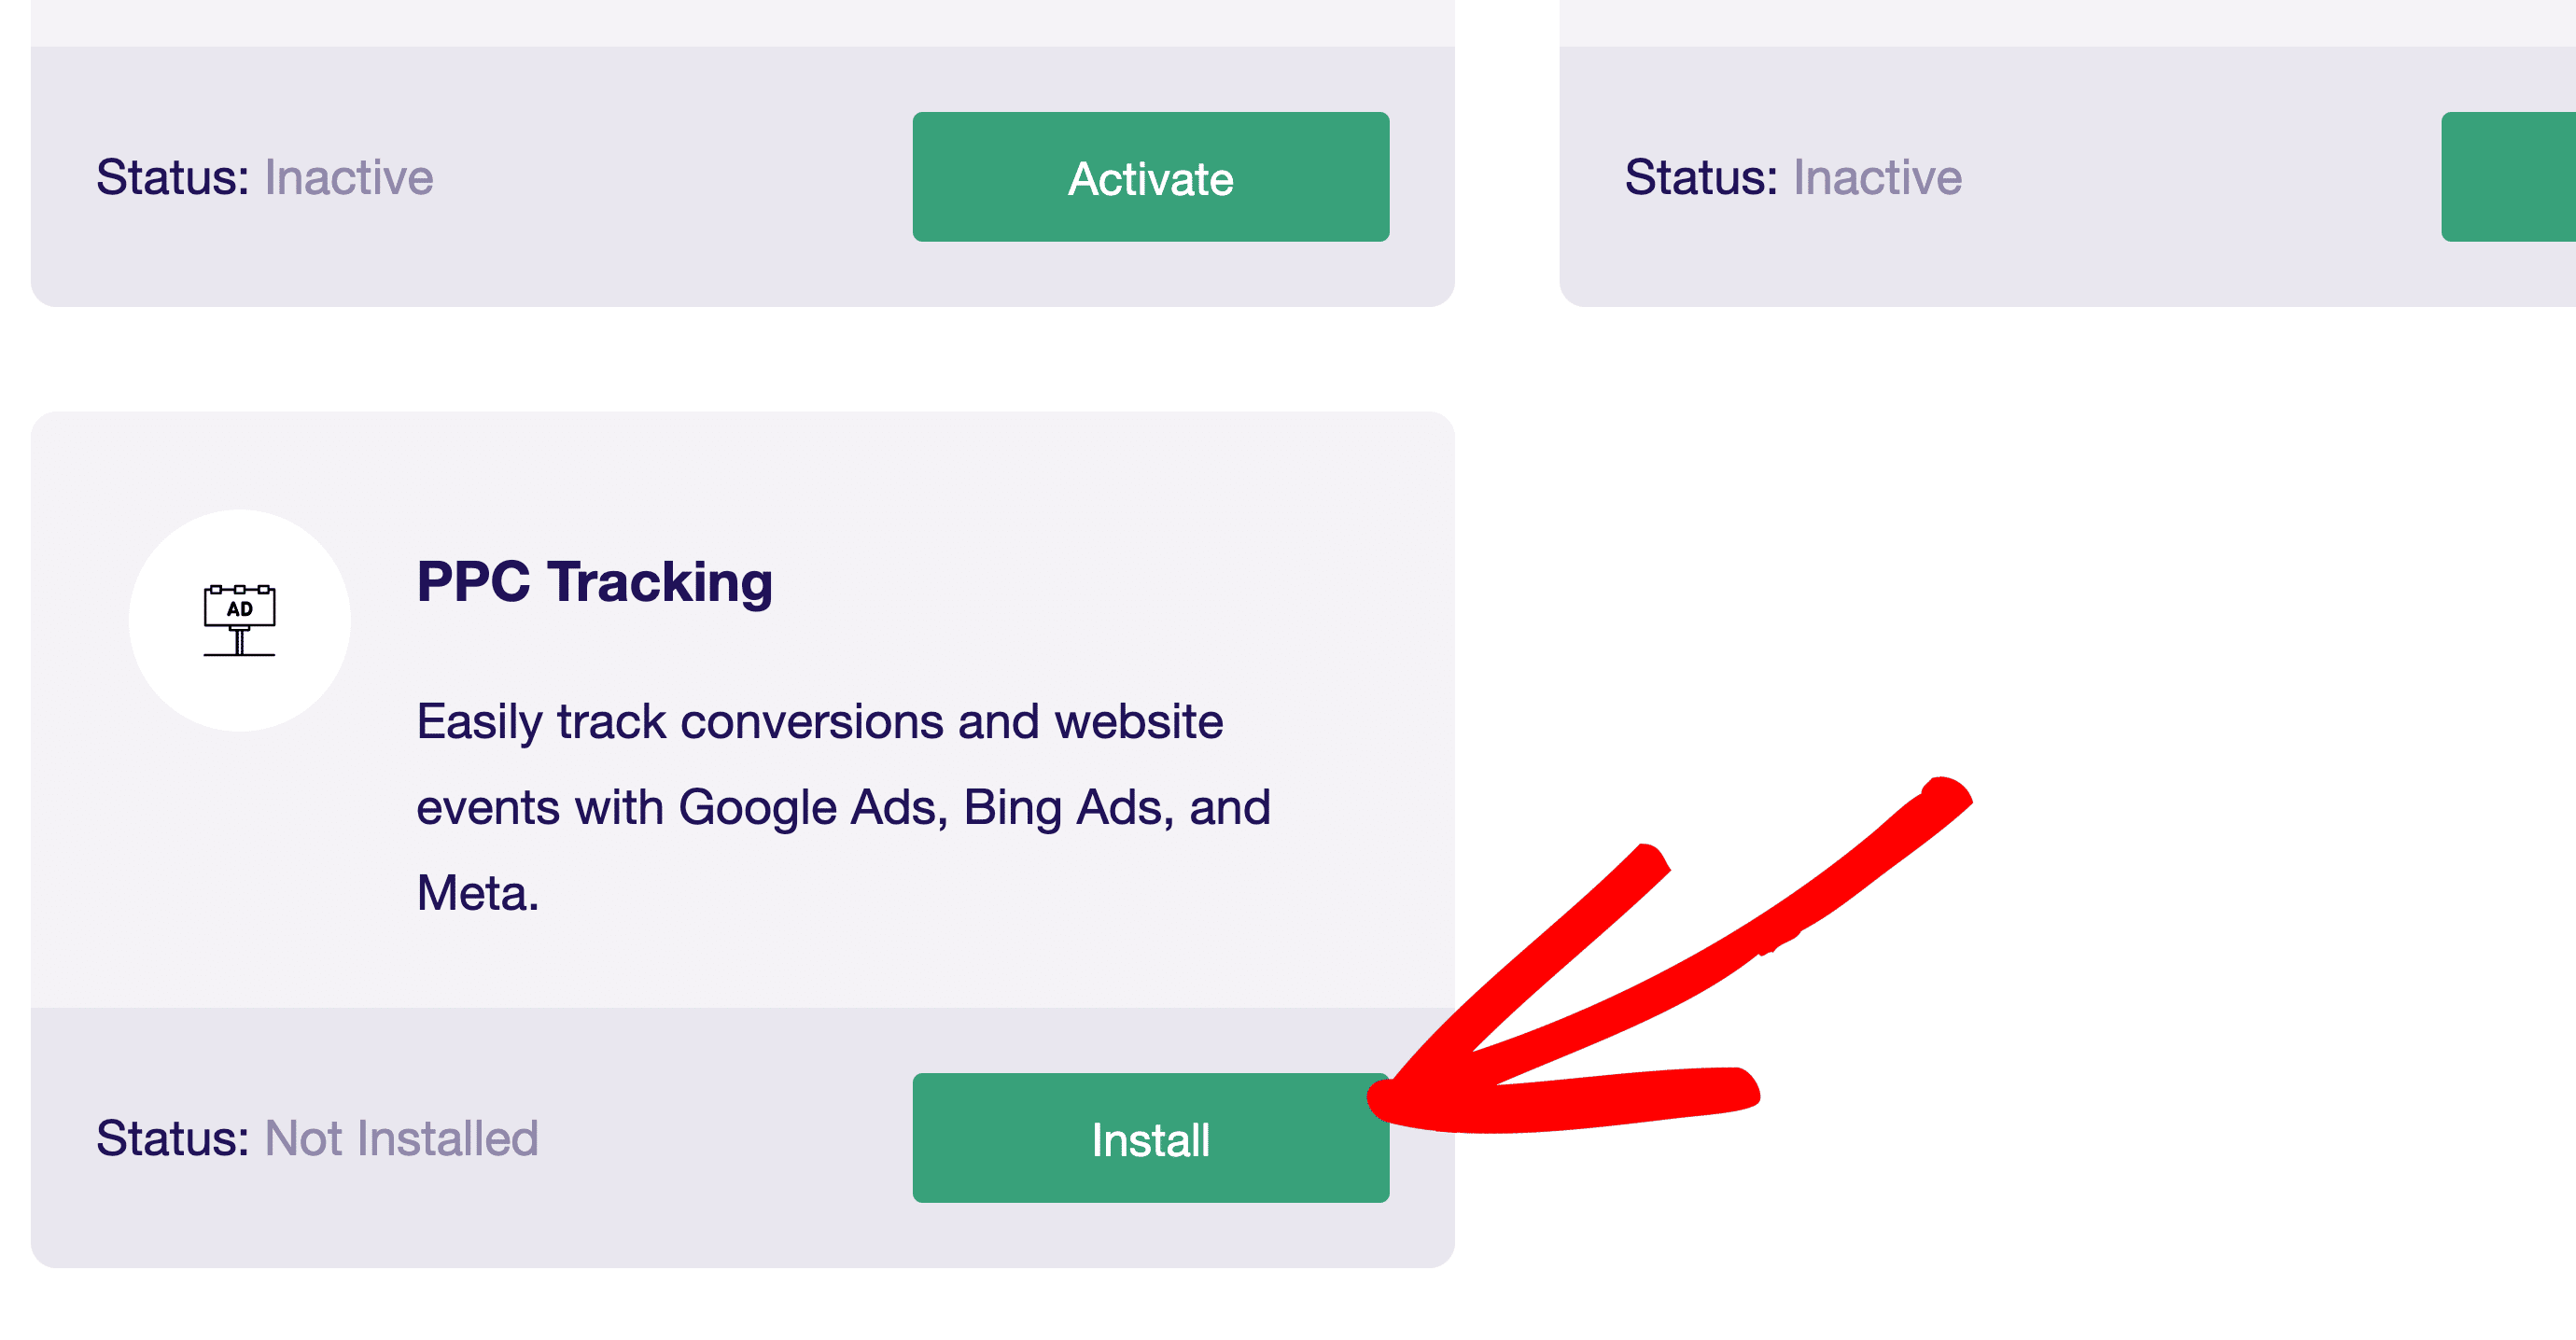
From your WordPress admin, navigate to ExactMetrics » Addons. Find the one that says PPC Tracking and press Install. After it finishes installing, the button will change to say Activate, click it.
After we finish the tutorial, you’ll have access to your Google Ads (AdWords) conversion and activity reports in your WordPress dashboard!
Now, we’ll guide you through setting up conversion tracking in your Google Ads account (Adwords Manager) for your WooCommerce store. If you need more detailed instructions for installing the ExactMetrics’ addons or connecting your Google Ads account to Google Analytics, check out our complete guide on conversion tracking Google Ads with Google Analytics (GA4).
How to Set Up WooCommerce Google Ads Conversion Tracking
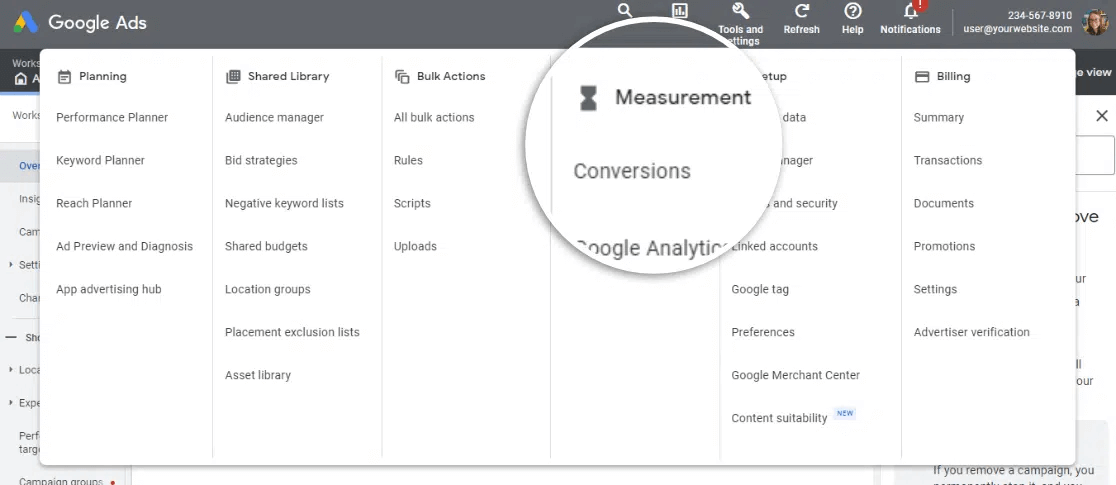
Head to your Google Ads account and sign in. Click on the wrench icon for Tools and Settings. Under Measurement, click Conversions:
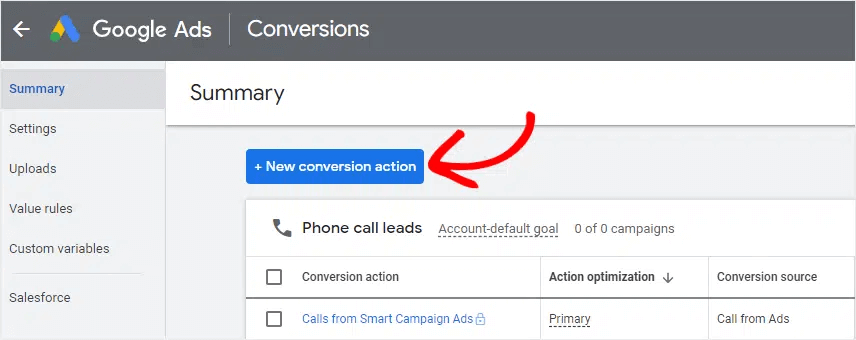
Now, press the blue + New conversion action button:
Next, you’ll see options for the type of conversion for Google Ads tracking. Click Website:

Now, scroll down and click + Add a conversion action manually:
Note: Before this screen, you might see a step to configure Google Ads conversion tracking. If so, just put in your website domain and press Scan. Once it finishes scanning, you’ll be able to continue with this step.

On the next screen, you’ll fill out your conversion action settings for Google Ads. For our example, we’ll be setting up conversion tracking in Google Ads for new newsletter sign-ups on our WooCommerce site.
First, choose the type of conversion tracker. Give your goal a Conversion name. Next, choose the conversion Value (we want the conversion value in Google Ads to be the same for each sign-up and count as $5.00. If, for example, you were tracking products that have different prices, you may want to choose the option to Use different values for each conversion).
Lastly, set the Count. Again, we want each person to only count once, but depending on the type of conversion tracking, you may want to count every action, like in the case of purchases.
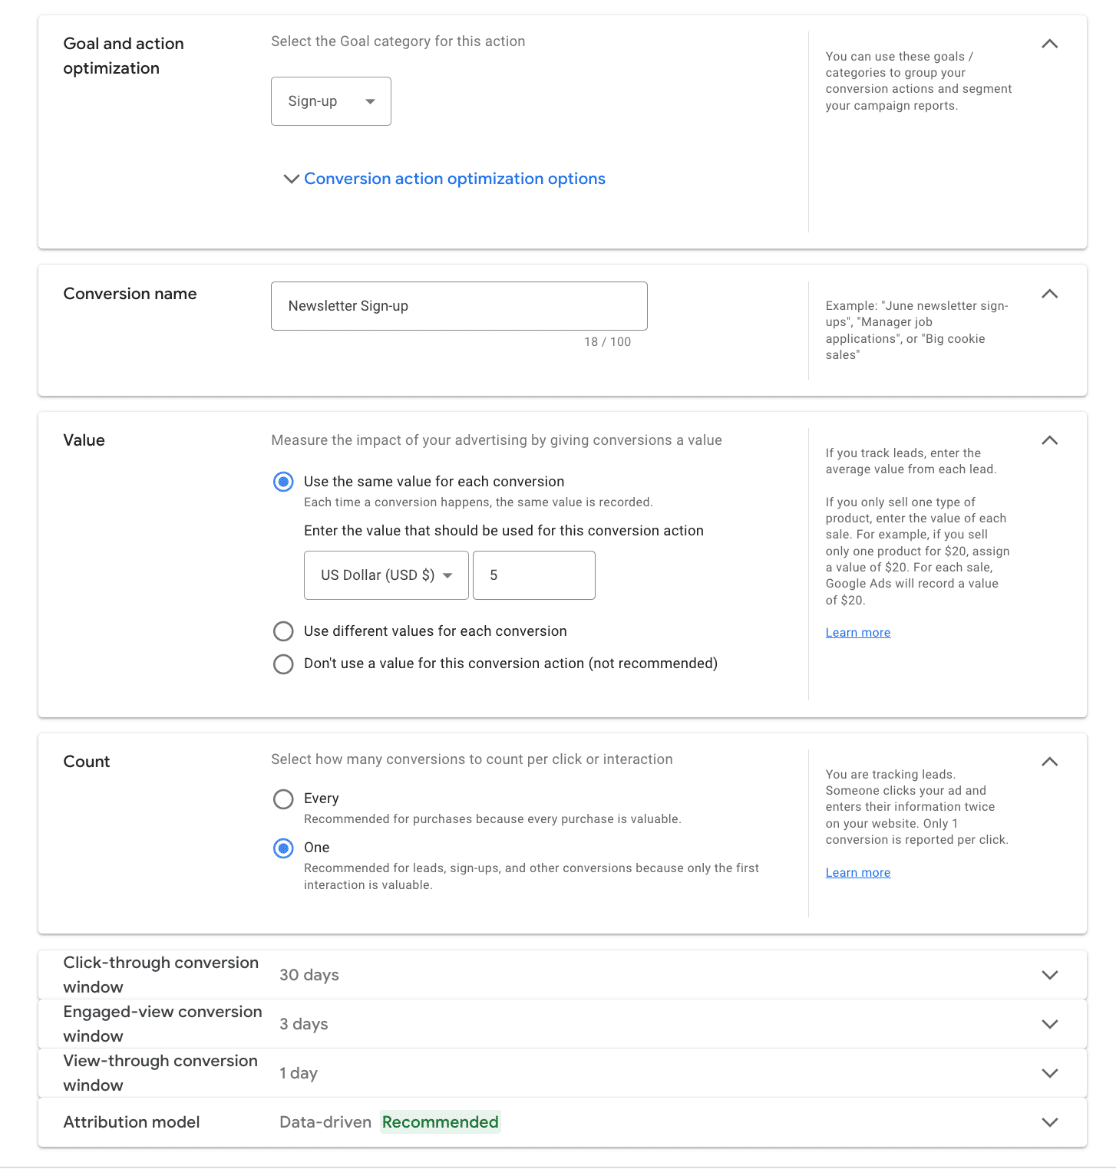
At the bottom, you’ll have some more options. If you’d like to change any of these advanced Google Ads conversion settings, feel free to do so.
When you’re finished, click the blue Done button at the bottom and then press Save and continue.
Now that you’ve set up conversion actions, we need to set up your conversion tracking tag.
You’ll see instructions for Google Ads tag setup by installing the Google (pixel) tracking code on your website but using the ExactMetrics plugin, we don’t need to touch any code.
After you’ve installed ExactMetrics and the PPC addon in WordPress, installing the tracking code only takes a minute.
To set up WooCommerce Google Ads conversion tracking, we need to find the conversion ID in Google Ads. To do this, click on the option to Use Google Tag Manager.
Here you’ll see your Conversion ID. Go ahead and copy it.
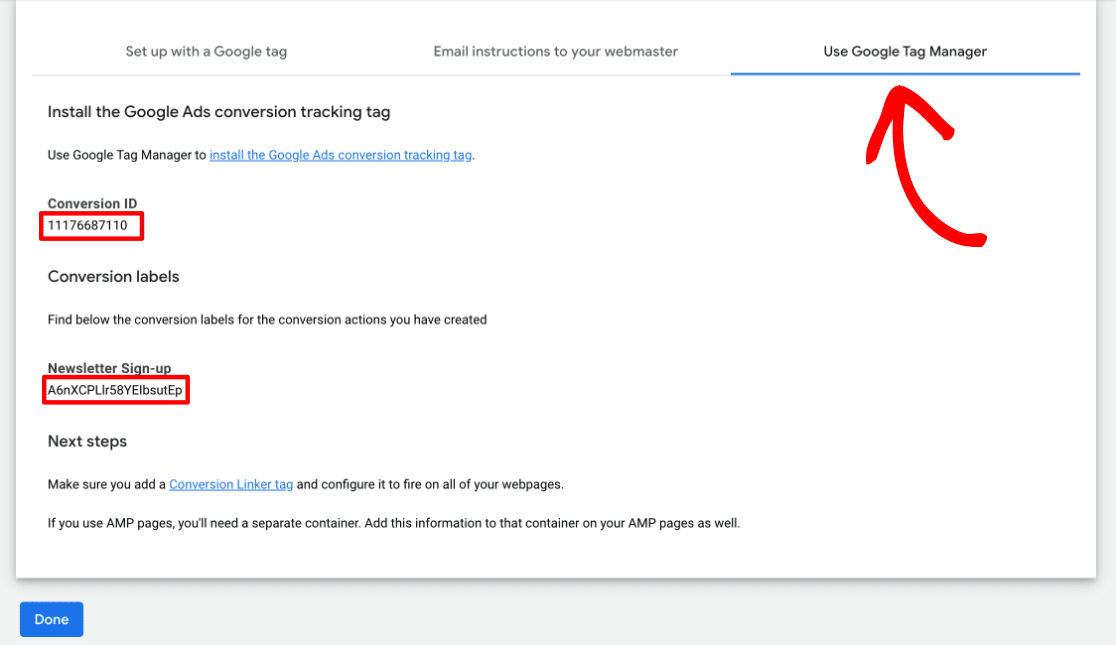
Now, head back to ExactMetrics. From your WordPress admin click ExactMetrics » Settings and click the Conversions tab at the top. Expand the Ads Tracking section.
Next, paste your Conversion ID under the Google Ads Tracking section.
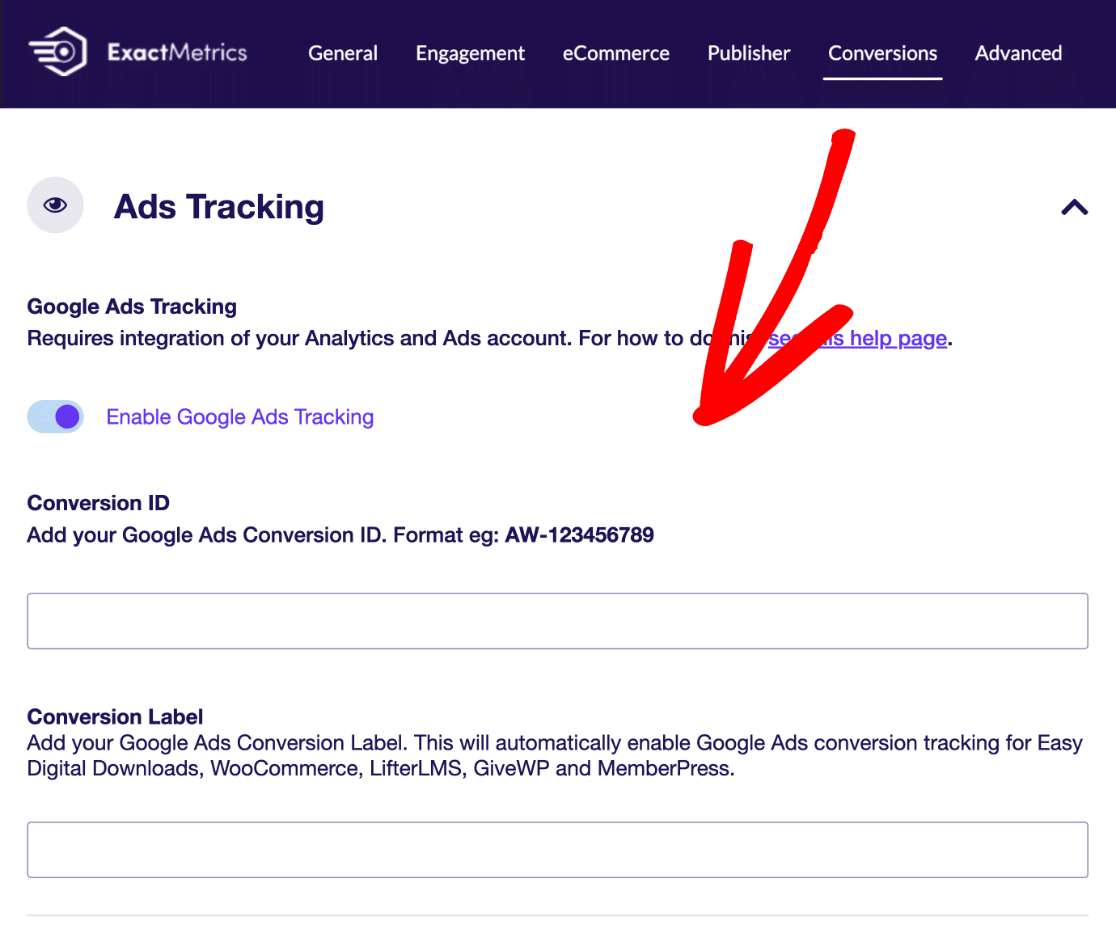
Now, just copy your Conversion Label from the previous page in Google Ads, and your WooCommerce tracking is good to go!
That’s it! You’ve successfully set up WooCommerce Google Ads conversion tracking on your WordPress site.
To see more WordPress eCommerce and WooCommerce guides, check out these articles:
- How to Set Up Google Analytics eCommerce Tracking (Simple Way)
- Best Way to Add a Facebook Pixel to WordPress (Step-By-Step)
- How to Show Popular Products in WooCommerce (Step by Step)
- How to Set Up WooCommerce Enhanced eCommerce
- Guide to eCommerce Customer Journey Analytics in WordPress
Not using ExactMetrics yet? What are you waiting for?
Don’t forget to follow us on Twitter and Facebook to see all the latest reviews, tips, and Google Analytics tutorials.

