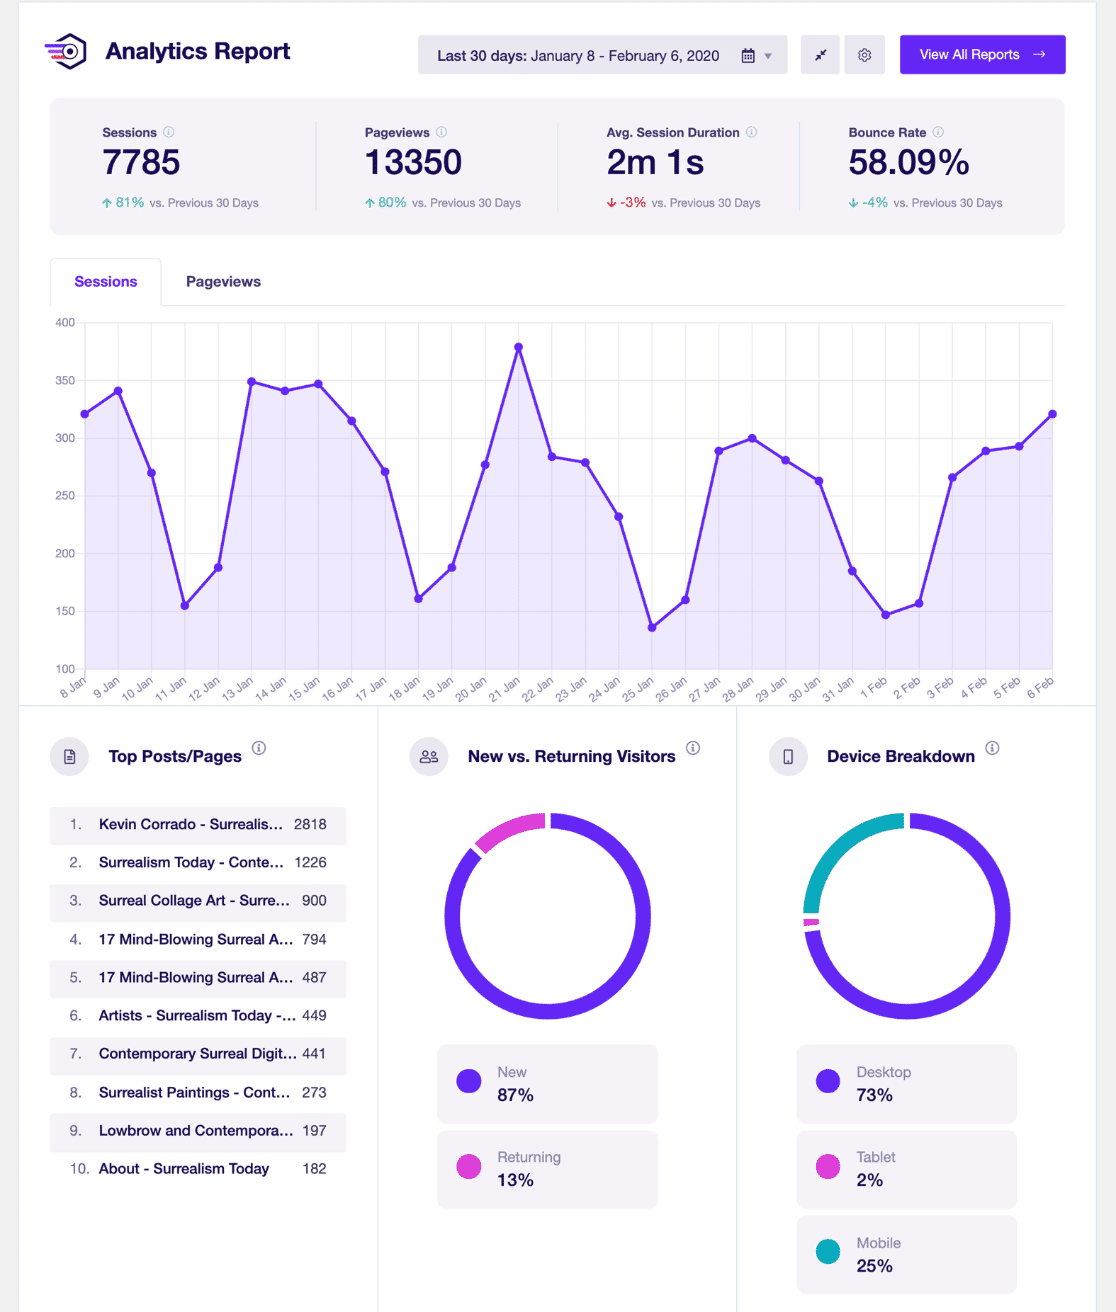
Ever wonder how your membership website is performing? Do you want to know which content is popular with your members and generating a lot of revenue? To answer these questions, you need to set up Google Analytics for MemberPress and track your visitors.
Google Analytics provides tons of insights about your users, how they behave on your site, and how your website is performing. Using this information, you can create strategies to grow your business.
However, using Google Analytics isn’t that straightforward, and it has a steep learning curve. If you haven’t used Analytics before, it’s easy to get lost in its vast maze of settings and reports.
So, in this article, we’ll show you how to set up MemberPress Google Analytics tracking the easy way. Let’s get started…
How to Set Up Google Analytics for MemberPress
When it comes to using Google Analytics for MemberPress and tracking eCommerce, the entire process can feel overwhelming. You would need to edit code and insert it on your website to get the data you need.
But what if we told there’s a simpler way…
With ExactMetrics, you can easily set up Google Analytics on your WordPress website. And using its eCommerce addon, you can automatically track your MemberPress performance.
ExactMetrics is the best premium WordPress Analytics plugin. You can set up advanced tracking on your WordPress site with just a few clicks and get reports right inside your dashboard.
Plus, with ExactMetrics, you gain access to tons of additional Google Analytics features and advanced tracking capabilities right out of the box. Here are some of ExactMetrics’ most popular features:
- Custom event tracking and custom dimensions
- Conversion tracking for Google Ads, Microsoft (Bing) Ads, and Meta (Facebook) Ads
- Advanced form tracking
- Display your most popular posts or products
- Affiliate and outbound link tracking
- Social media tracking
- And much more…
If you haven’t set up your site with the best membership plugin, follow our guide on how to create a MemberPress website on WordPress.
Then, just follow these steps to get started with Google Analytics for MemberPress.
Step 1: Install ExactMetrics WordPress Plugin
The first step you need to perform is downloading and installing the ExactMetrics plugin for WordPress on your website. You’ll need the ExactMetrics Pro license to view its addons and set up MemberPress tracking.
After purchasing, download the plugin’s zip file.
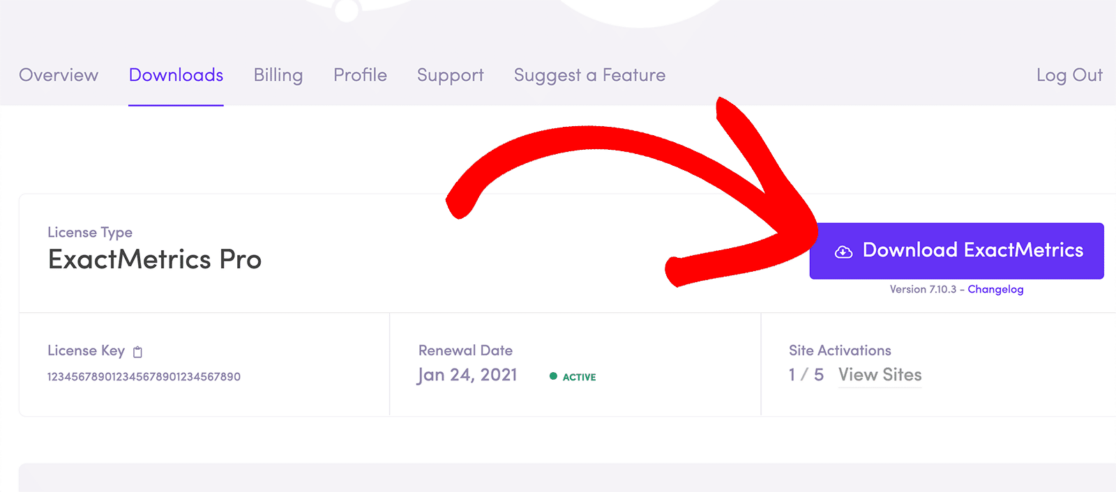
Next, upload the plugin on your WordPress site and activate it. Once ExactMetrics is installed and activated on your site, just follow the setup wizard to connect Google Analytics with WordPress.
For more details, here’s a step-by-step tutorial on how to properly set up Analytics on a WordPress site.
Step 2: Install and Activate eCommerce Addon
The next step in setting up Google Analytics for MemberPress is to install the ExactMetrics eCommerce addon.
You can do that by going to your WordPress dashboard and then to ExactMetrics » Addons. Now click Install below eCommerce.
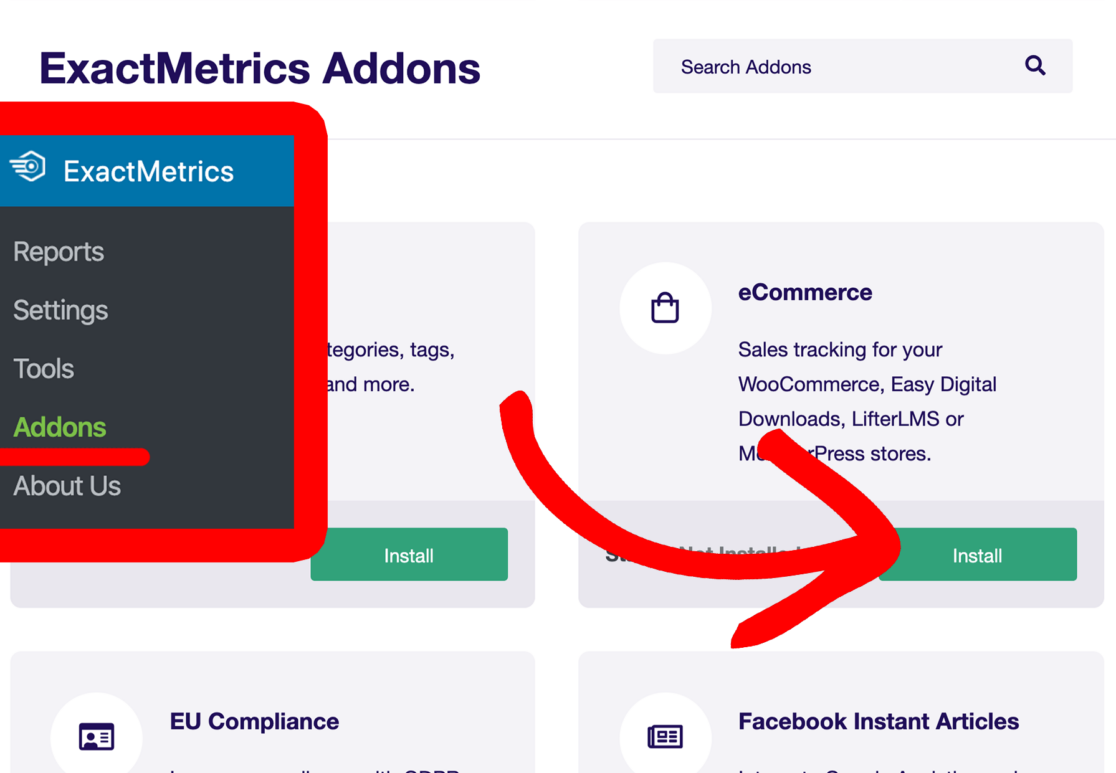
The addon will automatically install and activate. You can see the status of the change from Inactive to Active, which means it’s ready for use.
The plugin will immediately start tracking your membership site in Google Analytics. You can go to ExactMetrics » Settings » eCommerce to see that ExactMetrics automatically detected MemberPress on your website.
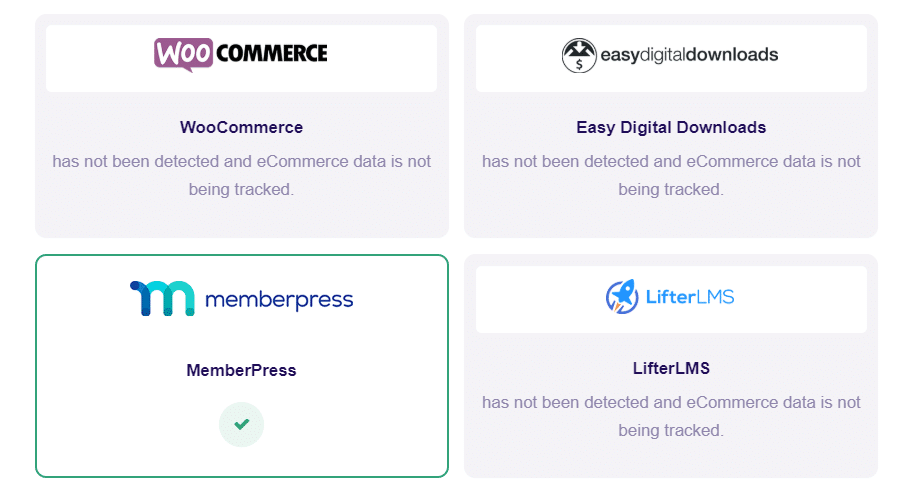
You can now view stats of how your MemberPress site is performing right inside WordPress.
Let’s see how to do that…
Step 3: View MemberPress Google Analytics Reports
One of the perks of having ExactMetrics on your website is that you get to see Google Analytics performance reports in your WordPress dashboard. No need to leave your site!
The best thing about these reports is that they’re easy to read and you give all the metrics that matter for your business, so you don’t have to work through navigating Google Analytics to find the right data.
To view your MemberPress tracking report, go to ExactMetrics » Reports and then select eCommerce from the options on the top.
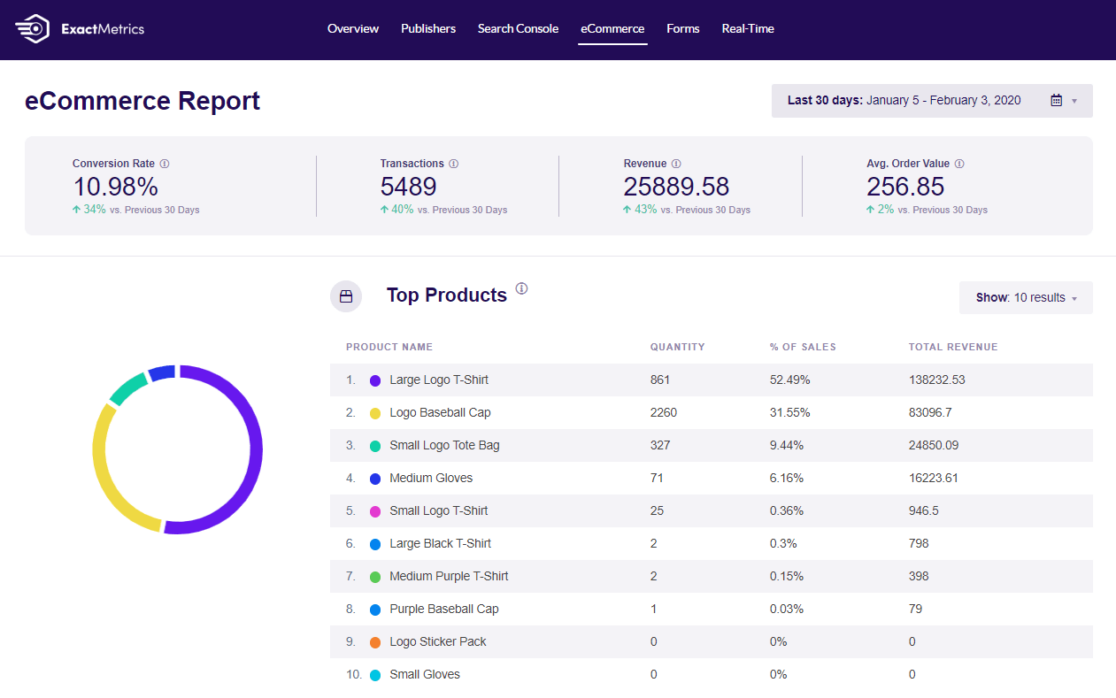
You can then select a date range and see the conversion rate of your site, number of transactions, revenue, and average order value. And if you want to share the report with your client or team members, you can even download it as a PDF file.
With the Top Products report, you can see which product is performing best and bringing in the most conversions.
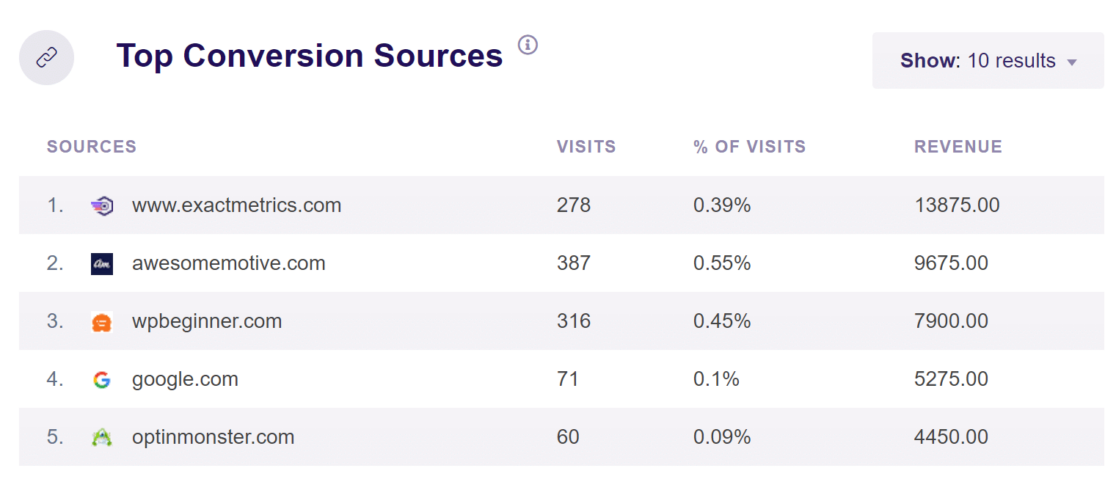
Now, if you scroll down, you’ll see more reports to help you boost MemberPress conversions.
ExactMetrics also shows you your Top Conversion Sources. So, you know where visitors who convert on your WordPress website are coming from.
And that’s it! Pretty easy right?
Want to learn how to track video plays for media content on your membership website? Check out How to Enable Google Analytics Video Play Tracking.
We hope you enjoyed our article on how to set up tracking in Google Analytics for MemberPress. If you found this post useful, you’ll also like our guide on How to Track Form Submissions in Google Analytics.
Not using ExactMetrics yet? What are you waiting for?
Don’t forget to follow us on Twitter and Facebook to see all the latest reviews, tips, and Google Analytics tutorials.


