Are you looking for a quick and easy way to link Google Ads to Google Analytics and your WordPress website?
By linking these platforms, you’ll get insights about your ad campaign’s performance and what people do on your site after they click on an ad.
In this article, we’ll walk you through how to link Google Ads to Google Analytics and WordPress in just a few clicks.
Why Connect Google Ads with Google Analytics?
You might be wondering why it is important to link your Google Ads (formerly known as AdWords) account with Google Analytics.
Google Ads is a powerful tool, but it only tells you half of the story. If you only look at the data in Google Ads, you’ll be missing out on the information about what users do once they’ve clicked on the ad.
But if you track Google Ads in Google Analytics, you’ll be able to understand your visitors’ behavior, where they click, how much time they spend on the page, and much more. It shows more of a customer journey and helps you allocate your budget to get maximum conversions.
For example, you might notice that some keywords have lower conversions but long visit durations. This shows that the keywords you’re targeting are great for creating awareness about your brand, but people aren’t ready to buy at this stage.
That being said, are you ready to learn how to add Google Ads to Google Analytics?
How to Link Google Ads to Google Analytics
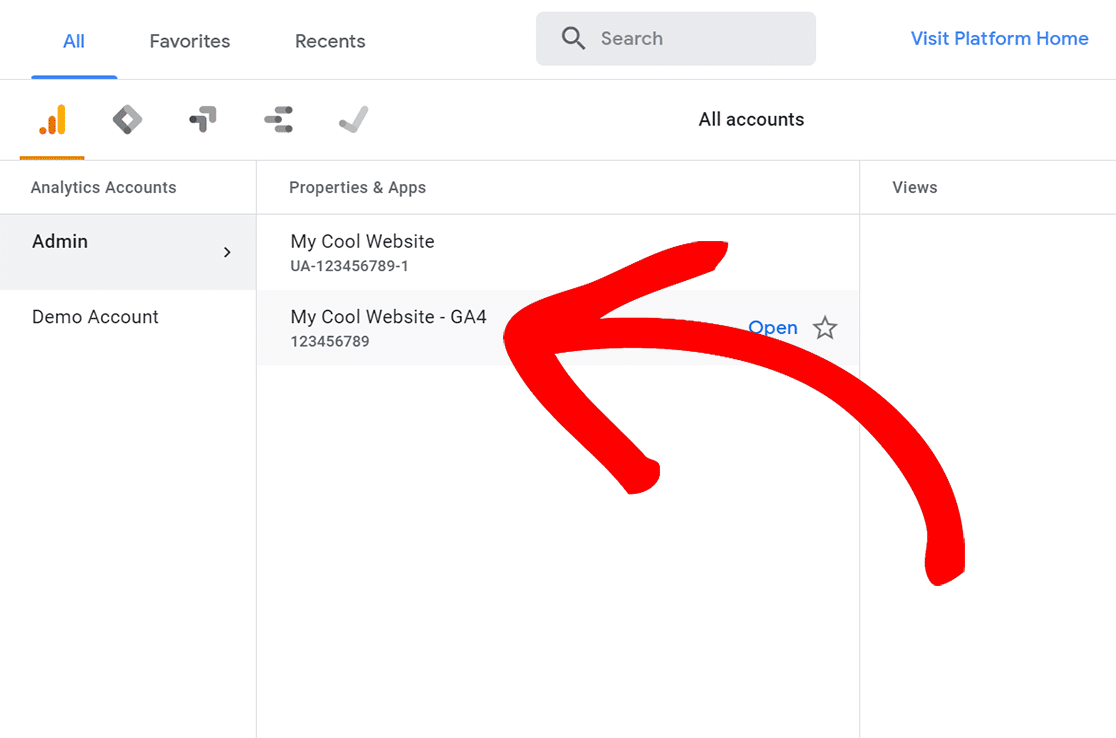
To set up the link between Google Analytics and Google Ads, start by opening the property you’re connecting:
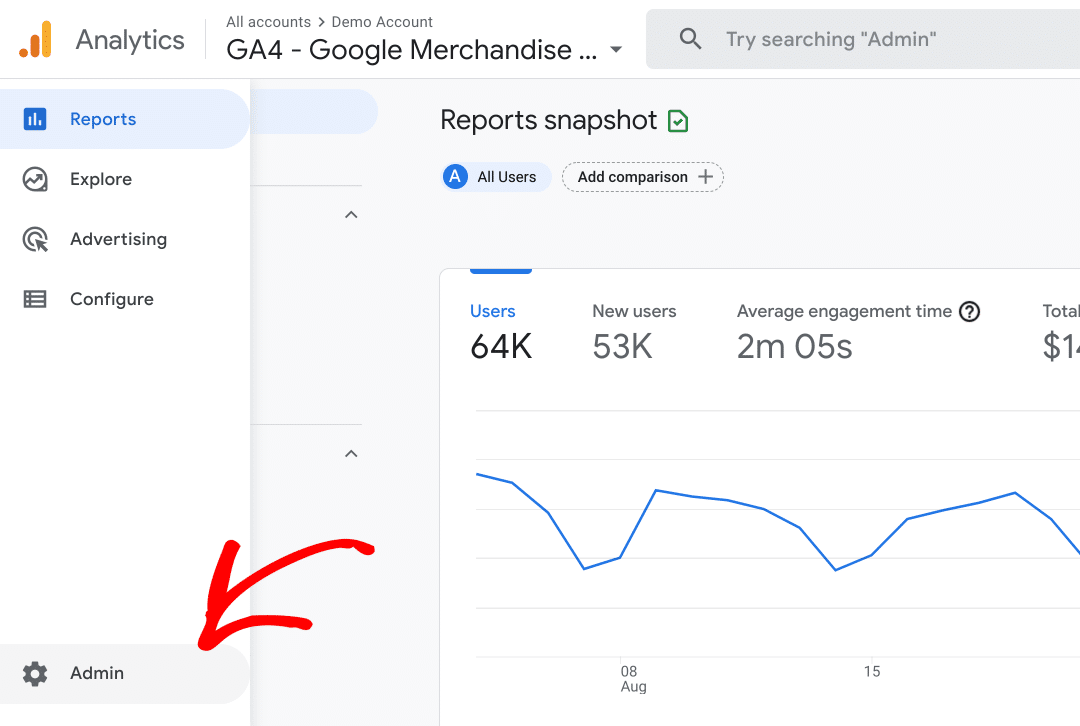
Next, open the Admin area:
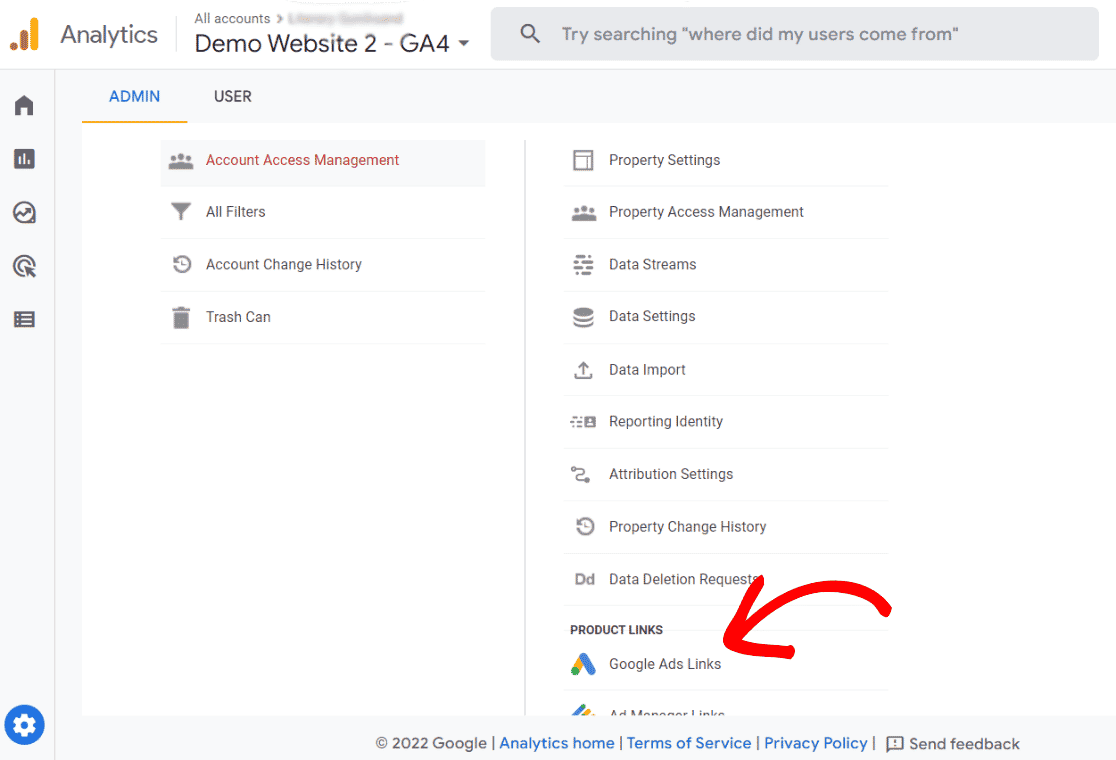
Find Google Ads Links in the middle column:
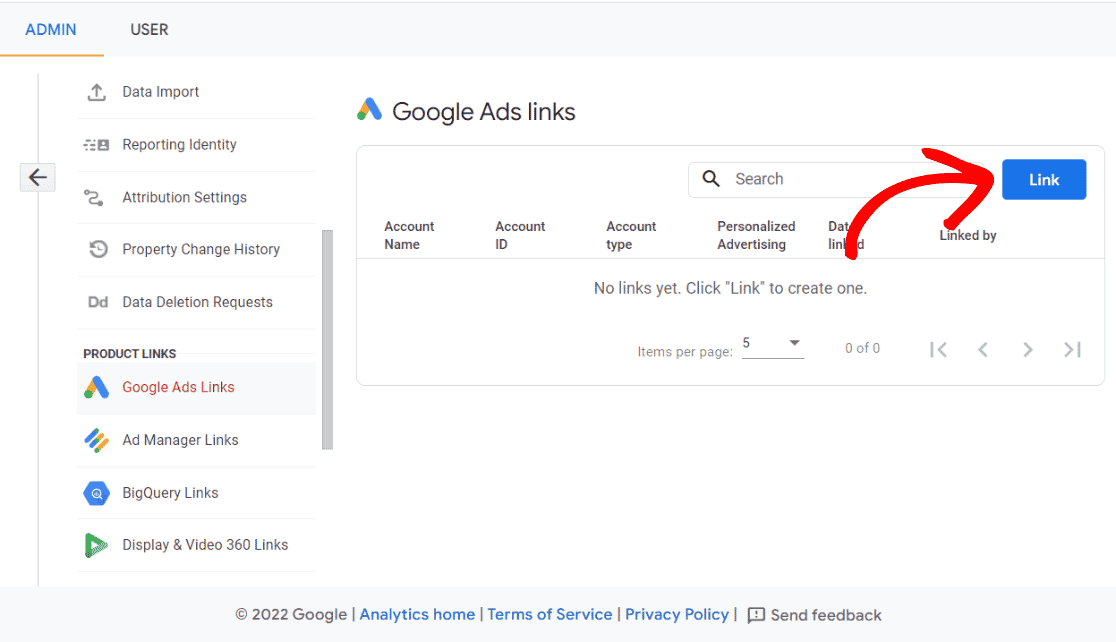
Next, click the blue Link button:
Next, click Choose Google Ads accounts:
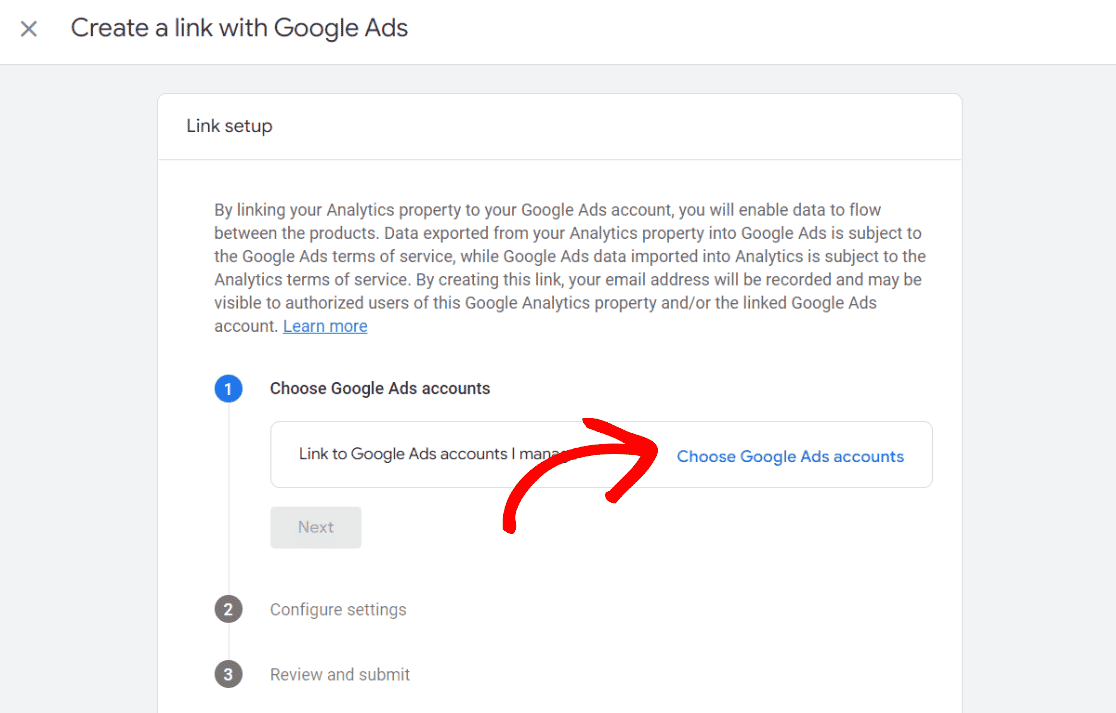
Now, choose the account(s) you want to link with and click Confirm:

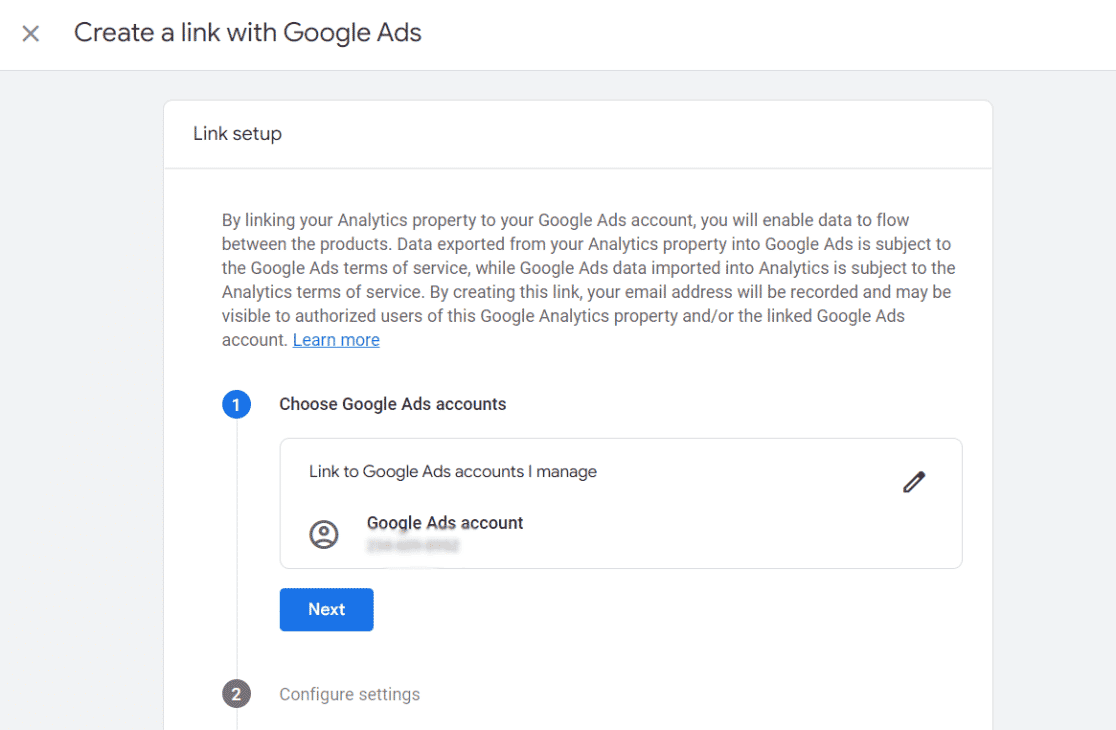
On the next screen, make sure the right account is chosen and click Next:
Now, you can choose whether you want to disable personalized advertising. You can change this setting any time after setup if you need to.
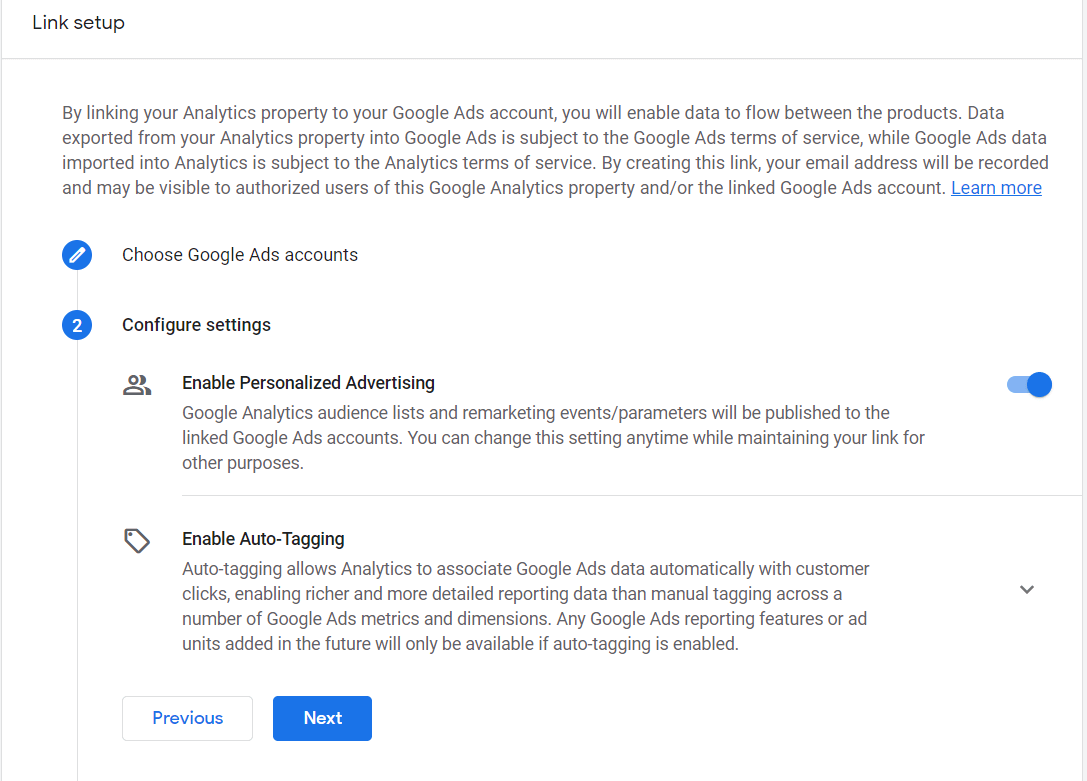
Finally, click Next, then Submit.
That’s it! You’ve successfully linked Google Ads to Google Analytics.
Connect Google Ads and WordPress for Conversion Tracking
The easiest way to connect Google Ads and WordPress to track your WooCommerce, Easy Digital Downloads, or MemberPress conversions is by using ExactMetrics. It’s the best premium Analytics WordPress plugin and helps you set up tracking without editing code or hiring a developer.
So, if you have an eCommerce site, it’s incredibly easy to set up conversion tracking using ExactMetrics.
To start, follow these steps:
Step 1: Install and Activate ExactMetrics
First, you’ll need to install and activate the ExactMetrics WordPress plugin on your website.
Using the plugin, you’ll get Google Analytics insights right inside your WordPress dashboard and be able to quickly and easily set up advanced tracking like file downloads, eCommerce tracking, form conversions, and outbound link clicks that Google Analytics doesn’t track by default.
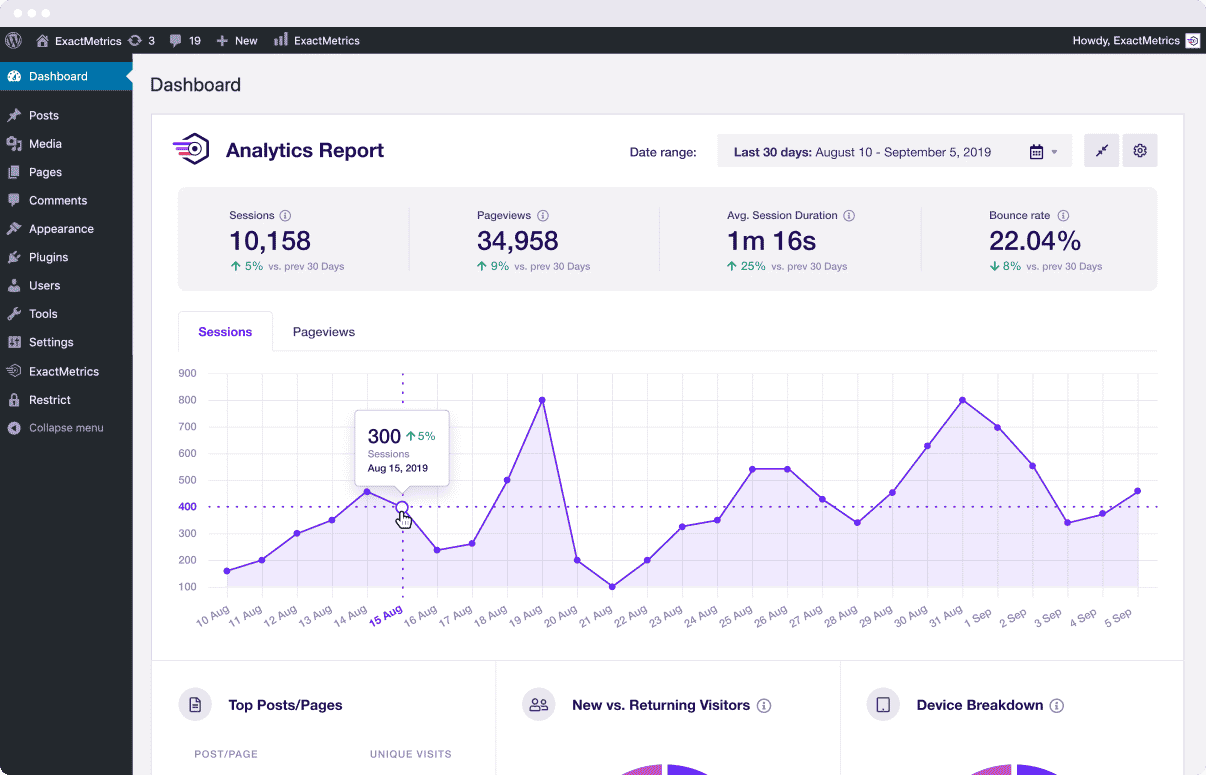
Next, you’ll need to add Google Analytics to your WordPress site. With the help of ExactMetrics, all you have to do is follow the steps in the setup wizard. The plugin will add the tracking code for you, and there’s no need to touch a single line of code.
For a full tutorial on how to set up ExactMetrics and connect your site to Google Analytics, read how to add Google Analytics to WordPress.
Step 2: Install ExactMetrics Ads Addon
Now that the plugin is up and running on your website, you’ll need to install and activate the ExactMetrics Ads addon. You’ll need a Plus or higher license to access the addon.
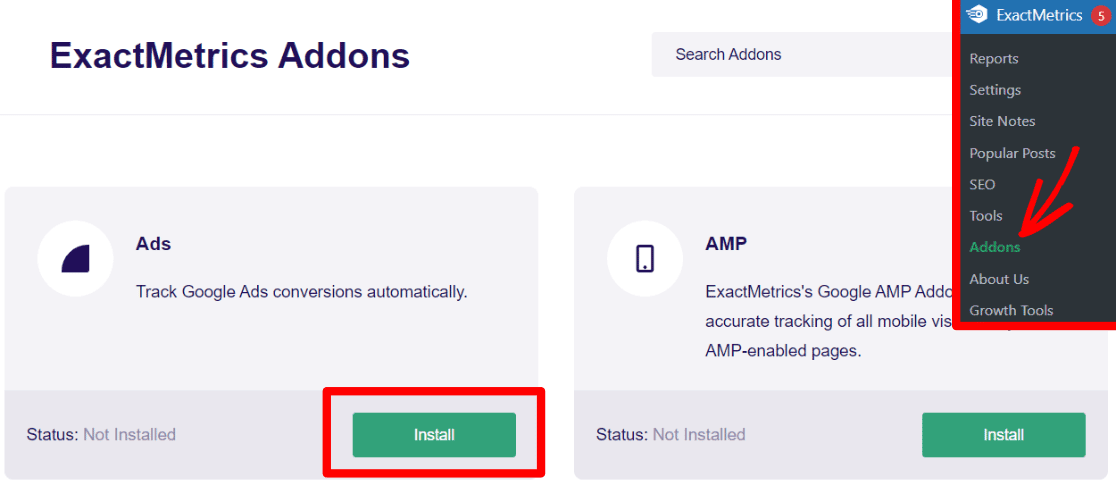
You can install the addon by going to ExactMetrics » Addons and then navigate to Ads. After that, click the Install button, and in a few seconds, the addon will automatically activate.
Step 3: Set up Conversion Tracking
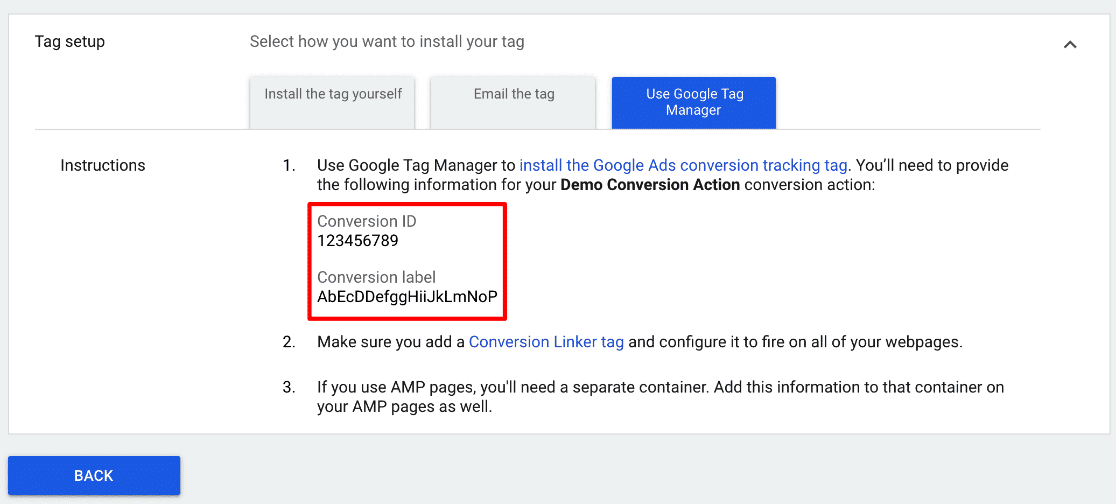
Next, you’ll be able to enter your Google Ads Conversion ID and Conversion Label in ExactMetrics. This will automatically add your Google Ads conversion tracking code to your site, without having to do it manually.
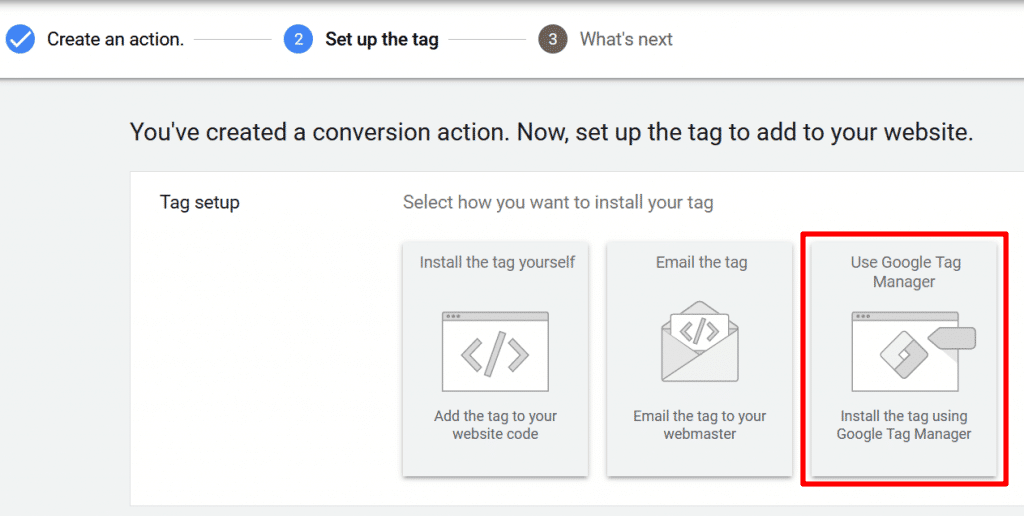
To find your Conversion ID and Conversion Label, go through the process of setting up a website conversion. When you get to this screen where you can choose your installation method, click the Use Google Tag Manager option:
You’ll then see this screen with your ID and label so you can copy-paste it:
Once you have the ID and label screen open, navigate to ExactMetrics » Settings » Publisher and then go to Ads Tracking. Here’s where you can paste your ID and label:
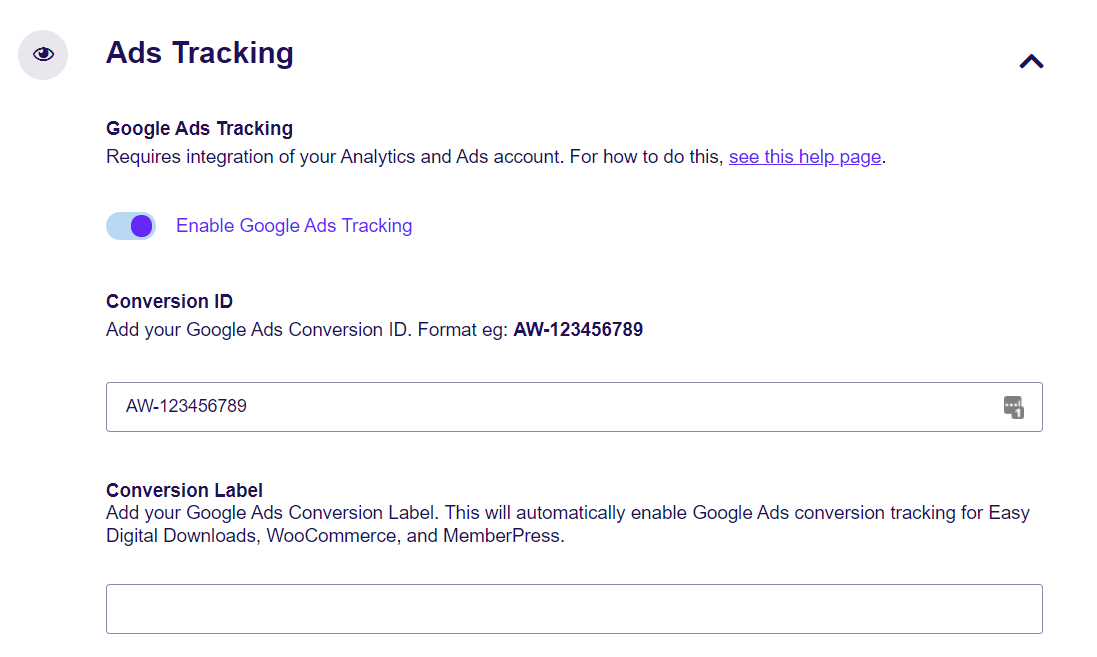
Click the Save Changes button when you’re done. You’ve successfully set up Google Ads conversion tracking!
How to View Google Ads Data in Google Analytics
After linking Google Ads and Google Analytics, you can now view different reports to understand your visitor’s behavior better.
To see how your campaigns are performing in Google Analytics, navigate to Reports » Acquisition » Traffic acquisition. On that page, scroll down to the table and you’ll find Paid Search for your ad traffic.
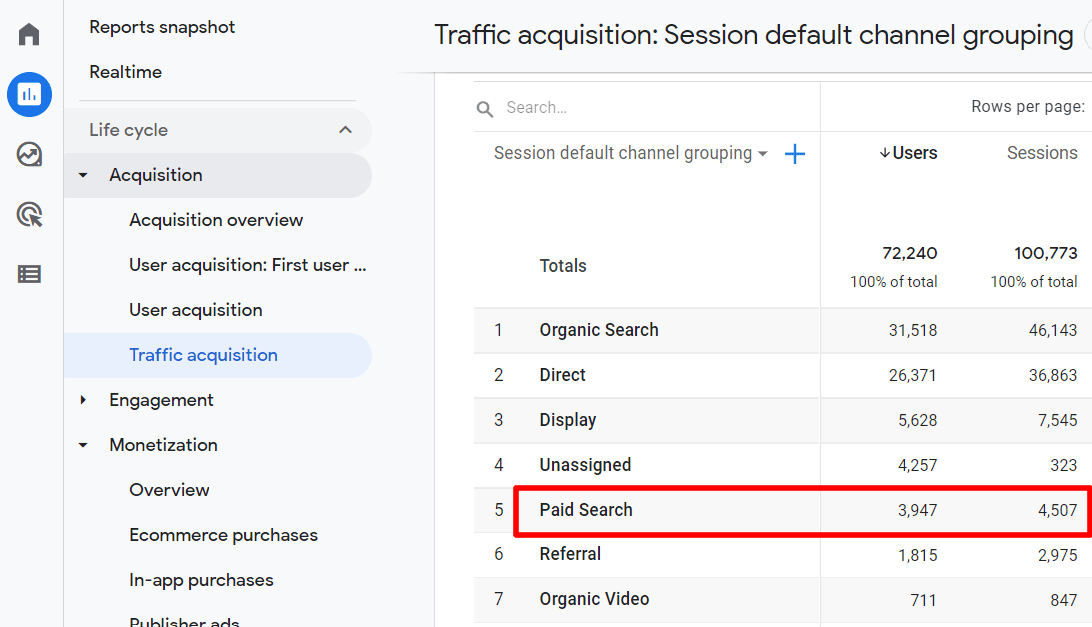
You can see the number of clicks, costs, cost per click (CPC), number of users, sessions, bounce rate, pages per session, and much more for each campaign.
Besides that, you can use Secondary Dimensions to drill down your campaigns further. For instance, you can select Device Category as a dimension and see which device people use to view your campaigns.
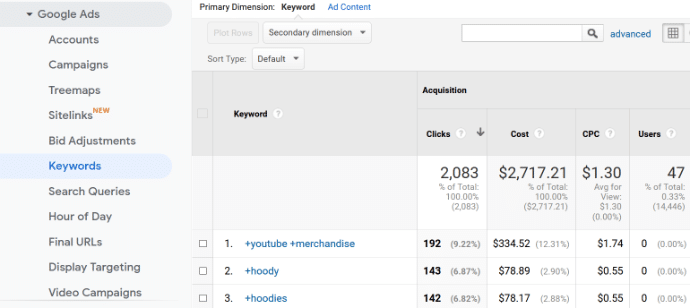
You can also view other reports like Keywords and Search Queries to see the search term people use to reach your website. This way, you can see which keywords to target in your campaigns.
And that’s it!
We hope you liked our article on how to link Google Ads to Google Analytics. You can also go through our guide on important Google Analytics metrics every business should track.
And don’t forget to follow us on Twitter and Facebook to get to know the latest Google Analytics tutorials.

