Wondering how to get web traffic stats for a specific page in WordPress? It’s not as hard as you may think! This guide will teach you how to easily get traffic stats for different pages of your website.
Tracking your site traffic has a lot of benefits, and seeing url traffic for specific pages can give a lot of insight into how different content performs. But, getting it set up properly can often be time-consuming and complicated.
Luckily, there’s a really easy way to see web traffic stats right inside WordPress, and we’ll show you step-by-step how to do it.
Why Get Web Traffic Stats for a Specific Page?
For your site to be successful, you need traffic. But, how do know if your efforts are paying off? Well, that’s where web traffic stats can help. Collecting traffic stats allows you to:
- See how your site is performing
- Determine what type of content your audience is interested in
- Identify traffic sources
- See how site visitors engage with different pages
- And more!
Understanding what attracts visitors and your most popular traffic sources can help you fine-tune your content marketing strategy. It can also help you increase your overall website traffic.
If you haven’t been tracking traffic stats in WordPress, you’re missing out on a prime opportunity. The good news is, it’s not too late to start. Follow the steps below to learn how to get web traffic stats for a specific page.
How to Check Page Traffic
- How to Set Up Website Traffic Stats
- How to See Overall Web Traffic Stats
- How to See Google Analytics Stats on a Specific Page
How to Set Up Website Traffic Stats
- Step 1: Download ExactMetrics
- Step 2: Create a Google Analytics Account
- Step 3: Install ExactMetrics
- Step 4: Connect ExactMetrics to Google Analytics
Although you can get web traffic stats for a specific page in Google Analytics, connecting your website with Google Analytics can be tedious and challenging because it involves adding tracking code to your website’s core files. Plus, any mistake can break your site. So, we recommend avoiding the risk altogether by using ExactMetrics to set up Google Analytics quickly and easily.
ExactMetrics is the best premium WordPress Analytics plugin, allowing you to easily set up Google Analytics without editing any code or needing a complicated tool like Google Tag Manager.
You get advanced tracking right out of the box with an extremely user-friendly interface and Google Analytics reports right inside your WordPress dashboard, including web traffic stats for any individual page on your site.
Why use ExactMetrics to track WordPress traffic stats?
- The plugin makes it easy to connect your site with Google Analytics
- Set up takes just a few minutes and there’s no code to deal with
- You can see Google Analytics reports right in your WordPress dashboard
- Get insight into your site traffic, form conversions, lead generation efforts, and more
Plus, you gain access to tons of additional Google Analytics features and advanced tracking capabilities with just a few simple clicks. Here are some of ExactMetrics’ most popular features:
- Custom event tracking and custom dimensions
- 1-click eCommerce tracking
- Conversion tracking for Google Ads, Microsoft (Bing) Ads, and Meta (Facebook) Ads
- Advanced form tracking and integration with the most popular form builders
- Display your most popular posts or products
- Affiliate and outbound link tracking
- Social media tracking
- Media and video play tracking
- And much more…
To get started, head to the pricing page and grab the license level that works for you. Then, just follow the steps below to start tracking your website traffic stats in WordPress.
Step 1: Download ExactMetrics
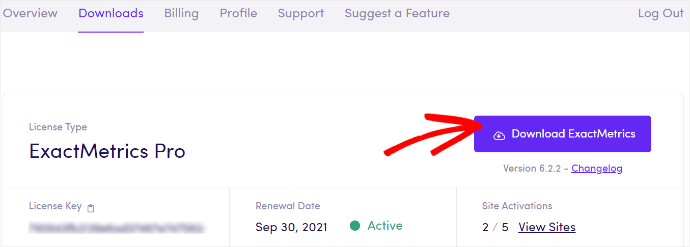
After purchasing the ExactMetrics Pro plugin, you’ll need to download the plugin. From the account area of ExactMetrics, select the Downloads tab.

Click the Download ExactMetrics button.
Step 2: Create a Google Analytics Account
After installing ExactMetrics on WordPress, you’ll need to create a Google Analytics account to start tracking website traffic stats on your WordPress site.
Already have your website’s Google Analytics account set up? Skip to the next step.
To sign up for a new Google Analytics account, go to the Google Analytics website and select the Start for free button.

Sign in to the Google account you want to use for your website’s analytics (or create a new one). Then, click on Start measuring.

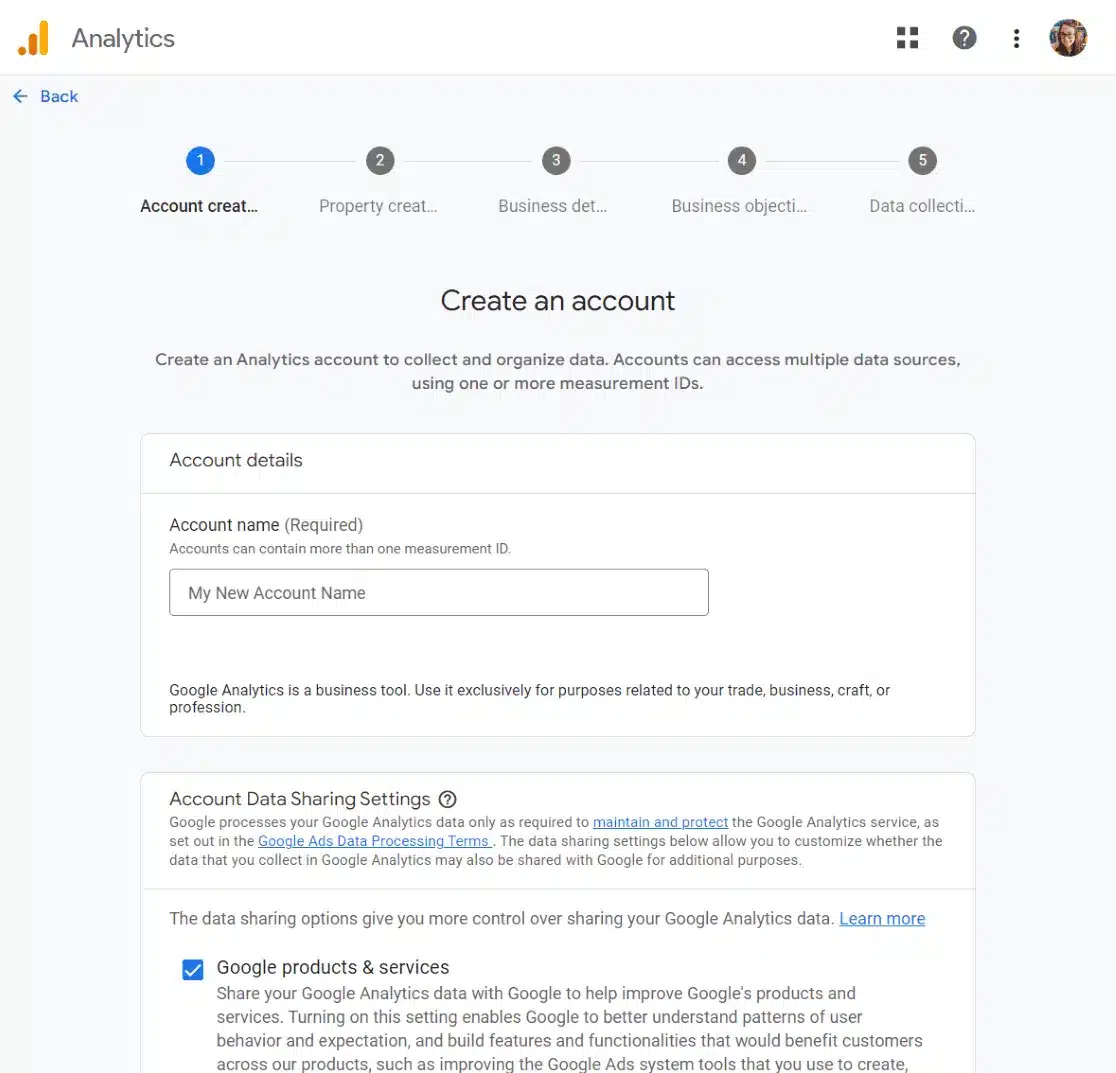
This will take you to the setup screen where you’ll first be prompted to enter an Account name. Select ALL of the boxes under Account Data Sharing Settings. Hit Next.
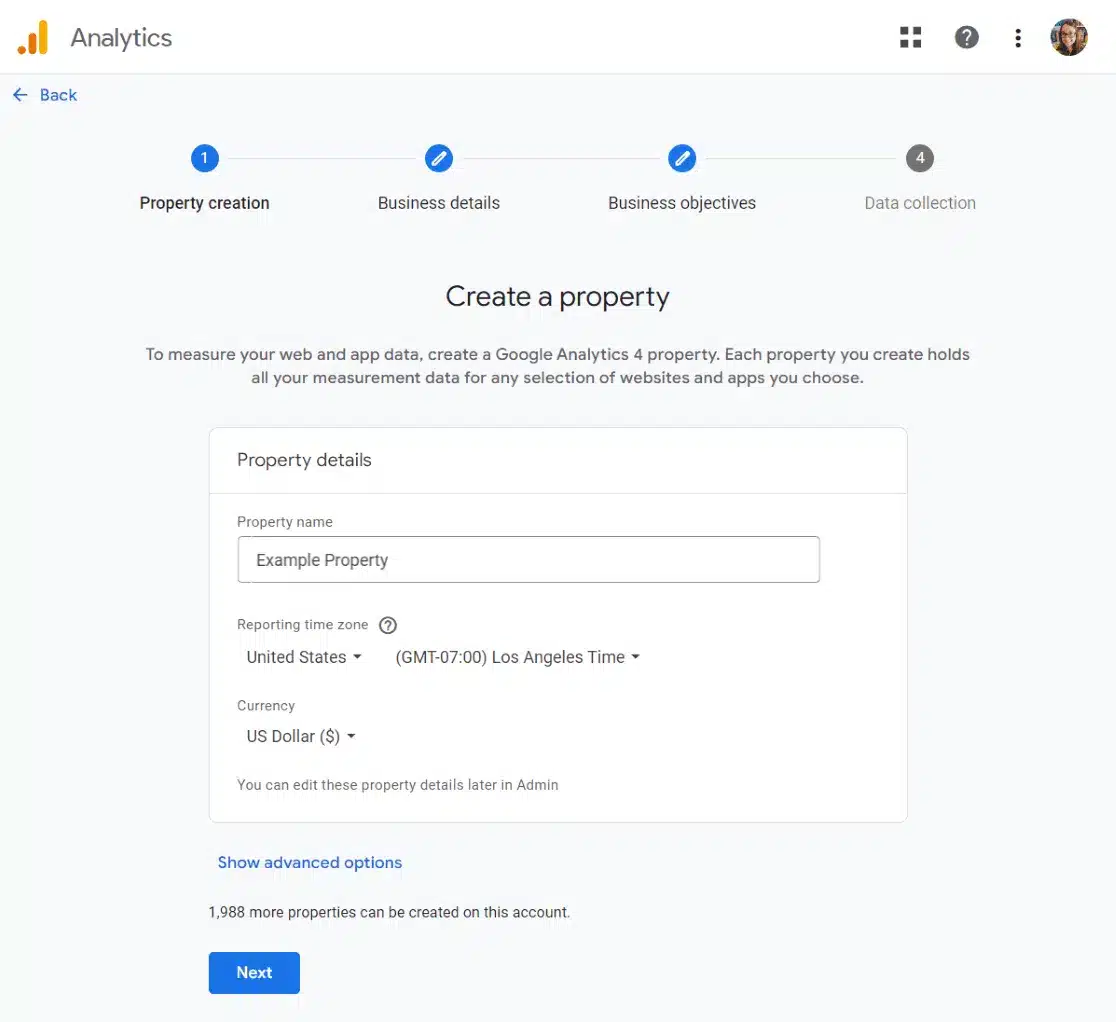
Now, you’ll be asked to provide a Property name. Most people use the name of their business or website for this. Go ahead and choose your Reporting time zone and Currency, and hit Next.
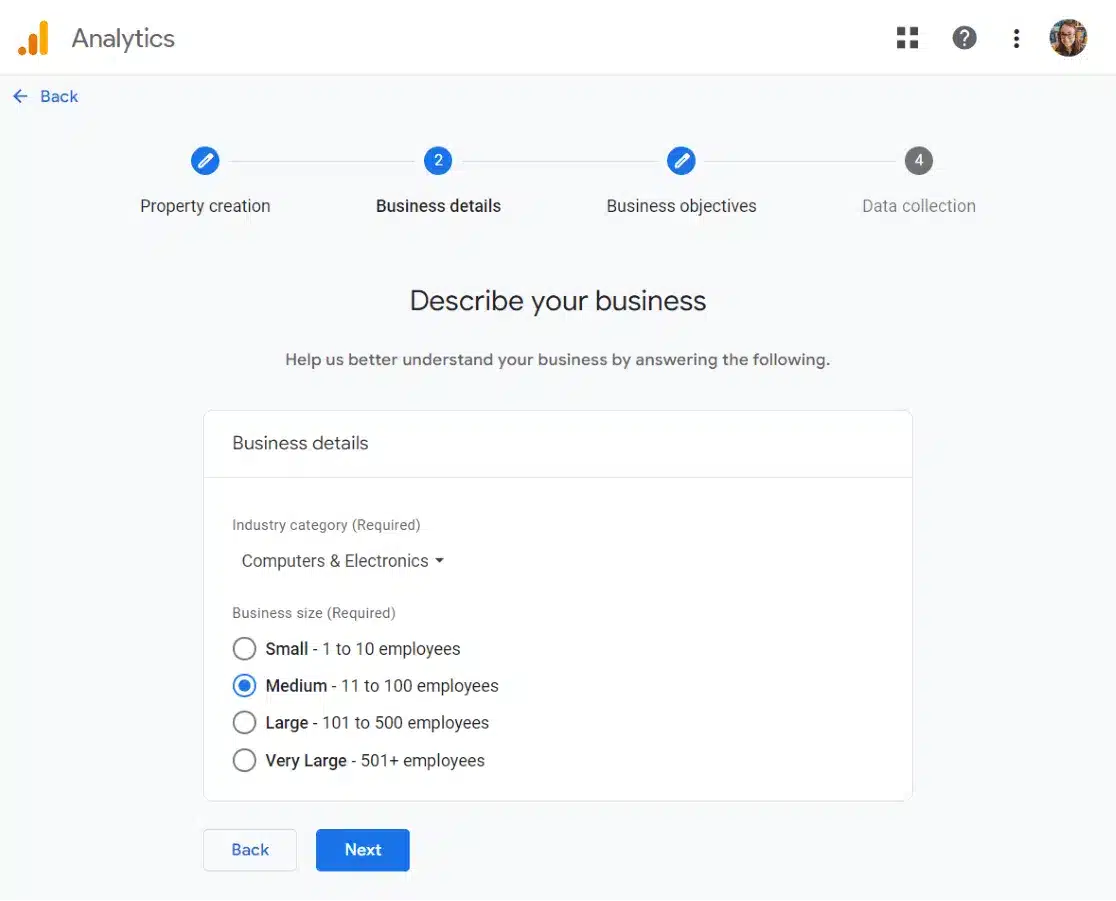
On the next screen, you’ll be asked to provide some Business details. Click Next when you’re done answering.
Next, Google will ask about your business objectives. We recommend selecting Get baseline reports to have all of the default reports populate in your account automatically.

Finally, click the Create button at the bottom of the page. That’s it, your Google Analytics account is set up! Now, head back to WordPress where we’ll use ExactMetrics to easily set up Google Analytics for your site and show you how to find web traffic stats.
Step 3: Install ExactMetrics
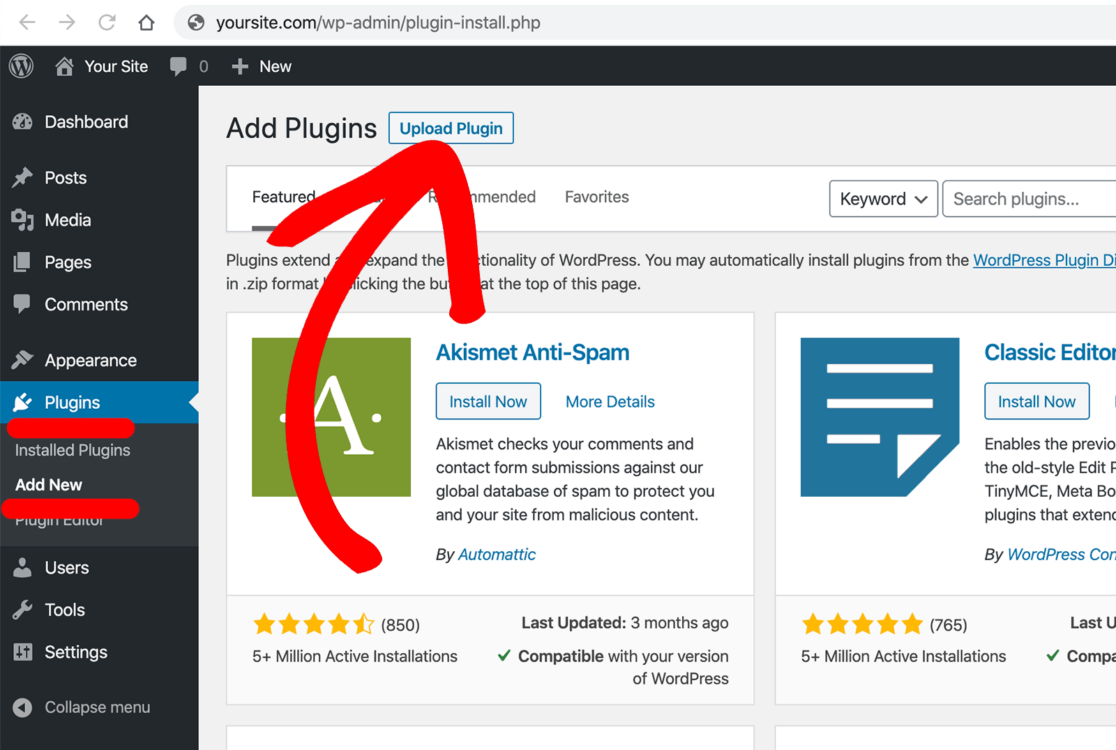
First, go to your WordPress Dashboard to install and activate the plugin on your site. Select Plugins » Add New and click on Upload Plugin near the top of the screen.
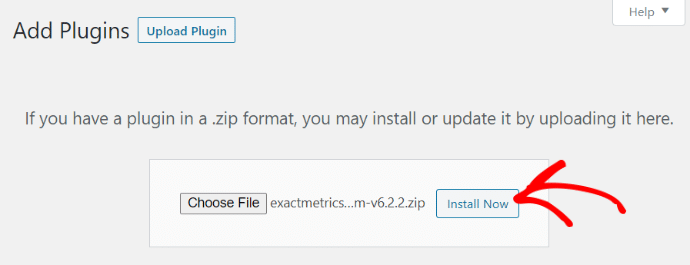
On the next screen, select the zip file you downloaded from your ExactMetrics account earlier. Click Install Now to upload the file and install it on your website.
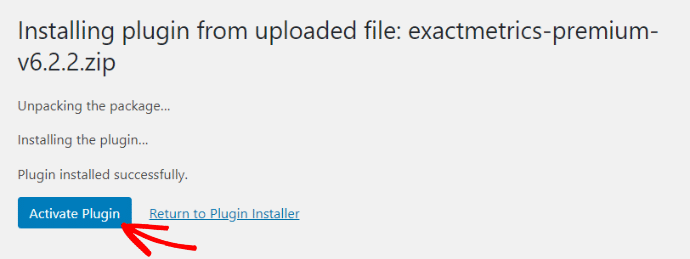
Once uploaded, click the Activate Plugin button to activate it on your site.
Step 4: Connect ExactMetrics to Google Analytics
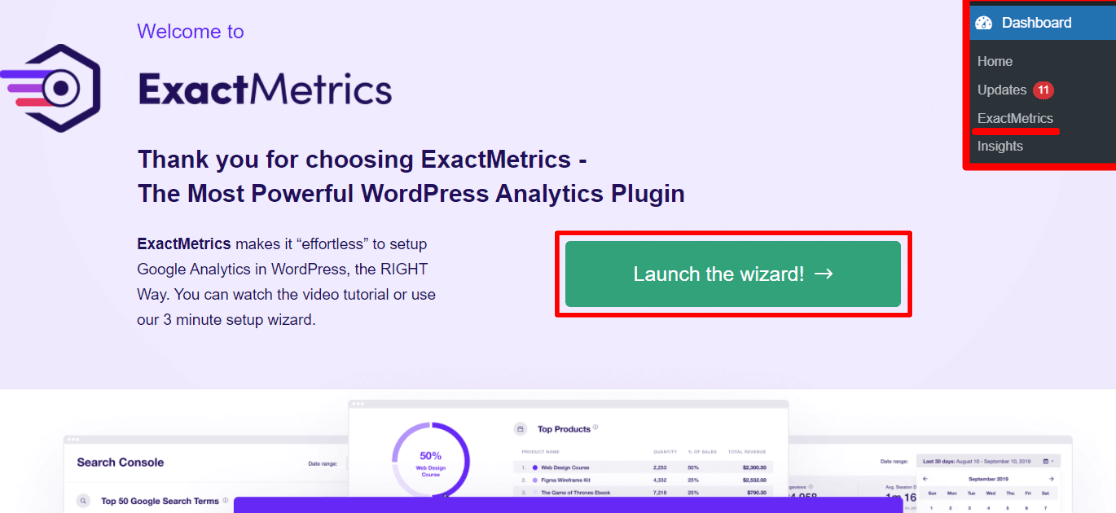
Next, click ExactMetrics in your WordPress admin menu and then click the big green button to Launch the wizard!
First, you’ll be asked to select your website category. Click Save and continue after answering.
Then, you’ll be prompted to add your license key, which you can find by clicking on the Retrieve your license key, logging into your ExactMetrics account, or checking your purchase confirmation email.
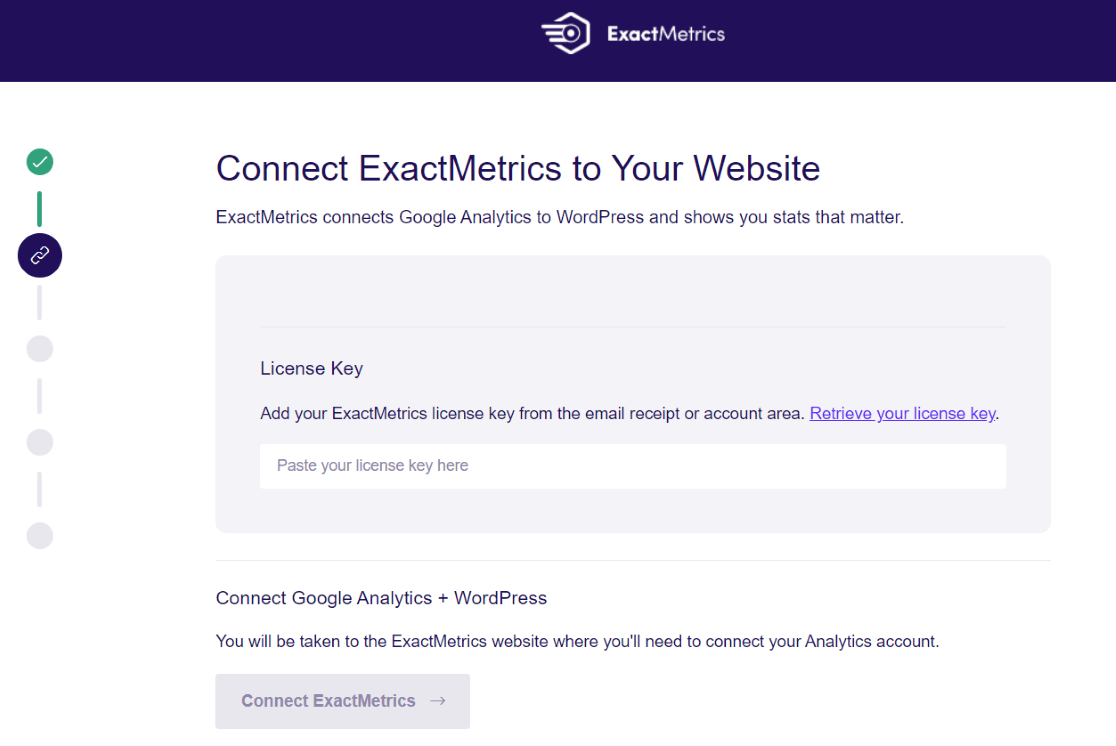
The setup wizard will help you connect your site to Google Analytics in a few clicks. Press the Connect ExactMetrics button when it turns green after verifying your license.
Next, select the Google account associated with Google Analytics for your site. Then click the Allow button to give ExactMetrics access to your Google Analytics data.
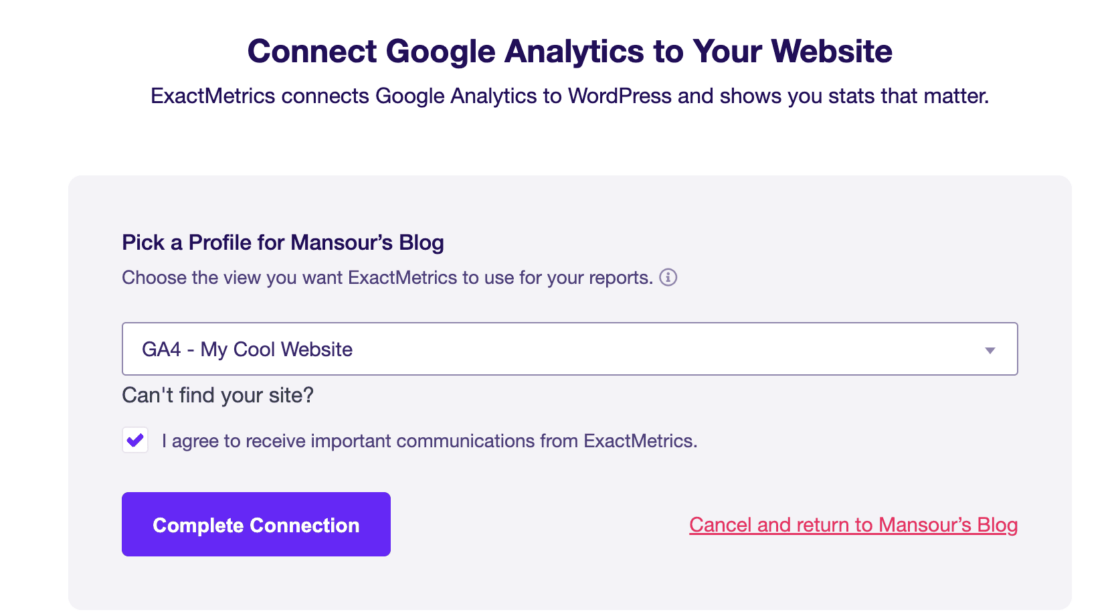
On the next screen, select the website profile you want to connect and click Complete Connection.
On the next page, ExactMetrics will recommend some settings based on the website type you selected. Go ahead and customize them to your liking. Then, scroll to the bottom of the page and click Save and Continue.
The fourth step of the setup wizard offers ExactMetrics addons. To conveniently see web traffic stats for any specific page directly on the fontend of your site, you’ll need to install the Page Insights Addon.
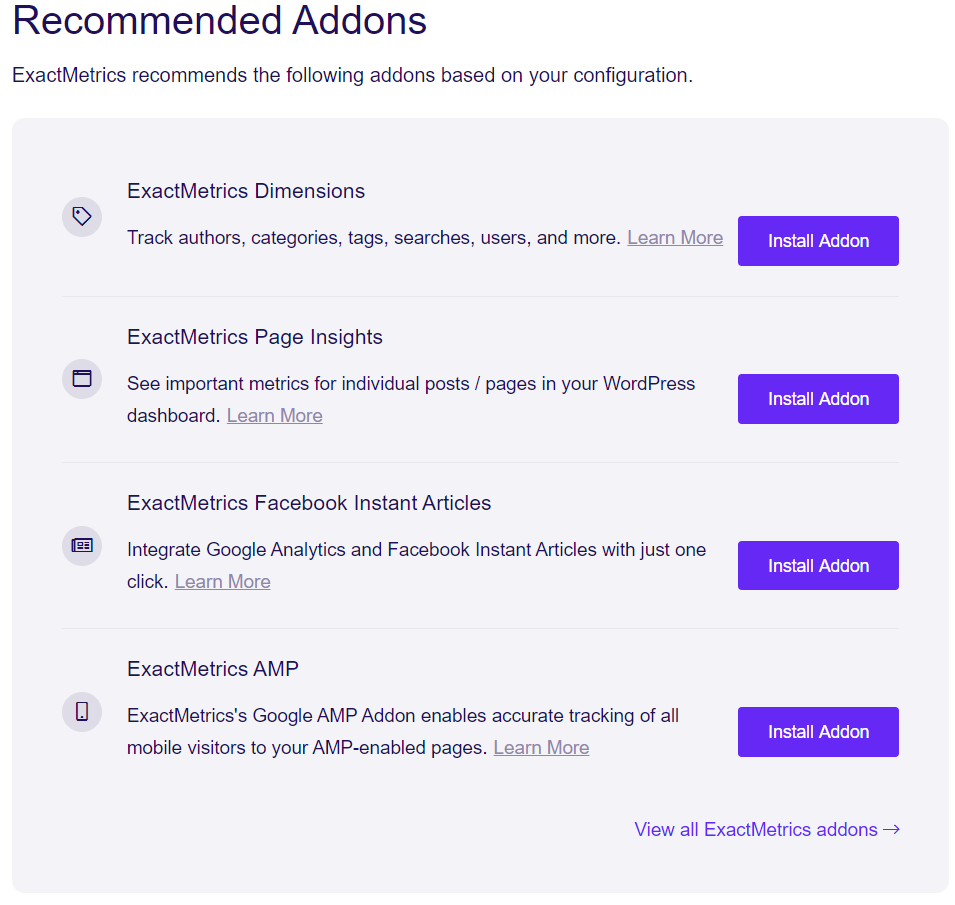
Choose what other addons you want to don’t want, scroll to the bottom of the page, and click Save and Continue.
On the last page of the setup wizard, click the Finish Setup and Exit Wizard button.
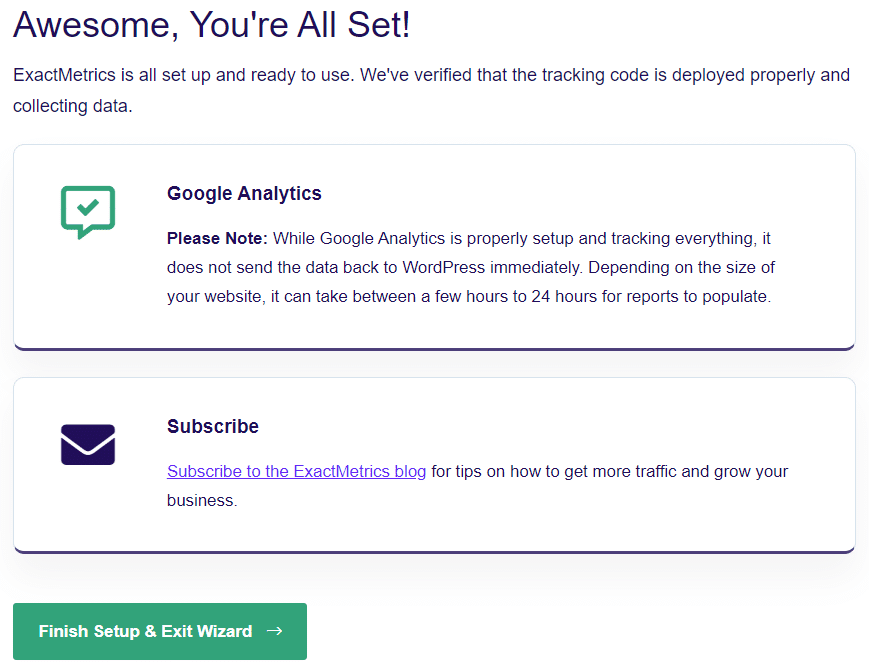
That’s it! ExactMetrics is now connected to your website’s Google Analytics account.
How to See Overall Website Traffic Stats
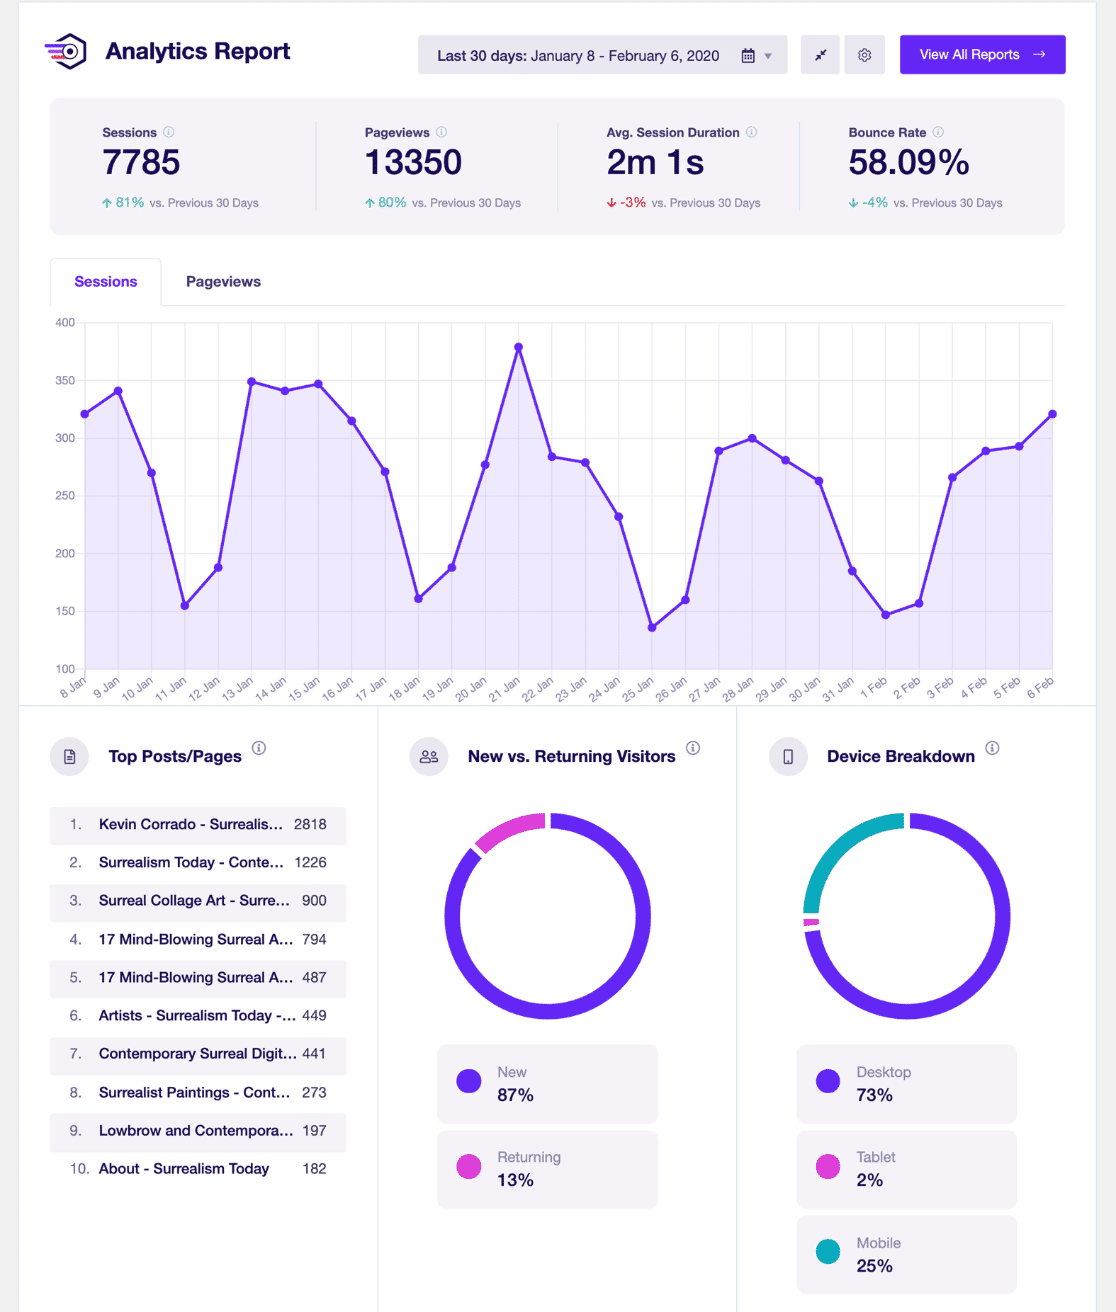
With ExactMetrics connected to your WordPress Site and Google Analytics account, you can get easy-to-read reports right in the dashboard.
Overview Report
This will take you to your Overview report where you can see:
- Sessions
- Pageviews
- New vs. Returning Visitors
- Device Breakdown
- Top Countries
- Top Referrals
Want to see which pages are getting the most traffic? Scroll to the bottom of the report, you’ll find a report showing the Top Posts/Pages on your site.
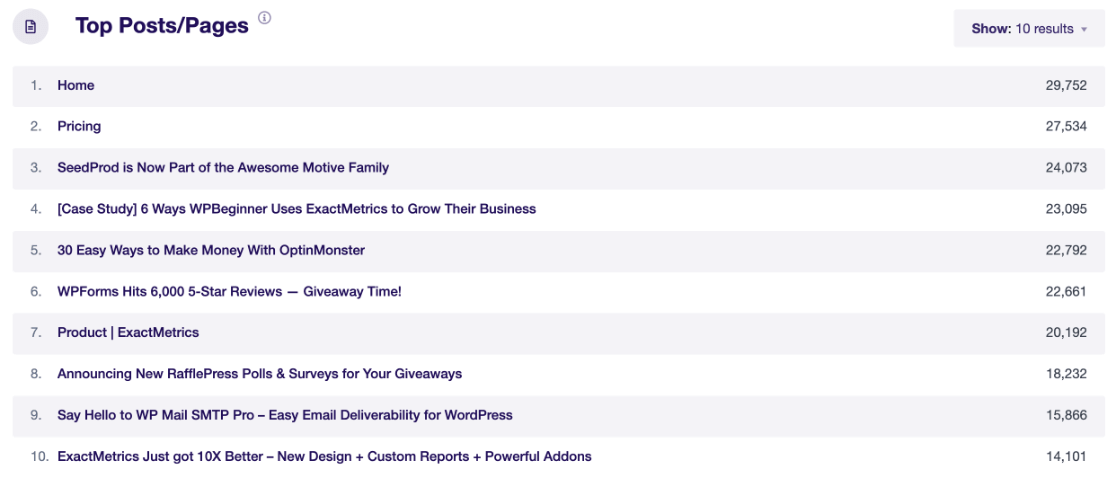
This provides an at-a-glance look at which posts and pages perform the best but the information can be broken down further.
Scroll back to the top of the page and click the Traffic tab.
Website Traffic Reports
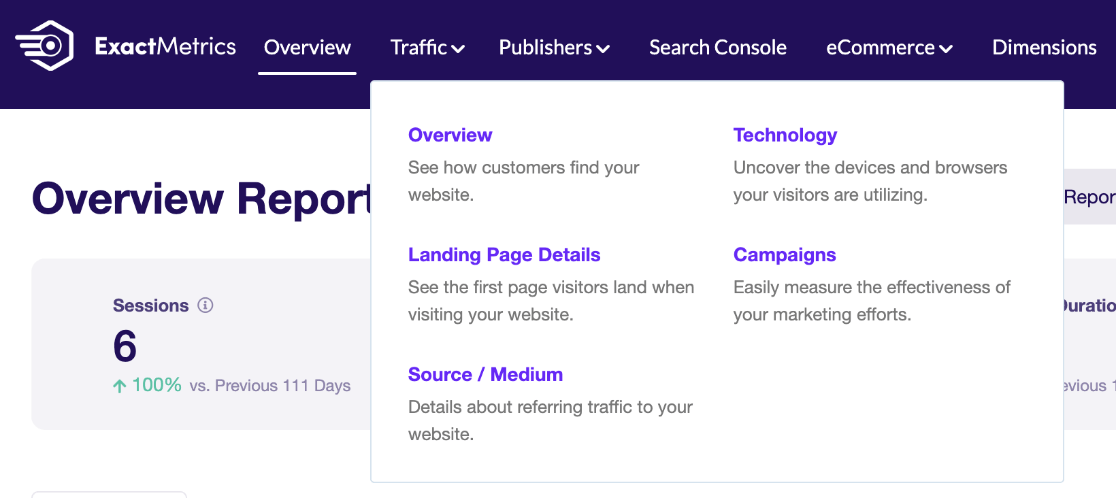
Here’s where you’ll find the reports you can use to see more in-depth website traffic stats. For example, if you click Landing Page Details, you’ll see your Top Landing Pages report. Easily see which landing pages are getting the most traffic, conversions, and more.
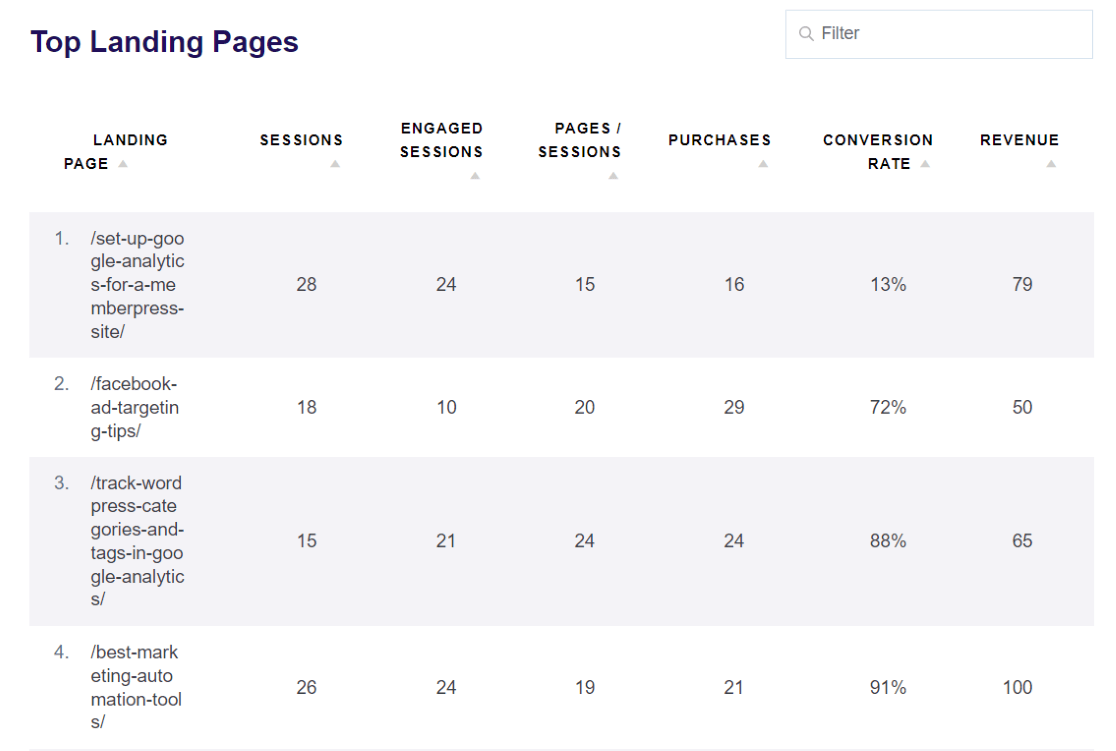
Here’s an explanation of the other traffic reports where you can find out more about your website’s traffic.
- Source/Medium: See where your web traffic comes from and key metrics for each traffic channel. For example, see how many visitors are coming to your site through social media or organic search, which channels are converting best, and more.
- Technology: See which web traffic stats for the devices and browsers that visitors use.
- Campaigns: Track all your marketing campaigns (UTM parameters) to see which campaigns are doing the best in terms of revenue, bringing in the most traffic, and more.
How to See Google Analytics Stats on a Specific Page
The insights found in your main traffic reports are super helpful for getting stats on your overall website, top pages, and more. But, what if you want to view stats for an individual page?
That’s where ExactMetrics Page Insights addon helps out.
A glimpse into page-specific insights allows you to see how individual pages and posts are performing. The addon provides crucial at-a-glance metrics to determine which pages and posts need to be improved or optimized.
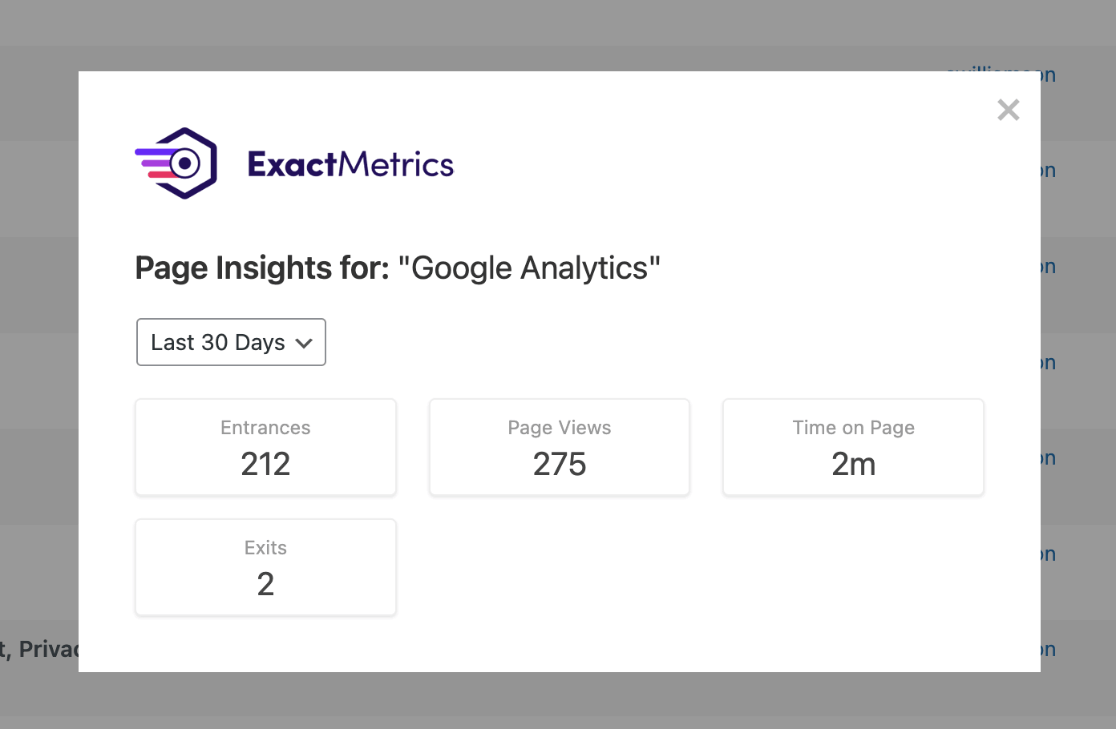
The Page Insights addon tracks the following web traffic stats for individual pages and shows yesterday’s stats or the last 30 days. You can see:
-
- Time on Page
- Entrances
- Page Views
- Exits
To get web traffic stats for a specific page in WordPress, there are a few different ways you can do that. Let’s see what they are.
In Your List of Pages or Posts
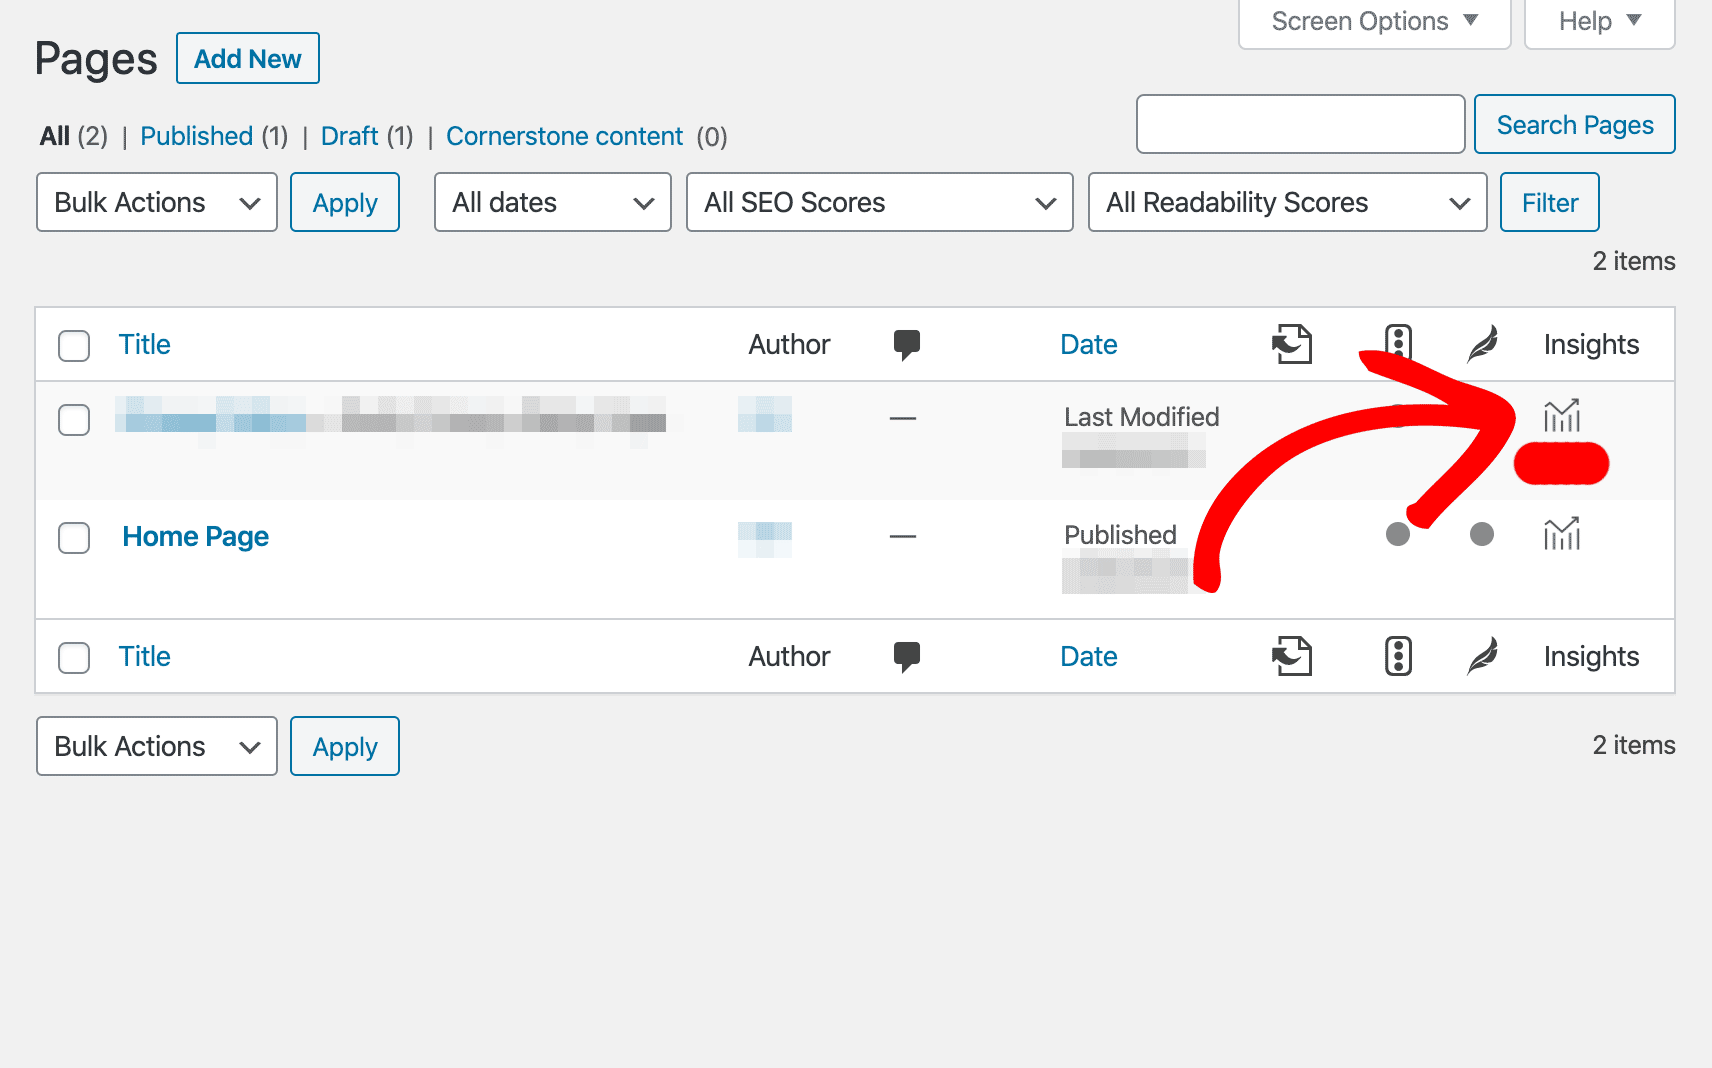
The first place to find web traffic stats for a specific page is in your list of pages or posts. Just click the icon under Insights in the far column.
A convenient popup will quickly show you the stats for that page.
In the WordPress Editor
To see a page’s traffic stats at a glance in the WordPress editor, just go to the page or post you want to view stats for. Press the button in the sidebar to Show Page Insights. 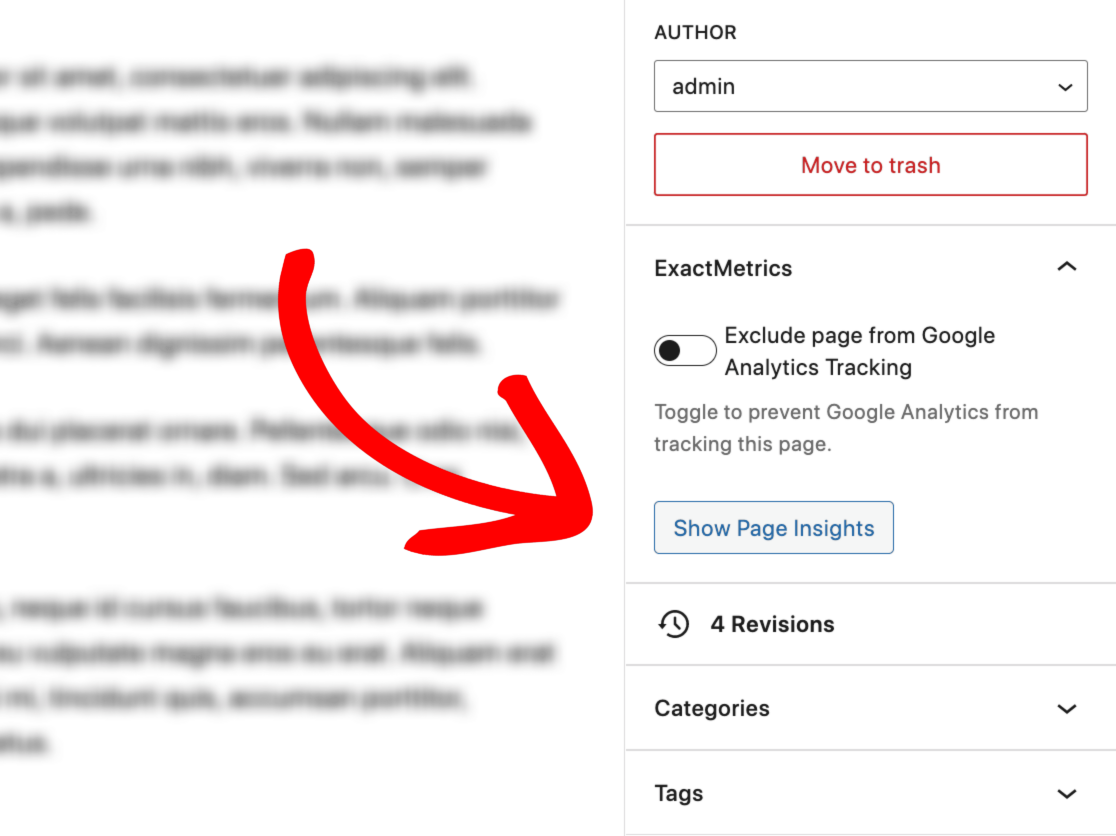
On the Front End of your Website Pages
Another great ExactMetrics feature is the ability to quickly see page insights while browsing the front end of your site. Go to the page you want to view on your website (while still logged in to your WordPress admin account). Using the admin bar at the top, click ExactMetrics to conveniently see the traffic stats for that page in a drop-down bar.

There you have it, now you know how to get web traffic stats for a specific page in WordPress!
Ready to try the best premium WordPress analytics plugin? Get started today! ExactMetrics Pro has helped over 1,000,000+ website owners grow faster and offers a 14-day money-back guarantee.
We hope you enjoyed this article! If you’d like to learn more about your site traffic, check out these guides on Google Analytics User Flow and how to set up user tracking in WordPress.
Not using ExactMetrics yet? What are you waiting for?
Don’t forget to follow us on Twitter and Facebook to see all the latest reviews, tips, and Google Analytics tutorials.


