Have you ever wanted to create an email newsletter as part of your online marketing strategy? But you haven’t because it’s too complicated and takes too much time? In this post, we’ll show you step-by-step how to easily create an email newsletter that works with your WordPress website to expand your audience and increase web traffic, sales, and subscribers.
Best of all, you don’t have to be a WordPress or marketing expert to get started and succeed!
Why Create an Email Newsletter?
You should create an email newsletter to promote your website for several reasons:
- Communicating with your audience keeps them interested in your brand or products. People are busy, so it’s easy for them to forget your business and website without regular reminders.
- Emails are a more personal form of communication than ads or other web content. People who read your email newsletter are more engaged, which makes them more open to your marketing messages.
- Email newsletters keep potential customers aware until they’re ready to buy, and encourage past customers to buy again.
- Email marketing has proven to be the most profitable online marketing strategy in terms of return on investment (ROI). Likes and shares on social media are nice, but email blows those channels away when it comes to actually making money for your business.
All these facts make email lists an important marketing tool for many online businesses.
You own your email lists and have complete control over how you use them. You don’t own or control your followers or traffic on Facebook, Twitter, or Instagram. And, those platforms can shut you down for any number of different reasons.
Now that you understand the huge impact of creating an email newsletter that works with your WordPress site to drive traffic and generate sales, let’s get started!
How to Create an Email Newsletter
We’ll describe the complete process of how to create a great email newsletter in 4 steps:
Step 1. Plan your email newsletter content and purpose
Step 2. Sign up with an email service provider
Step 3. Create email newsletter content
Step 4. Build an email list and send your first email newsletter
Click the links if you want to skip ahead and see a later step. Or, keep reading and follow along!
Step 1: Plan Your Email Newsletter Content and Purpose
The first step in creating an email newsletter is to plan what you want to share with subscribers and to determine the business goals for your newsletter.
Are you trying to maximize your number of followers and grow your email list? Alert subscribers to your eCommerce store’s weekly specials and discounts? Provide a monthly industry news recap to establish authority in your field?
Your newsletter’s content and objectives should align with your website. Any products or services you promote should be closely related to your main topic of interest.
Every email you send must have one or more calls-to-action (CTAs). A CTA is usually a link or button that you want readers to click, plus the text that tells them what to do. You’ve probably seen common CTAs like Buy Now and Join My Mailing List.
If you feel like it’s hard to create fresh newsletter content every week or every month, think about how you can repurpose content you’re already creating. Blog owners can share new blog posts in an email newsletter. For active social media users, you can share existing content in your newsletter to drive traffic to your website or other channels
Still stuck for newsletter ideas? Check out these awesome newsletter content ideas!
Step 2: Sign Up with an Email Service Provider
Next, select an email service provider to manage your email newsletter contact list, email content and design, and delivery. You’ll find there are dozens of email platforms and WordPress plugins, some of them with free options.
While it’s possible to create an email newsletter with a free WordPress plugin, for best results you’ll need features found only on paid platforms. Also, sending email from your WordPress site using a standalone plugin may cause your messages to be blocked or marked as spam.
To ensure reliable delivery of any marketing emails, including newsletters, pro marketers always use a dedicated, third-party email service. We highly recommend Constant Contact as the best email platform for small businesses and individuals who operate a WordPress site.
Signing up with Constant Contact is easy and free. You will have to pay after a 60-day trial period, but accounts start at an affordable $9.99 per month for up to 500 contacts.
First, go to ConstantContact.com and click the Start trial or Sign up now button. You’ll see a simple form where you need to fill in your personal or business info. After you enter all the required data, click the Get started button.
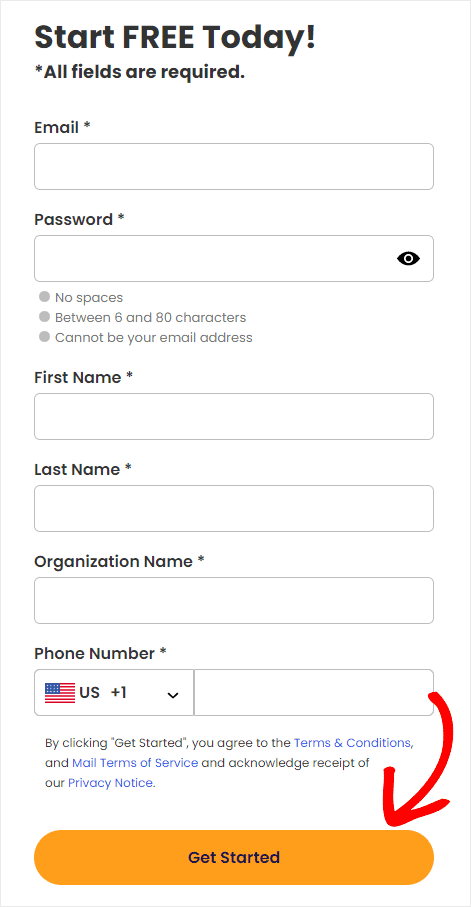
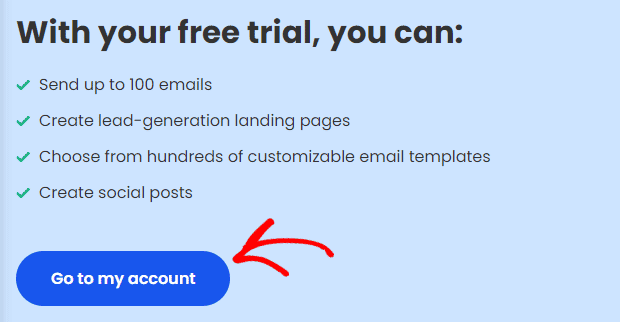
At this point, Constant Contact creates your trial account, so you may wait for a few seconds before the next screen appears. Click the Go to my account button to see your Constant Contact account details.
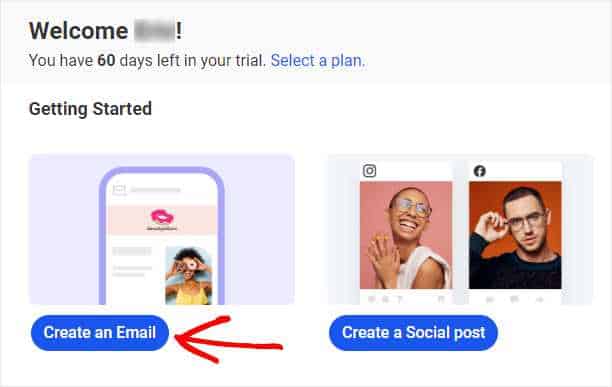
Now, you’ll see the Constant Contact dashboard, where you can create emails and campaigns, manage contacts, and view reports. Since our next step is to create an email newsletter, click the Create an Email button.
In addition to its other features, Constant Contact has a WordPress plugin to seamlessly hook your website to your contacts lists. This lets you add simple lead capture forms and automate the addition of subscribers to your contacts.
For eCommerce site owners, Constant Contact offers a Woocommerce plugin. This plugin simplifies adding products to emails and sending targeted messages to certain members of your audience, like previous buyers.
Step 3: Create Email Newsletter Content
Okay, now that you’ve set up an email marketing account, you have a place to create email campaigns and manage your contacts. Let’s build your first email newsletter.
Choose an Email Template
After you click Create an Email in the previous step, the next screen shows you all of Constant Contact’s built-in email templates. We suggest you start with one of these professionally designed templates for your first newsletter attempt.
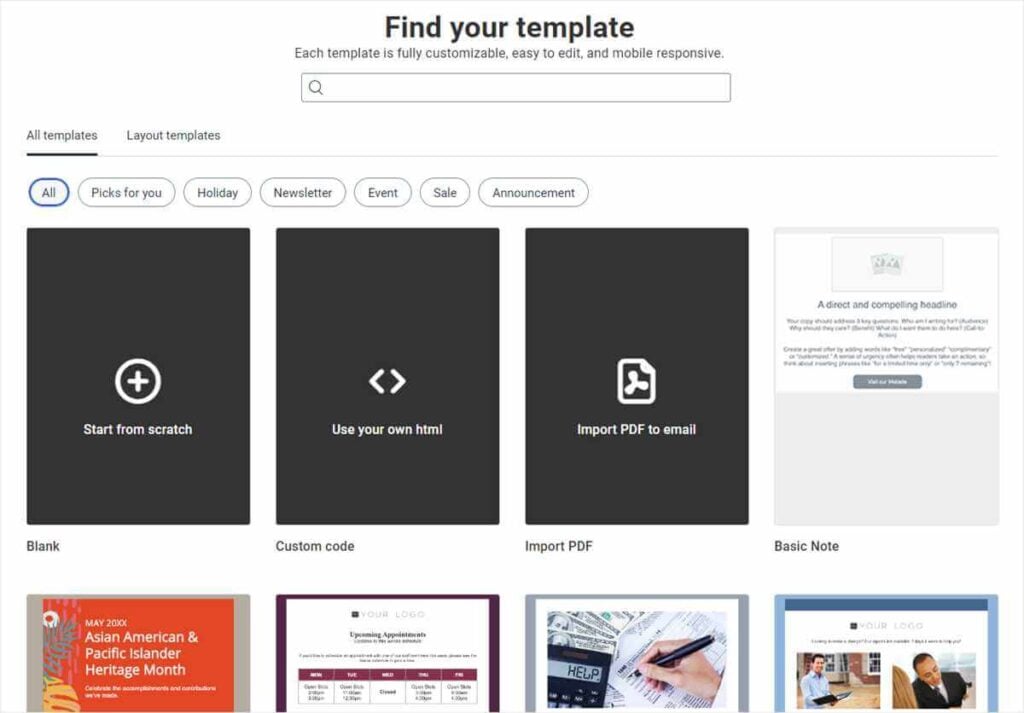
Browse through and select a newsletter template that you feel is appropriate for your content.
You may want to narrow your choices by selecting the Newsletter filter, or typing “newsletter” into the search box. Once you’ve found the perfect template, hover over it and click Select.
Edit the Email Template
The chosen template now displays in the email editor. This is a drag-and-drop interface with blocks and layout elements in the left sidebar, and a preview of your email on the right side.
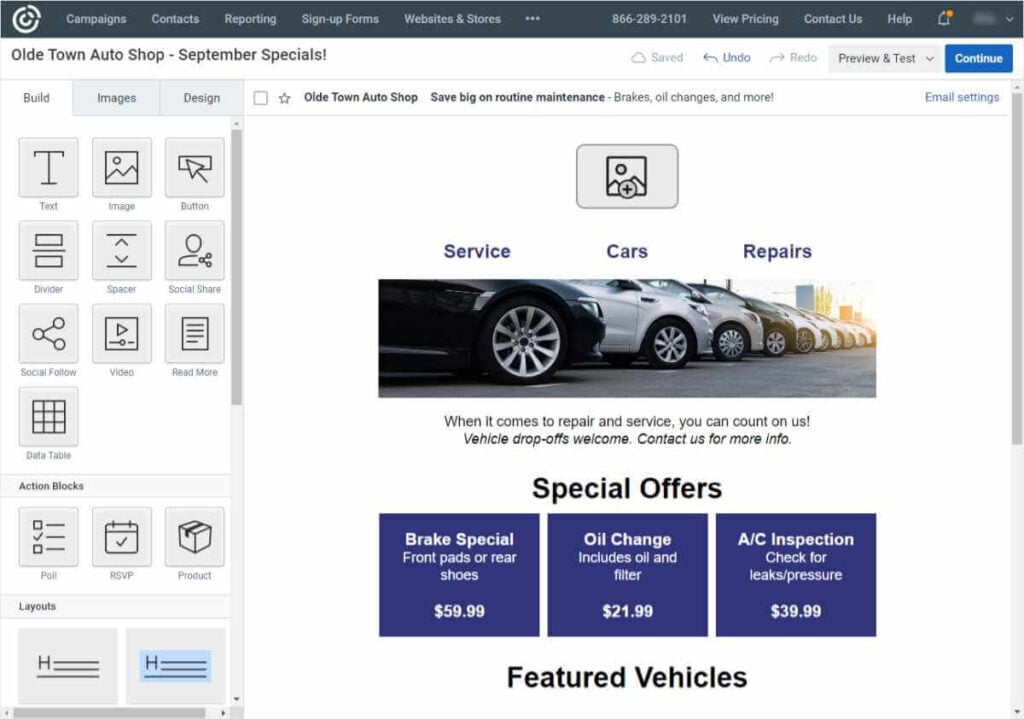
To edit the template, click on and edit the parts that you wish to keep in the preview area. Select and delete items you don’t need. Then, drag blocks from the left into the newsletter preview to add new elements like text boxes, images, and social sharing buttons.
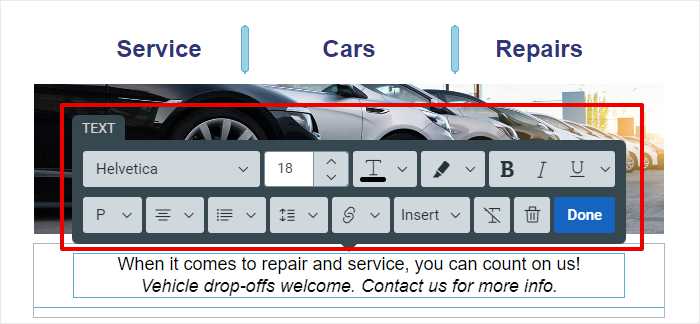
When you select an item in the editor, a menu appears so you can edit the content. In the example below, we’ve selected a text box, so the text editing menu appears.
We’ve seen what you can do in the Build tab of the email editor, so let’s check out the other two tabs.
Upload and Place Images
Click the Images tab to upload images into your Constant Contact image library. Once you store them here, they’ll be available again whenever you’re designing or editing a new email.
When you click Upload images, you’ll get options to upload from desktop, mobile, or Facebook. You can also search for and upload stock images from Constant Contact’s stock library.
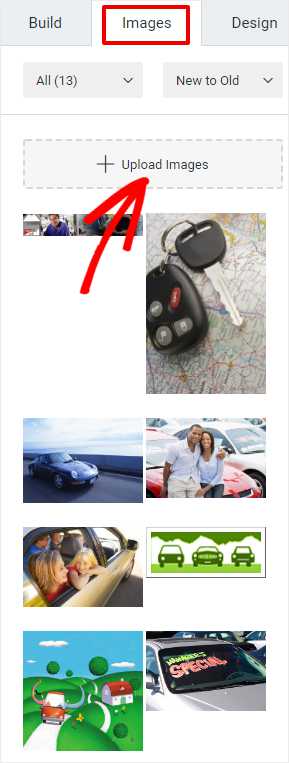
To use your images, first drag an image block from the Build tab into your email template wherever you want to place the image. Then drag an image from the Images tab into the block you just placed, and format as desired.
Design Email Styles and Colors
Finally, the Design tab is where you set your email’s background color, borders, default fonts, and button styles. Click the tab and change these design elements until you’re happy with the layout and appearance of your email newsletter.
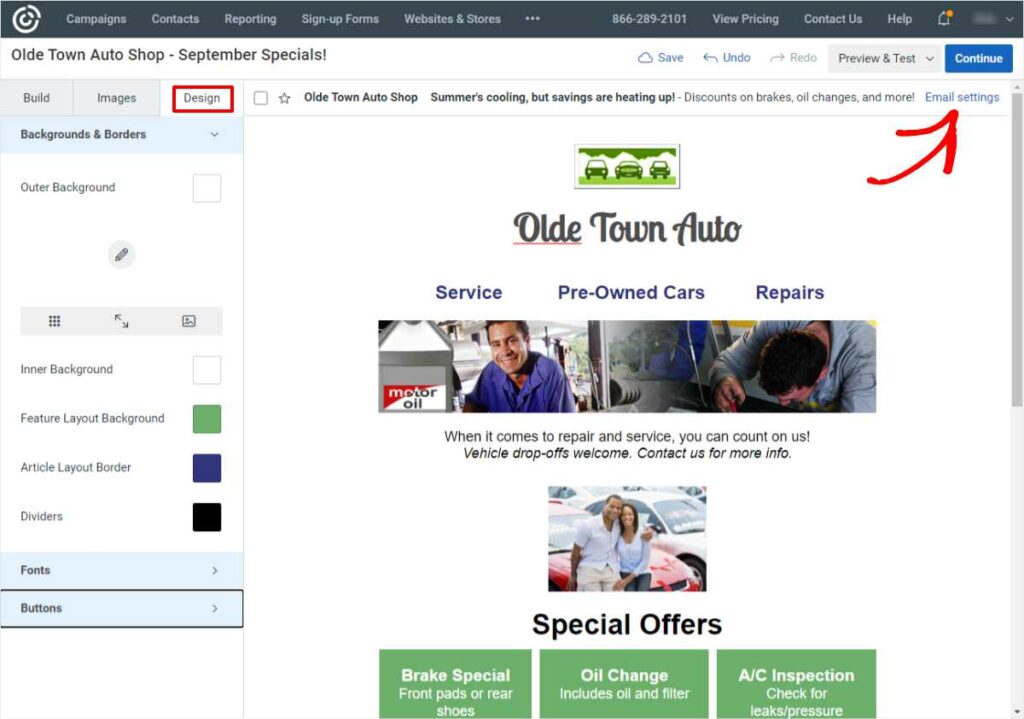
Before you finish with your email design, make sure to click the Email settings link at the top right of your email. Here’s where you can see and change the subject line of your email, the From name that appears in recipients’ inboxes, and the email address that you’re sending from.
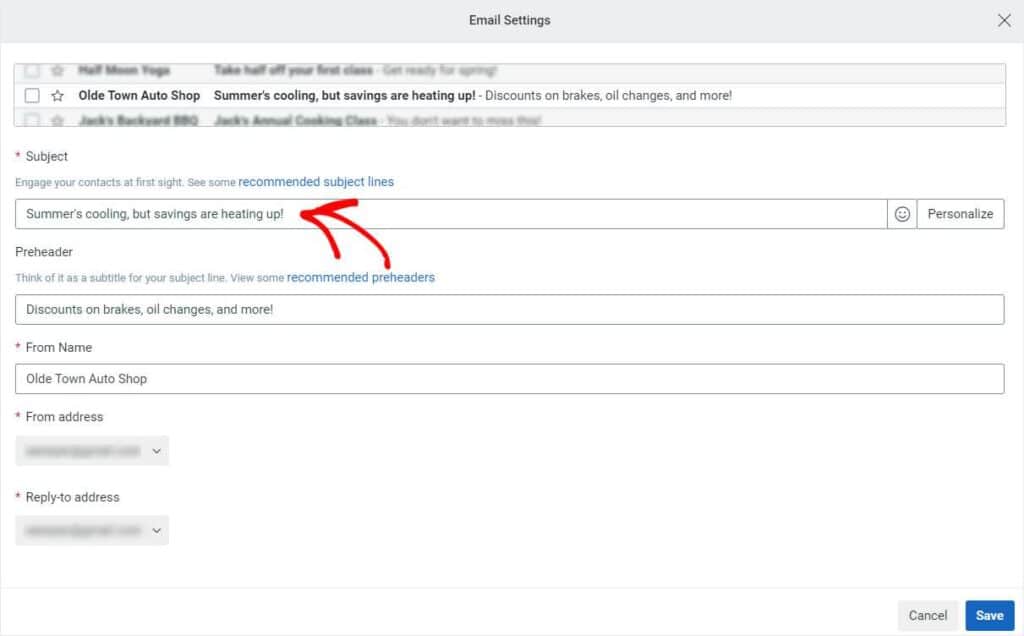
This is your chance to write a great headline in the subject line, one that gets people to click and read your newsletter! After you edit your subject line and sender information, click Save. Then hit the Continue button from back in the editing screen.
Step 4: Build a Mailing List and Send
The next step is to create an email newsletter contact list that includes all the people you want to receive your newsletter. Click the Contacts menu item from your Constant Contact dashboard. The contacts screen opens.

Click Create List. A dialog box will ask you to name your new list. Give your email newsletter list a name that is easily recognizable and easy to differentiate from your other mailing lists. Click Save to see the contact list you just created.
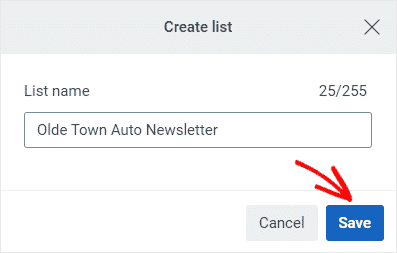
Since this is a new list, it is empty and you’ll need to add contacts to build it. Click the Add Contacts button to see the options for adding new contacts to your newsletter list.

Constant Contact offers several methods for adding contacts. You can type them in one at a time, copy and paste, or upload from a file.
Each process has an easy-to-use wizard that walks you through the details of importing contacts, including warnings to let you know whether you may be violating privacy laws by adding contacts.
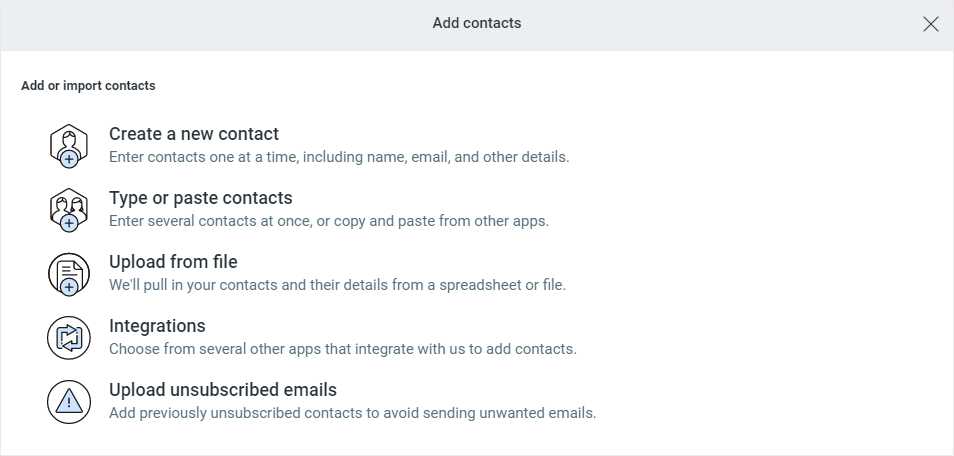
Choose one or more of these methods to build your newsletter contact list. Whatever form your existing contact info is in, Constant Contact will easily import the data.
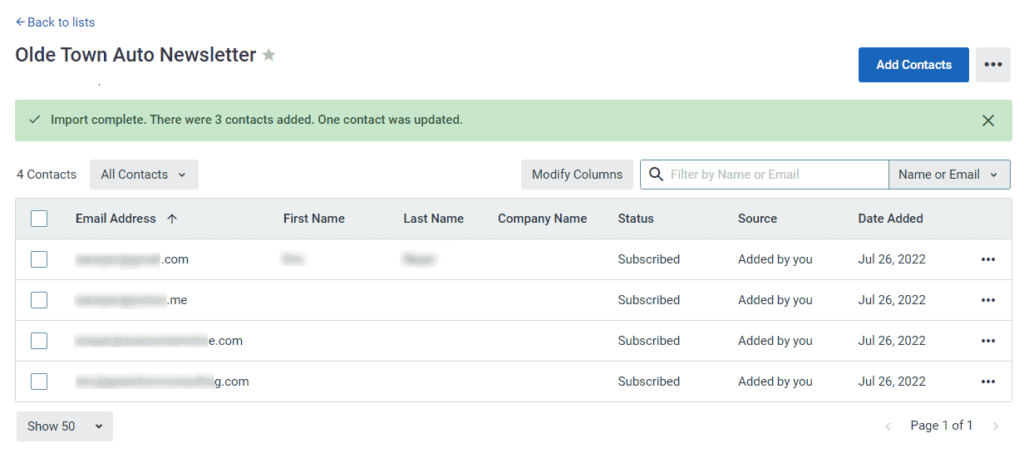
As soon as you add some contacts, your list will look something like this:
Now, we’re ready to send our email newsletter! Click Campaigns in the top menu and you’ll see the email we just created in the list. Click the three-dot menu and select Schedule from the list.

At this point, the campaign info screen displays and you have one final chance to edit your subject line and preheader. The preheader is text that is displayed as a preview in some email readers, so it’s another chance to grab your readers and entice them into reading more.
To select the contacts list we just created, we’ll check the box next to Olde Town Auto Newsletter. The numbers in parentheses show the number of contacts in each list.
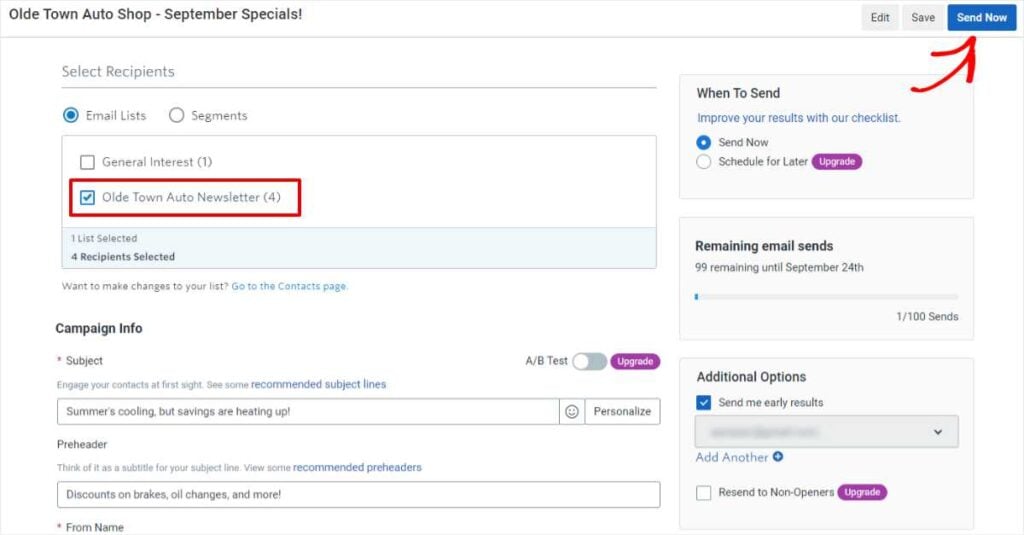
Paid accounts in Constant Contact can choose to schedule their email campaigns for delivery at a specific time and date. Since we’re using the free trial version of Constant Contact, we’ll launch our newsletter manually when everything’s ready to go.
Let’s go ahead and click Send Now, and our email newsletter is on its way!
It’s really pretty easy to use this powerful email marketing tactic to grow and retain customers. You can cancel at any time without penalty, so there’s little risk in trying out a paid Constant Contact account. Get started with Constant Contact now!
Email Newsletter Frequently Asked Questions (FAQs)
How Much Do Email Newsletters Cost?
Email newsletters can be a very affordable form of marketing. With most plans, you can send as many messages as you like for one monthly fee. A few plans charge based on monthly mail volume, but most platforms charge based on the number of contacts in your list. Unlike paid advertising, email newsletters are free to send, aside from for the email provider service charge.
Can I Buy an Email List for My Newsletter?
You can buy email lists, segmented by audience demographics or area of interest, from a variety of sources. However, you should never send your email newsletter to a list of people who haven’t specifically granted you permission to do so. Generally speaking, purchased lists don’t perform well and expose you to the risks of being banned or blocked by other email providers.
How Do I Build an Email Newsletter List?
The best way to create a contact list for your newsletter is to ask website visitors to sign up by providing their email addresses. You need to make sure you have permission before you send contacts any emails. Granting this permission is called opting in to your list. Many countries have strict penalties for sending spam email, so make sure you follow the laws that apply wherever you are sending email messages.
Build Your Email List Faster with OptinMonster
Constant Contact gives users some simple optin forms for gathering emails, but they’re extremely basic. For better-designed and higher converting optin forms, use a tool dedicated to that purpose.
One of the best ways to collect email addresses for your newsletter list is to use a WordPress plugin like OptinMonster. It lets you create beautiful email optin forms designed to maximize new leads and subscribers.
OptinMonster can run multiple optin campaigns at the same time. Here’s a simple example of how to use two optin forms on a website:
First, create an email signup form popup that only appears when visitors leave the home page. OptinMonster has a setting that detects a user’s intent to exit your site. Before that visitor can leave, OptinMonster triggers a popup box to appear and give you one final opportunity to engage with someone who may never visit your site again.
Second, you can use OptinMonster to add a static newsletter signup box to the sidebar of every other page. The OptinMonster plugin essentially gives you unlimited possibilities when it comes to optin form design and functionality.
Tracking Email Visitors with ExactMetrics and Google Analytics
When you send out an email newsletter with links that point back to your website, you’ll want to know how well your email performed in terms of attracting site visits. You can track email traffic right in your WordPress dashboard by using ExactMetrics, the best premium plugin for Google Analytics.
Not only does ExactMetrics track stats like sessions, page views, and top-performing posts, it can also show you exactly how much traffic is coming from your email links.
If you plan on running a successful email marketing program, you’ll need to be able to see and analyze what those visitors are doing once they reach your site. An email provider like Constant Contact can’t tell you that, so a tool like ExactMetrics is critical. Try out ExactMetrics today!
We hope you liked our article on how to create an email newsletter for your WordPress site. If you found this info valuable, you might want to check out this complete guide to tracking conversions in WordPress.
Not using ExactMetrics yet? What are you waiting for?
For more tutorials and tips on analytics for WordPress, follow us on Facebook and Twitter.


