Do you want to connect Google Search Console to Google Analytics 4 and WordPress?
Google Search Console is a free tool that helps you optimize your website for Google search and boost your site’s organic performance.
While it’s really helpful on its own, if you connect it with Google Analytics, you can really make optimizing and keeping track of keyword rankings easier.
In this article, we’ll show you how to connect Google Search Console with Google Analytics so you can monitor and grow your organic traffic.
Why Connect Google Search Console to Google Analytics?
Google Search Console is a free tool that shows how your website is performing in Google’s search results. It shows the search terms that people use to find your site in the search engine.
Plus, it’ll alert you to any errors on your site, check if your content is indexed, submit an XML sitemap, find out which websites are linking to your site, check your site’s speed, improve your internal links, and more.
That said, Google Search Console doesn’t tell your visitors’ actions once they land on your website after performing a keyword search on Google. This is where linking Search Console with Google Analytics can help you out.
When it comes to monitoring organic traffic in Google Analytics, you can find out which links organic visitors clicked the most, which files they downloaded, whether they signed up for your email newsletter and more.
How to Link Search Console to Analytics
Just follow these steps to link Google Search Console to your Google Analytics account.
Step 1: Verify Your Site on Google Search Console
To connect both tools, you first need to make sure that your website is set up and verified in Google Search Console.
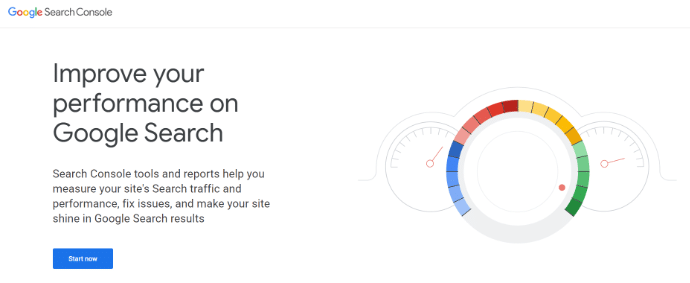
Start by visiting the website and then click the Start Now button.
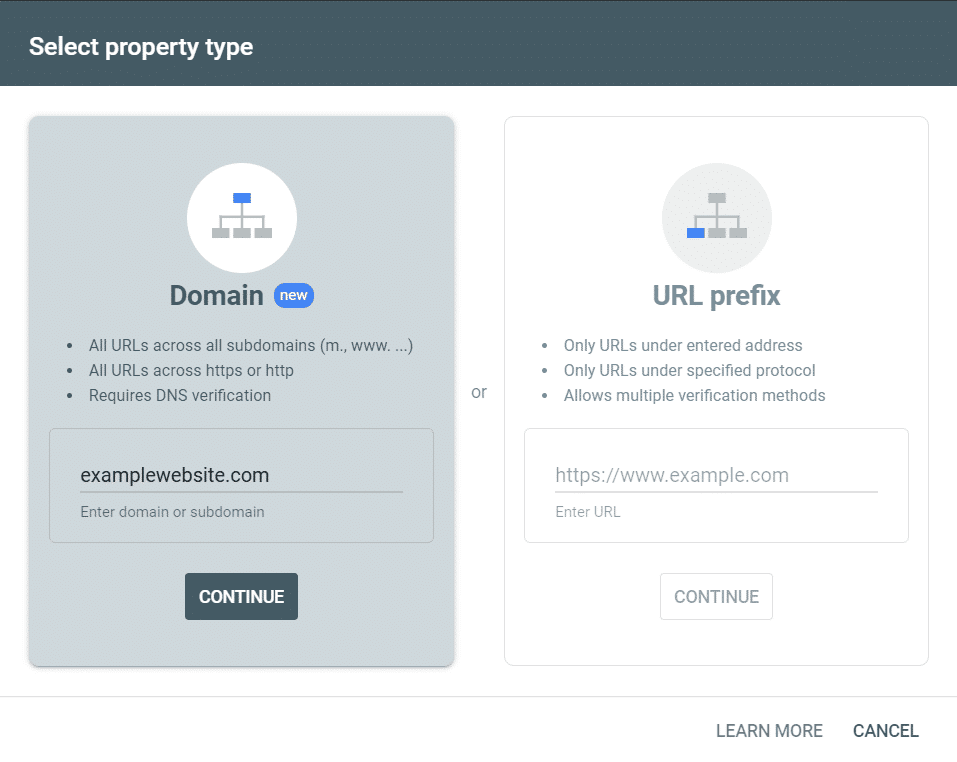
You can either enter a domain or a URL prefix to link to the Search Console. We highly recommend using the domain method, as the URL prefix method can result in connection issues.
To verify using your domain, enter your domain name and click Continue:
Google will then provide you with instructions for specific hosting providers. Or, choose Any DNS provider for the universal instructions:
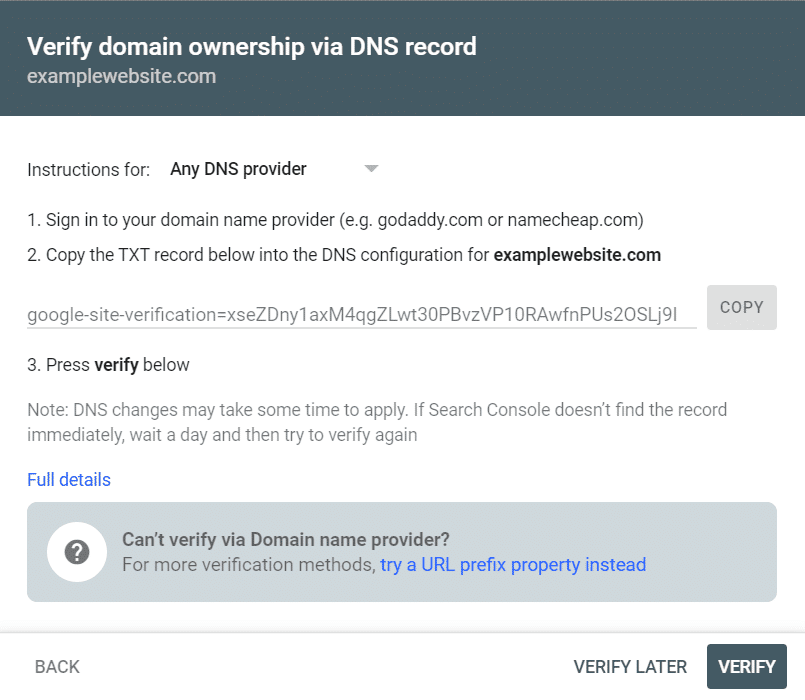
You’ll just need to copy and paste the string of code it gives you (called a TXT record) into your DNS, wherever your provider’s spot for that is. For example, here’s how pasting a TXT record looks in Siteground:
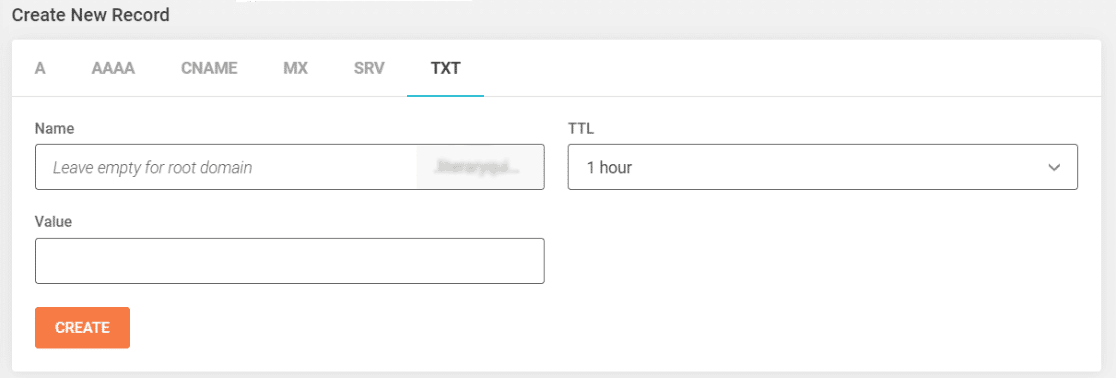
Take your code from Search Console, paste it into the Value field, and click Create.
Then, when you click Verify on the next screen, you should get a success message.
If you need help verifying your site, visit Search Console Help.
That’s it! You’re connected and verified in Google Search Console. You’ll now be able to view data about your site in Search Console after it populates.
Step 2: Connect Search Console to Google Analytics
Now that you’ve verified your website with Google Search Console, it’s time to connect it with your Google Analytics property.
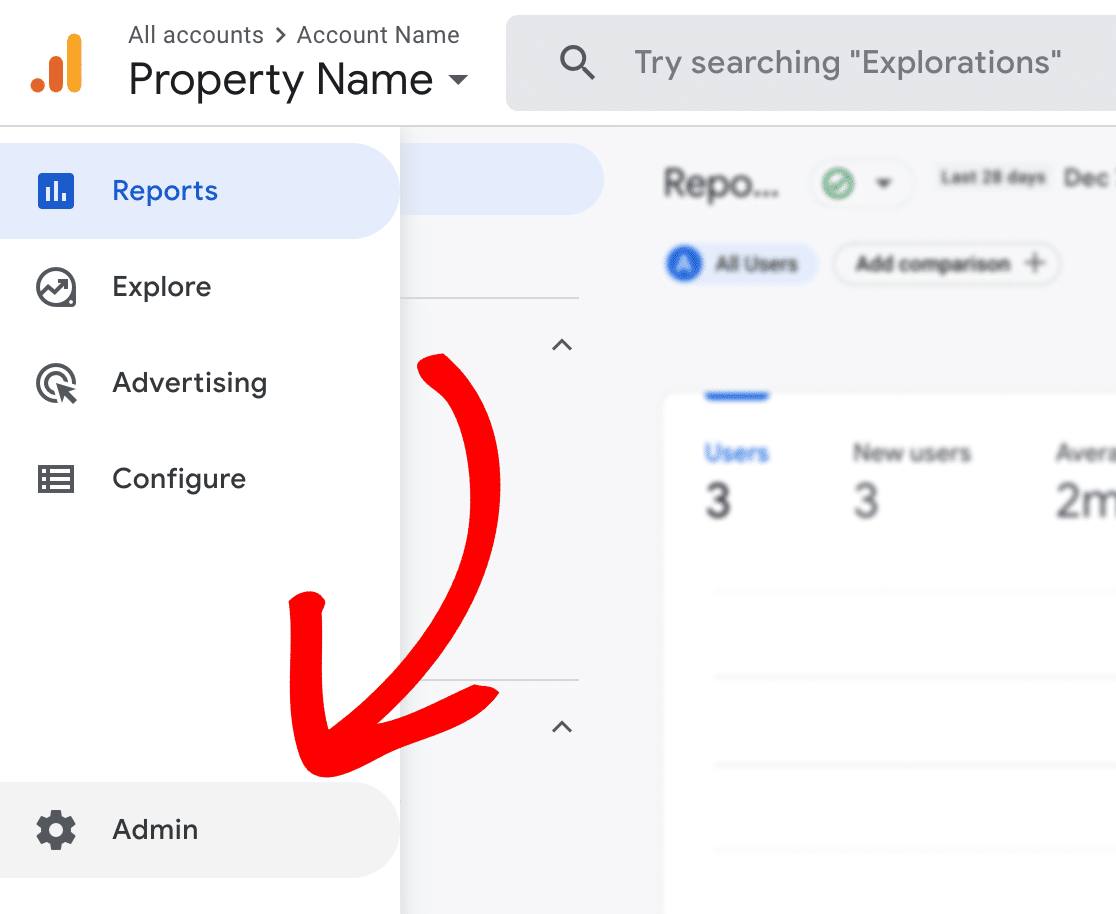
Click the Admin cog on the bottom left of your Analytics dashboard.
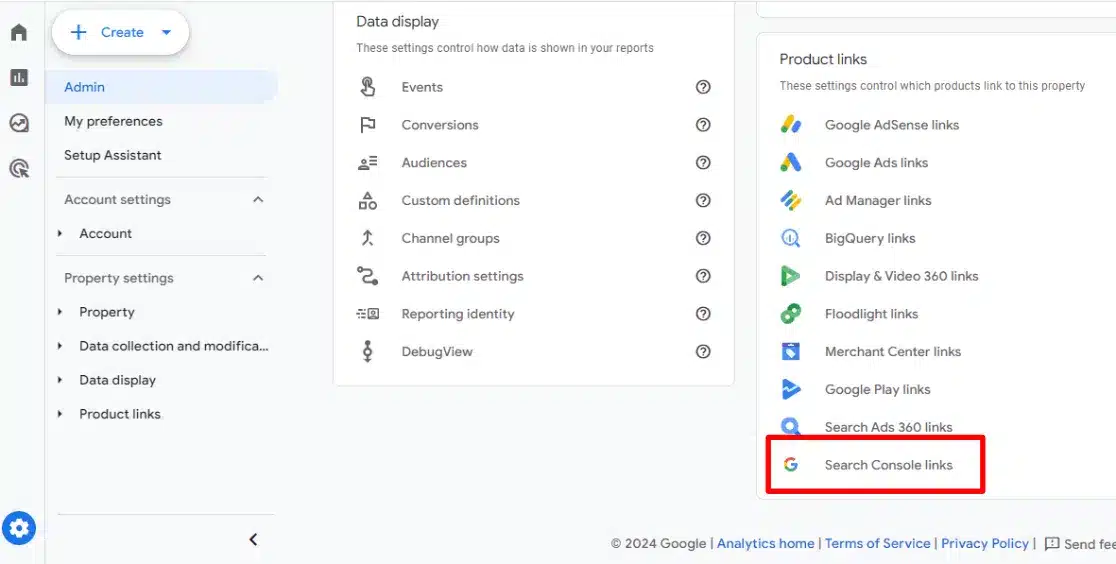
Now, scroll to find the Search Console Linking button at the bottom of the middle (Property) column:
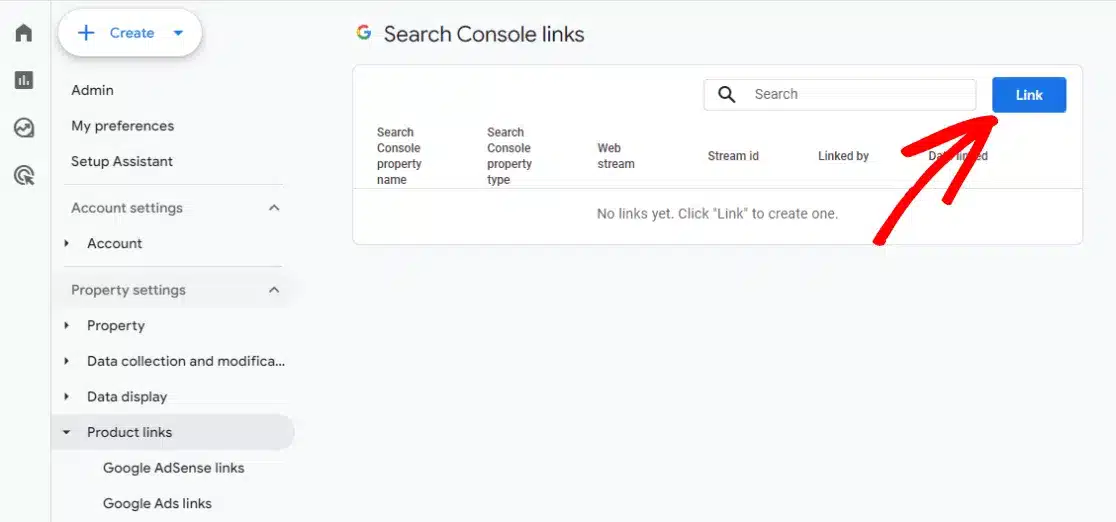
After you click that, you’ll find the blue Link button:
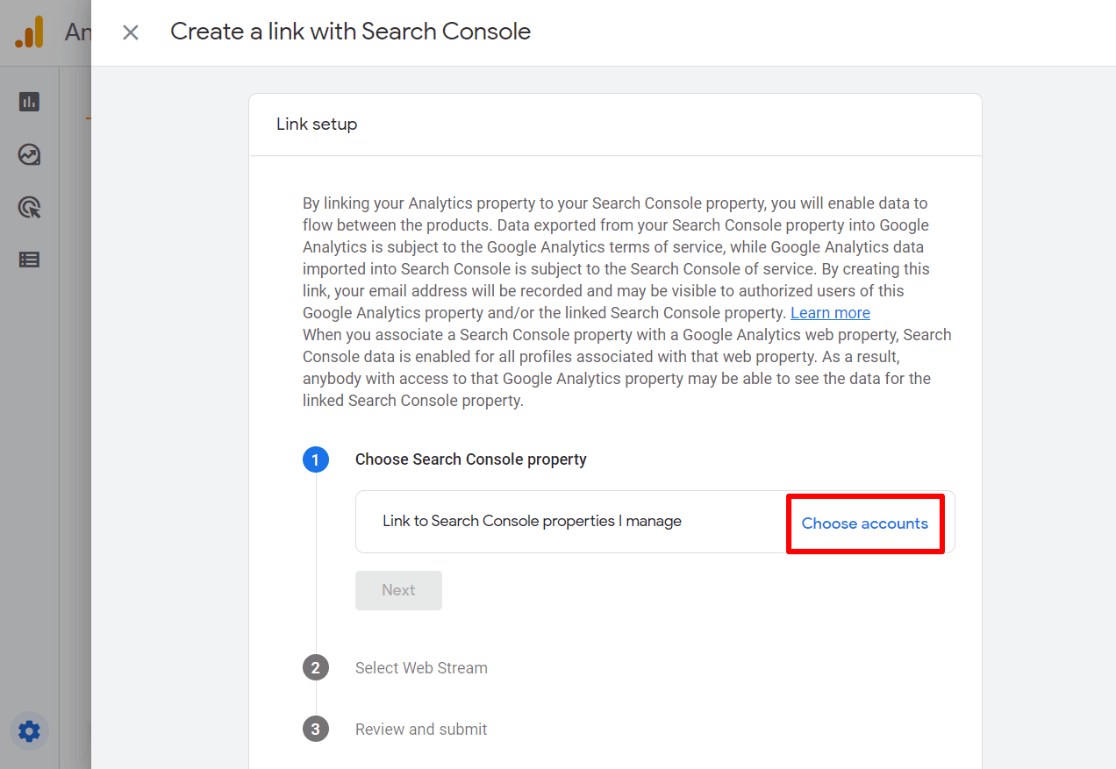
Next, click the blue Choose accounts link.
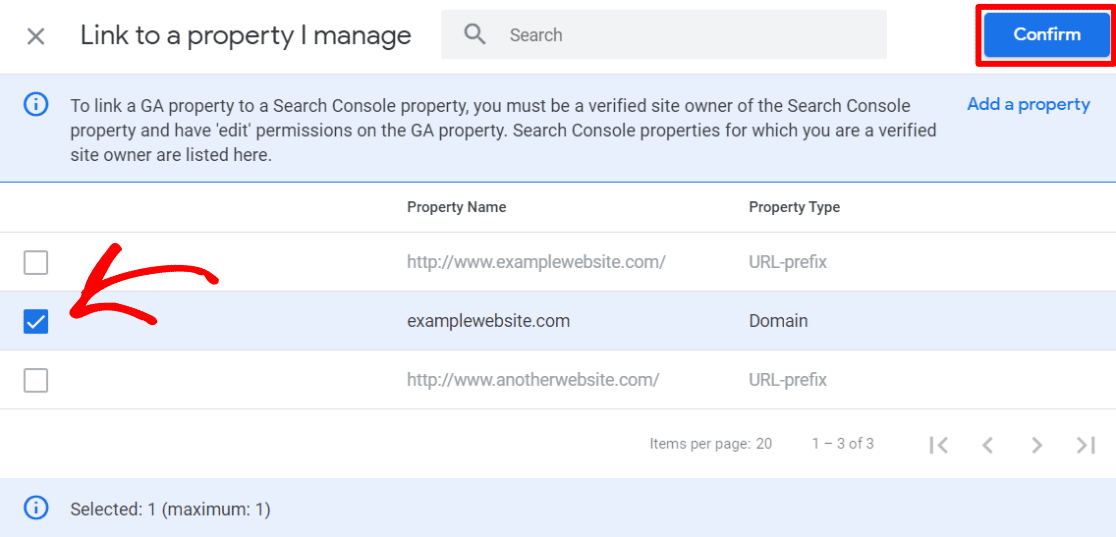
Now, find the property you’d like to connect to and click the checkbox next to it. Then click Confirm.
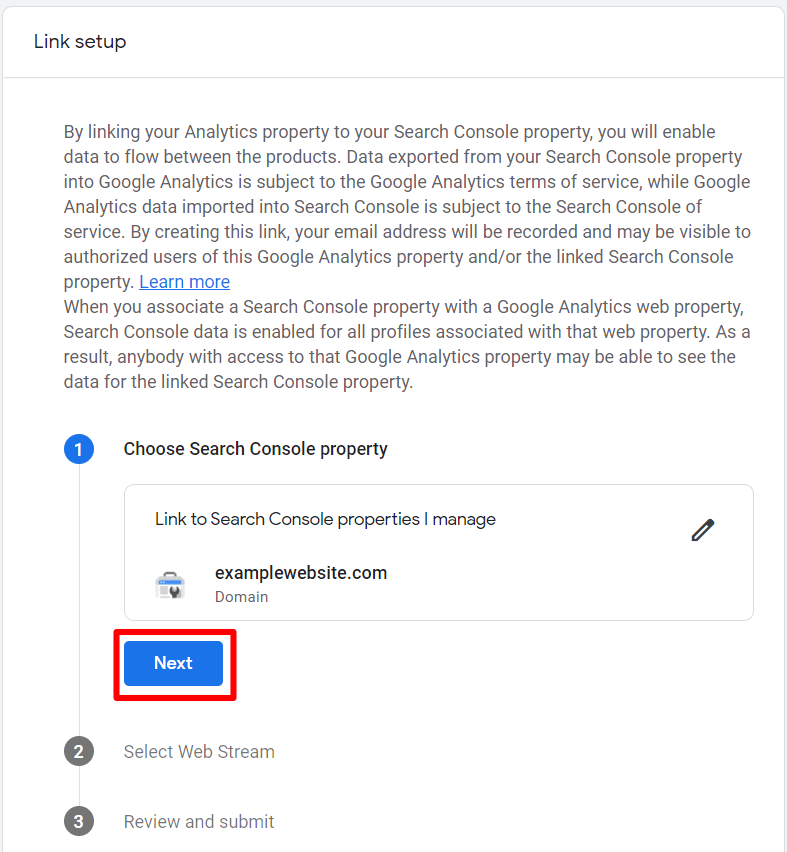
Click Next.
Click Select.
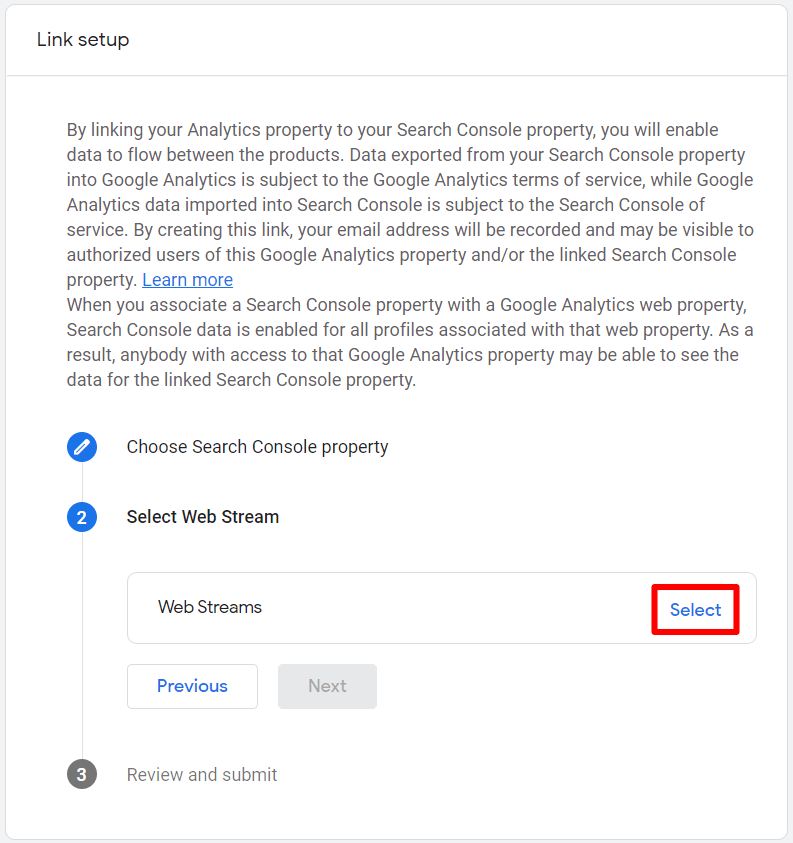
Choose the data stream you want to connect with by clicking Choose.

Click Next.
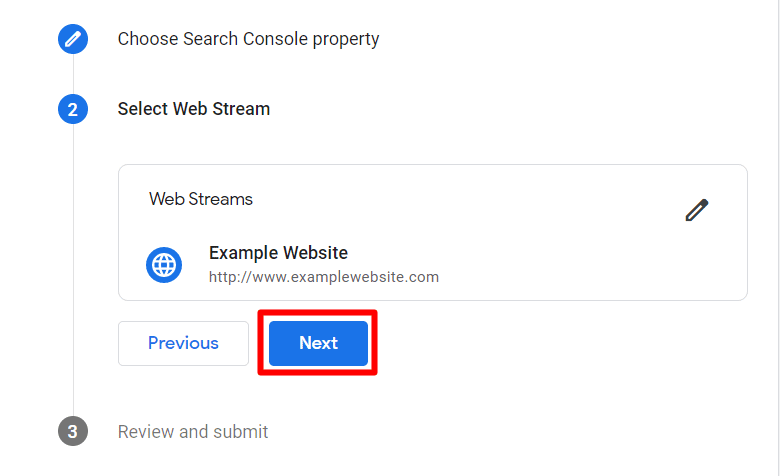
Check that everything is correct and click Submit.
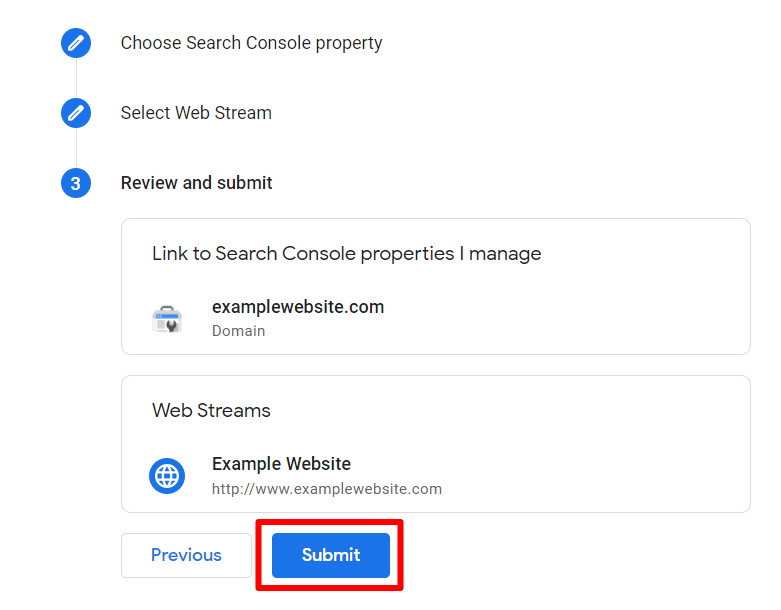
You’re done! Your Search Console property is now connected to Google Analytics.
How to See Google Search Console Data in WordPress
WordPress users, did you know there’s a way to see both the stats that matter from your Google Analytics account and your Search Console keyword data right inside your WordPress dashboard?
ExactMetrics is the best premium WordPress analytics plugin. With ExactMetrics, there’s a whole list of things you can set up and monitor in Google Analytics and your WordPress dashboard, plus an easy-to-set-up automated reporting feature.
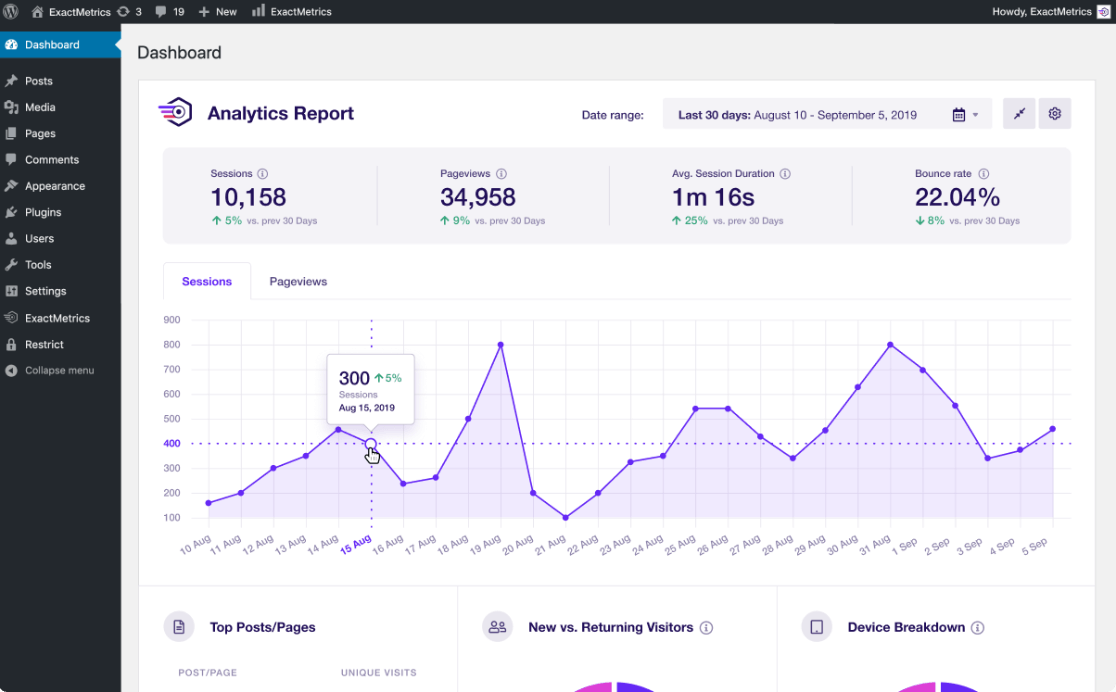
Our most popular features include:
- One-click ecommerce setup and tracking
- Top outbound and top affiliate link clicks
- GDPR compliance
- Scroll tracking
- Form tracking
- Popular posts or products widget
- And more
With ExactMetrics, all your most important metrics are right there in your WordPress dashboard.
All you have to do is install and activate the plugin on your WordPress website.
Step 1: Install ExactMetrics
To start, head to the Pricing page and get started with ExactMetrics at the Plus level or above. Once you complete checkout, download the plugin.
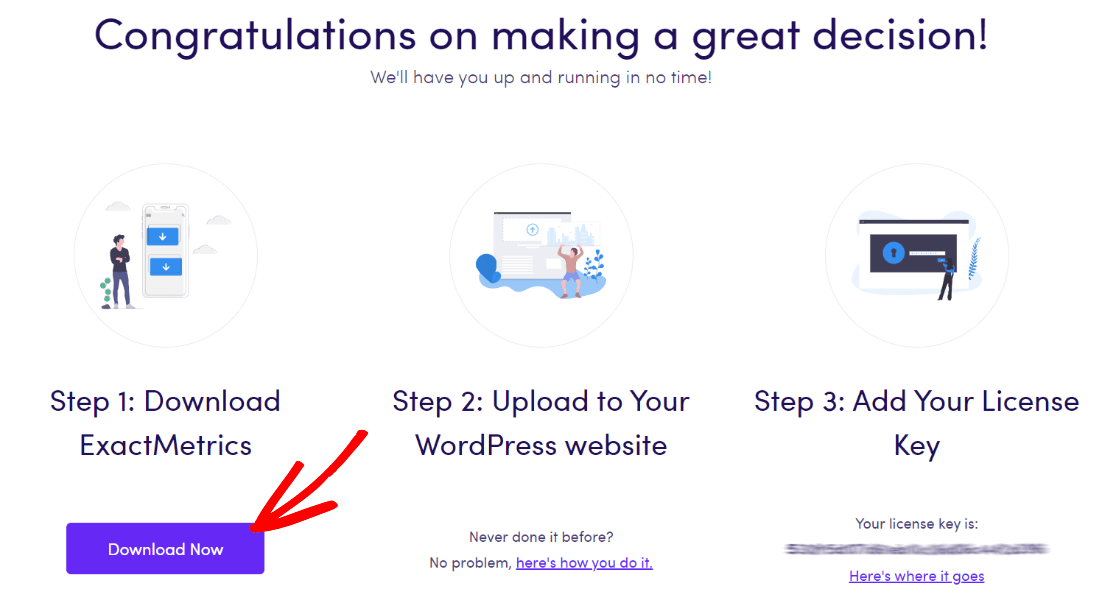
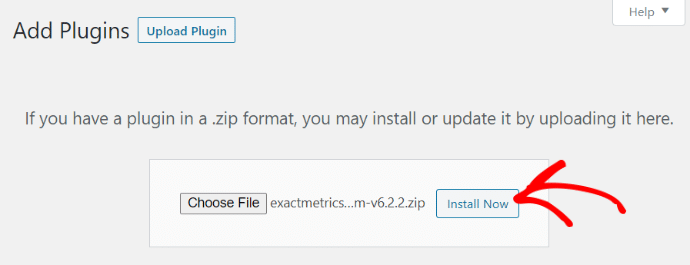
Next, upload it to your website.
Step 2: Add Your License Key and Connect to Google Analytics
Now that you have ExactMetrics installed, you can add your license key and connect your Google Analytics account. To get set up, click on ExactMetrics under your WordPress Dashboard and click the big green “Launch the wizard!” button.
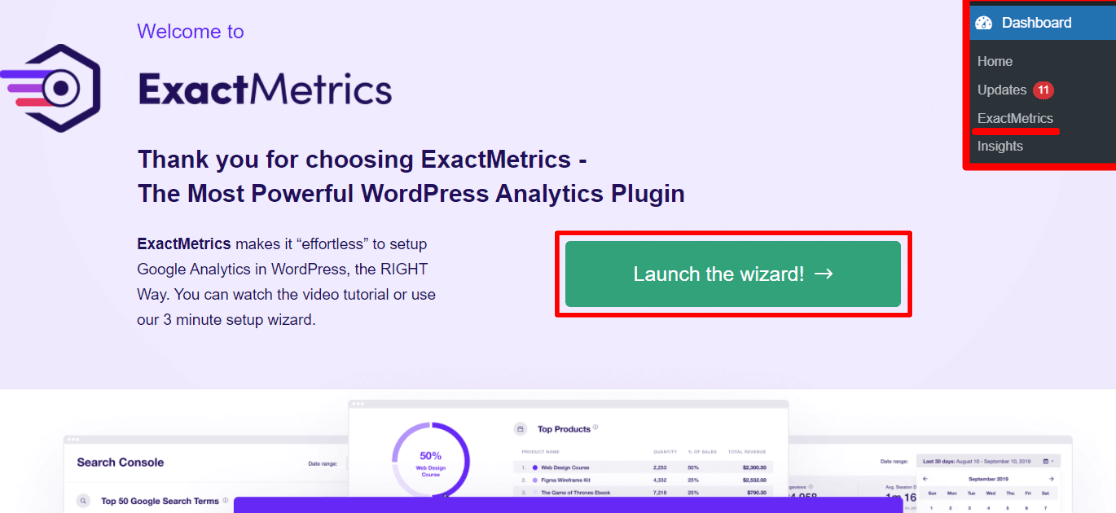
Once you’re in the wizard, you’ll get to this page where you can add your license key and connect with Google Analytics:
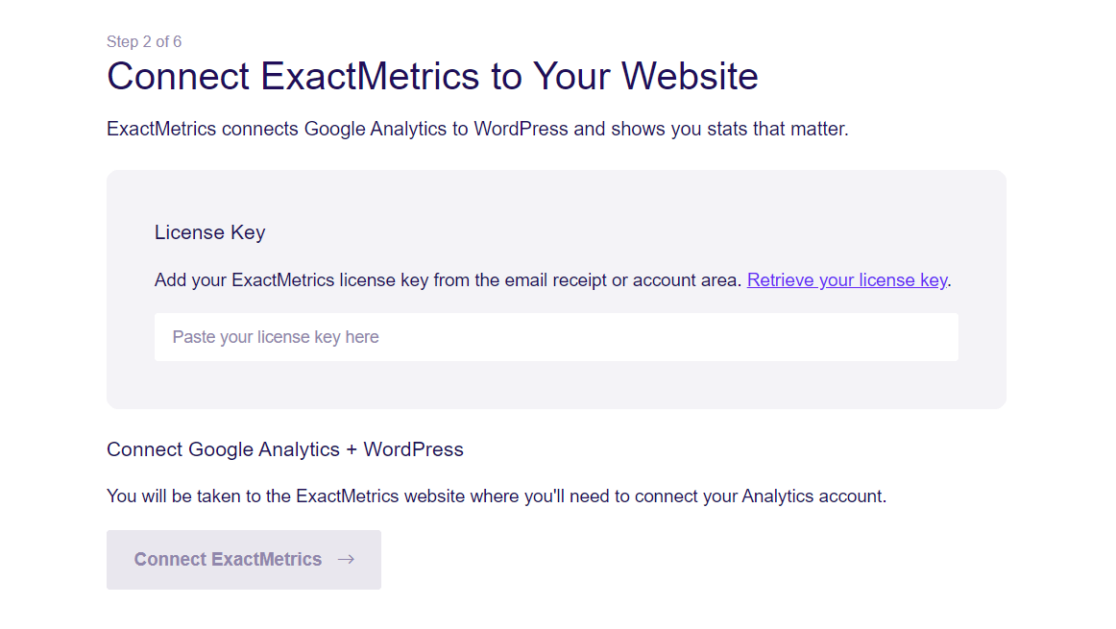
For more details on this step, check out our guide on how to properly add Google Analytics to your WordPress website.
Step 3: Access Your Search Console Data in WordPress
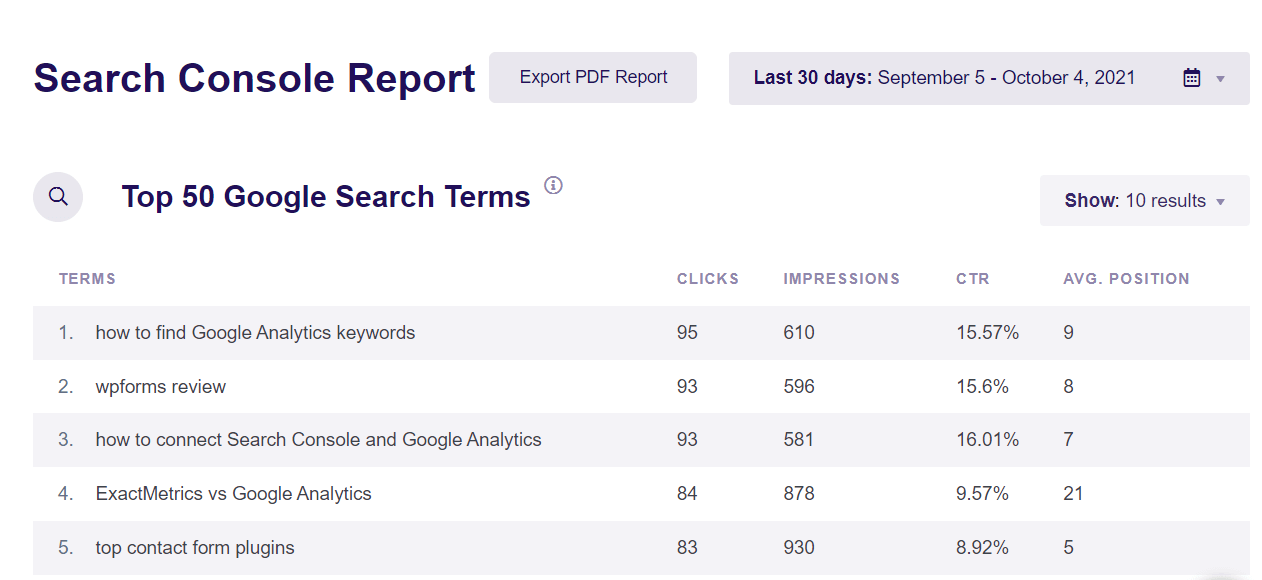
Just go to ExactMetrics » Reports » Search Console to see your top 50 Google search terms. For each keyword, you can see the number of clicks, impressions, click-through rate (CTR), and average position.
How to See Search Console Data in Google Analytics
Google Analytics doesn’t have the Search Console report out of the box, so you’ll need to add it.
To do that, head to Acquisition » Acquisition overview, then scroll down to find the two Organic Google Search cards:
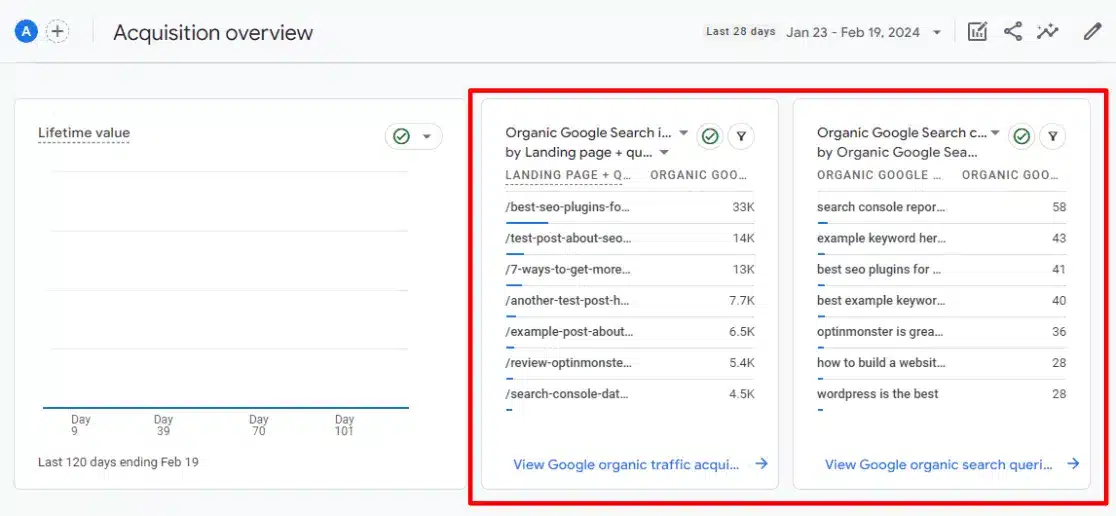
In this section, you’ll find two key reports: organic landing pages and organic search queries. By selecting the blue links located at the bottom, you can access the complete details of these reports.
Interested in adding these insightful reports to your primary Google Analytics report dashboard?
Simply navigate to Library to get started:
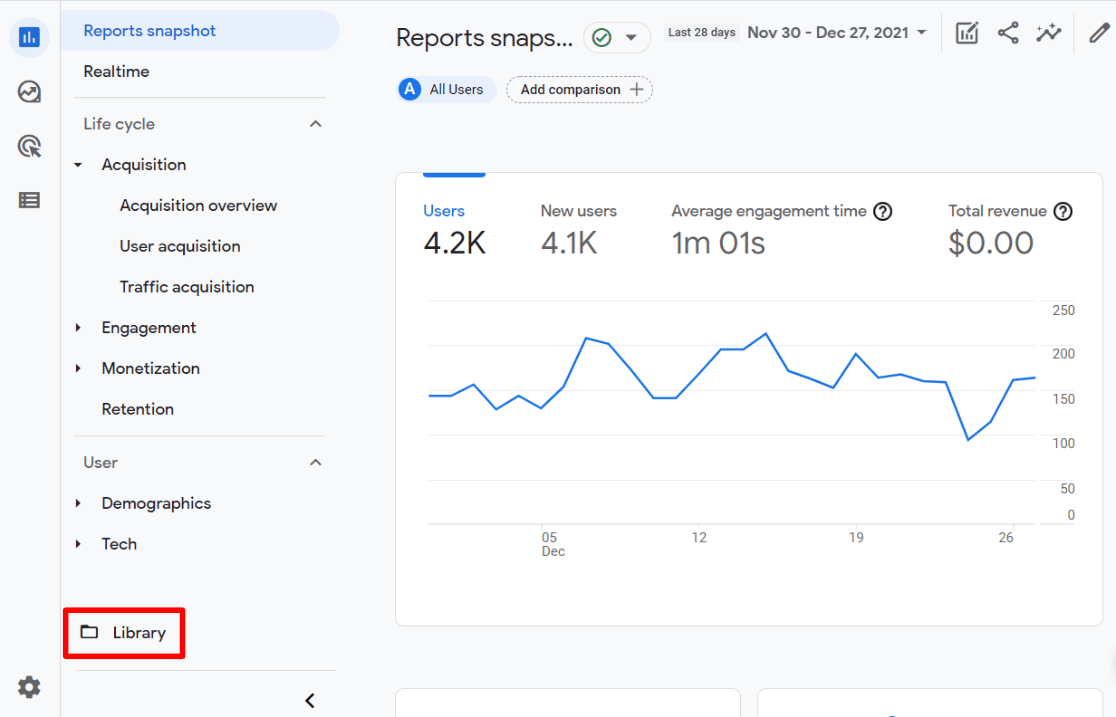
Now, look under Collections to find the Life Cycle card. Click Edit collection.

Next, scroll through the list until you locate the Google organic search traffic and Queries reports. You can then click and drag each of these reports to your preferred location within your report navigation menu:
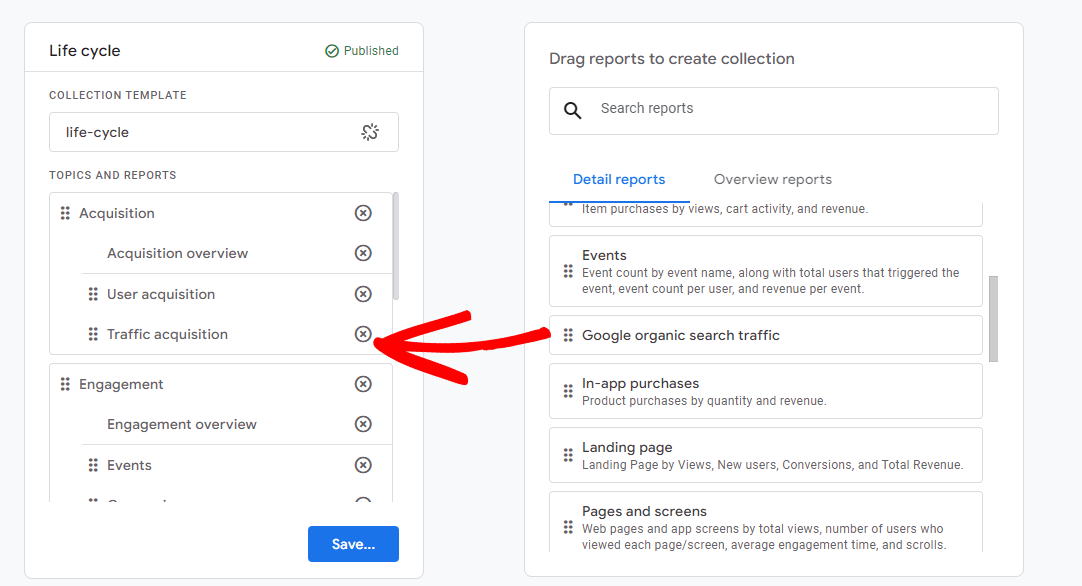
After placing both reports where you want them in the navigation, click the blue Save button and select Save changes to current collection:
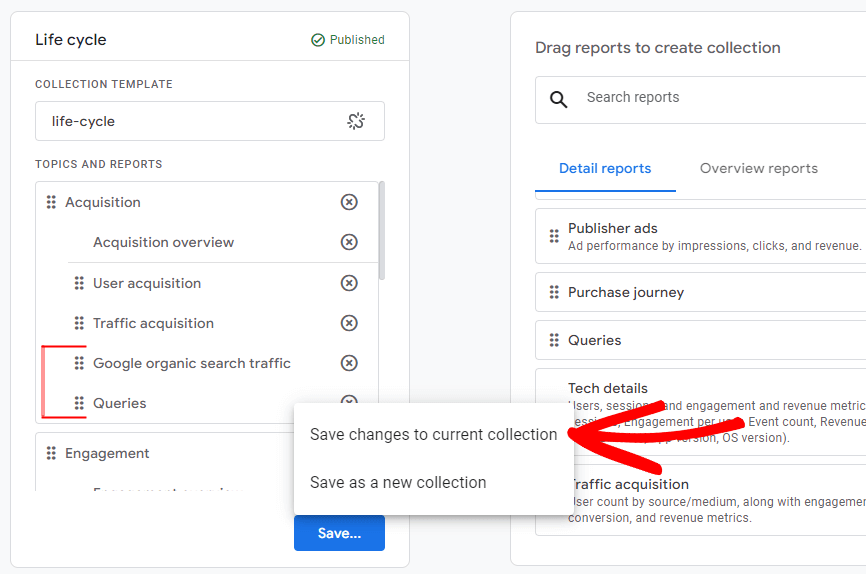
That’s it! You should now have a new Search Console section in your Google Analytics dashboard:
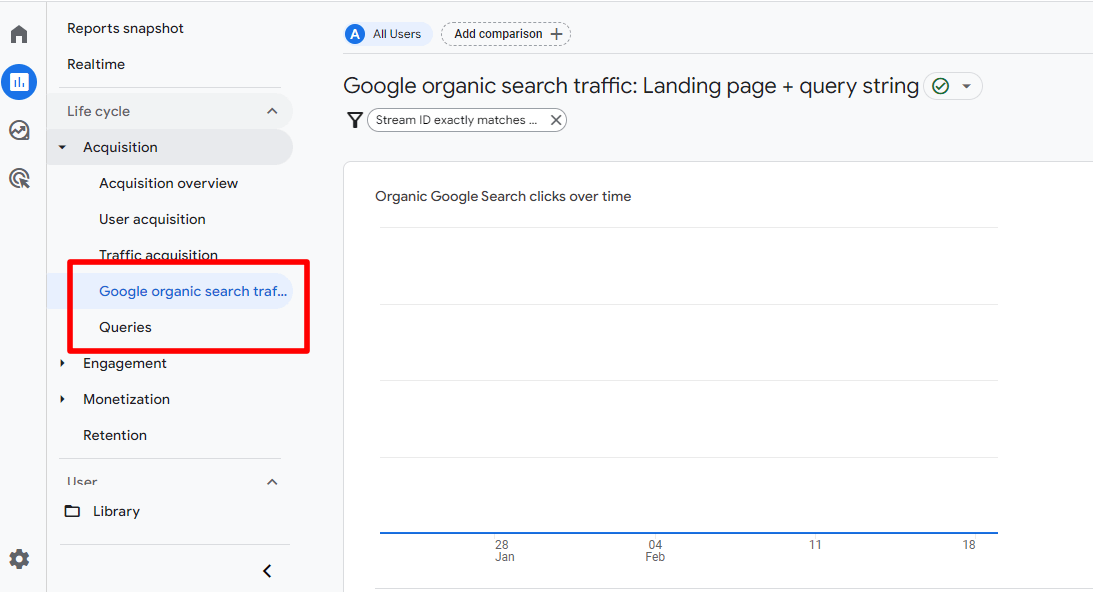
You’ve now successfully linked both platforms. Using the data, you can boost your site’s SEO and drive more organic traffic.
We hope you liked our article on how to connect Google Search Console with Google Analytics. You may also like to review our guide on How to See Google Analytics Traffic Source & Medium.
And don’t forget to follow us on Twitter and Facebook to learn the latest Google Analytics tutorials.

