We’re often asked by visitors how to accurately measure the traffic that’s coming from AMP pages on their WordPress website. To do that, you need to learn how to track AMP pages in Google Analytics.
AMP or accelerated mobile pages allow your website content to load quickly on mobile devices. But when it comes to tracking your visitors in Google Analytics from AMP, many people find the process difficult and complex.
In this article, we’ll show how to easily add Google Analytics to AMP pages in WordPress and how to find AMP in Google Analytics to start tracking your data. Let’s begin…
What Are Accelerated Mobile Pages?
Accelerated Mobile Pages, known as AMP, is an open-source project by Google. Its aim is to make mobile web content load faster in order to provide a seamless user experience on mobile devices. They use a bare-bones version of your site with streamlined CSS and lazy load images to make your pages load faster.
Since Google has now gone mobile-first, you have to ensure that your site works properly on mobile devices without hindering the overall experience. Mobile-first means that Google will give preference to a site’s performance on mobile as compared to desktop and will rank them higher.
So, you can enable AMP on your site to make sure your web pages open in an instant on mobile without any delay and increase the chances of your site ranking in the top 10 results on Google.
Why Track AMP Pages in Google Analytics?
If you’ve enabled AMP on your site, it’s important to know how many people visit your site using it. Collecting data about traffic from AMP can help you make decisions to grow your business. You can see which pages are popular and drive a lot of traffic from AMP, so you can create more content around similar topics. And, you can provide personalized messages for AMP users to increase conversion rates.
How to Add Google Analytics to AMP Pages
To add Google Analytics tracking on AMP pages, just follow these steps.
- Step 1: Install ExactMetrics and Connect Google Analytics
- Step 2: Install the Official AMP plugin for WordPress
- Step 3: Install and Activate ExactMetrics AMP Addon
- Step 4: View AMP Traffic in Google Analytics
Unfortunately, adding Google Analytics to AMP-enabled pages isn’t that straightforward. That’s because it requires you to edit the tracking code on your website manually and uses a different code snippet than your standard Google Analytics tracking code. This is often a difficult task for non-developers.
Another problem with adding Google Analytics to AMP pages manually is figuring out how to avoid counting the same visitor twice. If a user visits your site through AMP and then through a desktop, Google Analytics will count it as 2 different sessions.
This will mess up your reporting and won’t give you accurate traffic stats. So, how can you avoid these issues?
Install ExactMetrics and Connect Google Analytics
With ExactMetrics you don’t have to worry about coding or inaccurate reporting on AMP pages. It sets up the Google Analytics tracking code for you, prevents double-tracking, and supports other ExactMetrics tracking features on AMP pages such as custom dimensions.
The first step is to install ExactMetrics on your website and connect it to Google Analytics using the simple setup wizard.
ExactMetrics allows you to easily set up Google Analytics without editing any code or needing a complicated tool like Google Tag Manager. You get advanced tracking right out of the box with an extremely user-friendly interface and Google Analytics reports right inside your WordPress dashboard.
Aside from easily adding Google Analytics to AMP pages, you gain access to tons of additional tracking features with only a few clicks such as 1-click eCommerce tracking, social media tracking, form tracking, video play tracking, affiliate link tracking, and lots more.
To get started, head to the pricing page and grab the Plus license or above. Then, download the ZIP file from the Downloads tab of your account area. Next, install it on your WordPress site by going to Plugins » Add New » Upload Plugins.

Press Activate after the plugin finishes installing.
Now, just follow the setup wizard to connect Google Analytics to WordPress, and you’ll be done in no time.
You can read our detailed guide on How to Add Google Analytics to WordPress (Step-by-Step Guide) for a full walkthrough on getting set up with Google Analytics and ExactMetrics.
Install the Official AMP plugin for WordPress
Next, you need to install the AMP plugin on your WordPress site if you haven’t already. It’s the official plugin by the AMP project team and Google and is what helps you provide a smooth and fast experience for mobile users.
Go to Plugins » Add New on WordPress and search for AMP. When you see it, press Install Now.
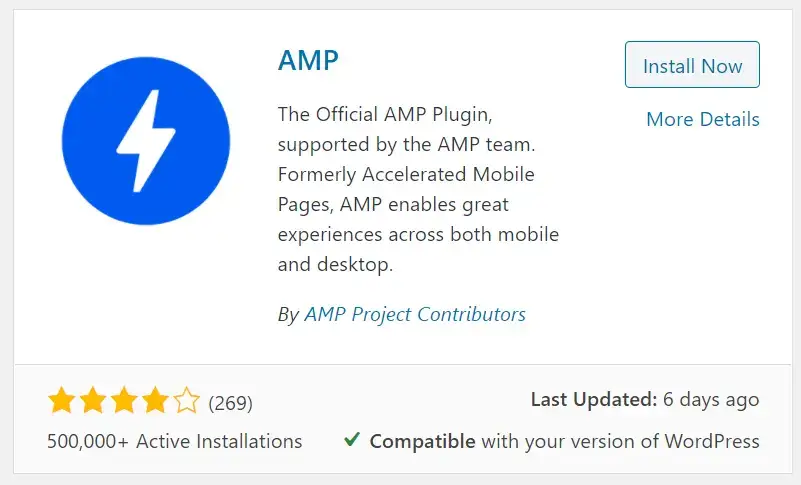
When the button changes, press Activate.
After the plugin is activated on your site, it will automatically create AMP versions of your posts and pages. Type /amp/ at the end of a post URL if you want to check that it’s working.
Install and Activate ExactMetrics AMP Addon
So, you have ExactMetrics set up and connected to Google Analytics and AMP pages created.
The next step is to install the AMP addon, so you can start tracking AMP visitors. Start by going to your WordPress dashboard and navigating to ExactMetrics » Addons. Find the one labeled AMP and click Install.
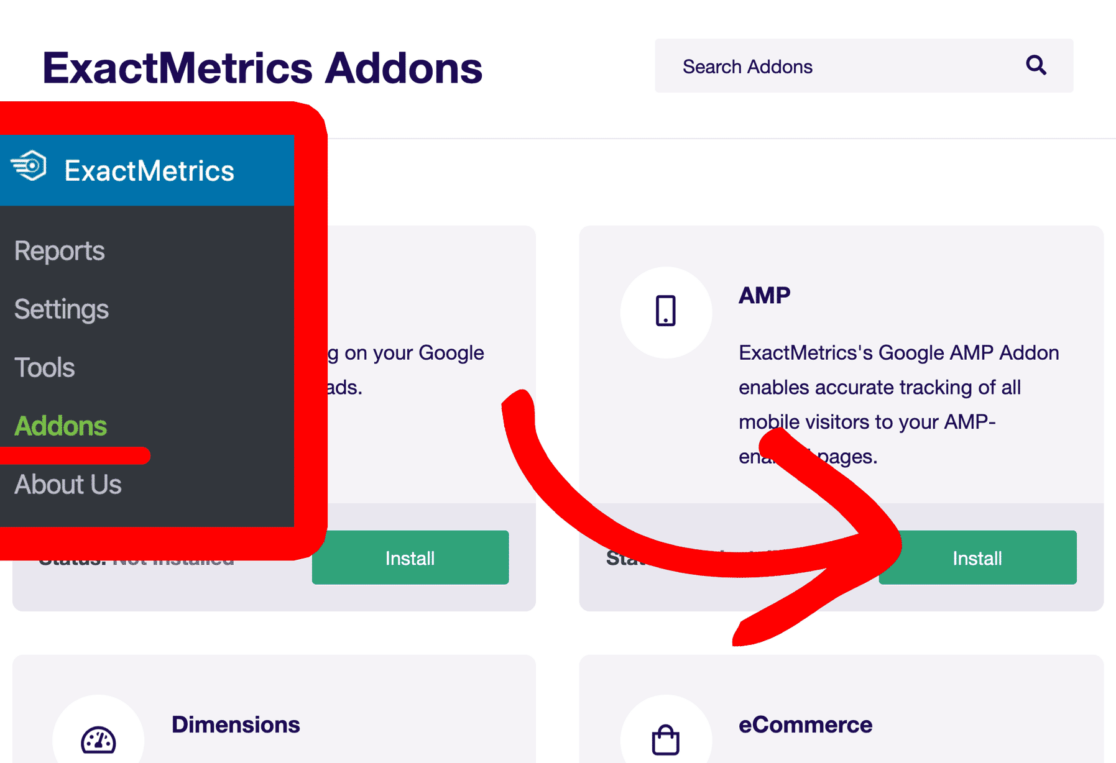
The addon will automatically install and activate on your website, and you’ll see the status change to Active, which means it’s ready for use.
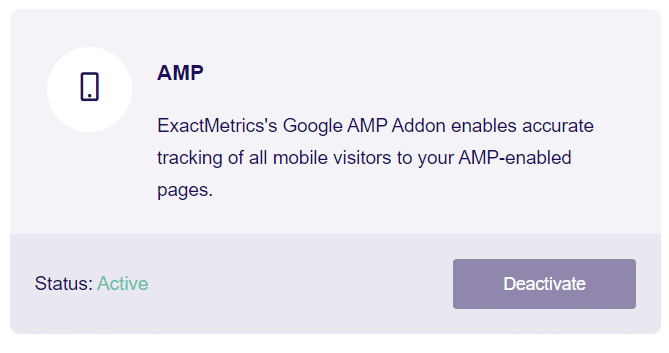
That’s it! You’ve successfully added Google Analytics to AMP pages, and no further setup is needed.
If you want to double-check your AMP settings, go to ExactMetrics » Settings » Publisher and scroll down to Google AMP. You’ll see that AMP tracking is enabled.
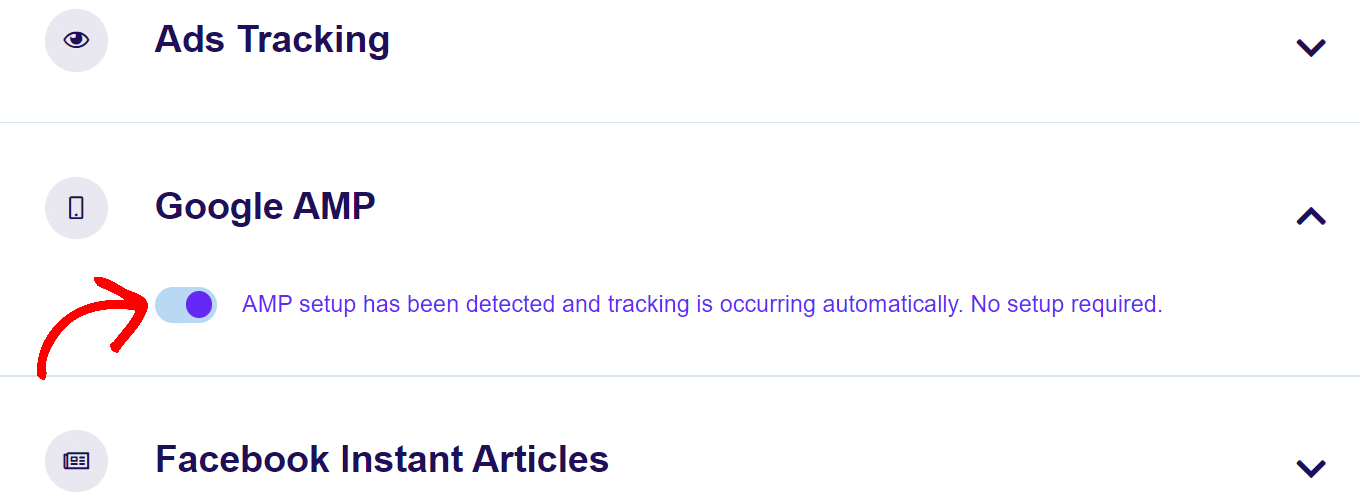
If you have a consent box on your website for GDPR compliance, then another option will appear under Google AMP. The option will say Wait for AMP consent box. If you enable this, then the AMP tracking code will not load until the user grants permission.
Now, you’re probably wondering how to find Google Analytics AMP data. Let’s see how to do that next.
How to Check AMP in Google Analytics
After adding Google Analytics to AMP pages with the steps above, you’ll want to check your AMP pages to see the traffic coming from them. Navigate to Reports » Engagement » Pages and screens from your Google Analytics account.
Here you’ll see all the pages that are driving traffic to your website. To view stats from AMP pages only, enter /amp in the search bar above the table.
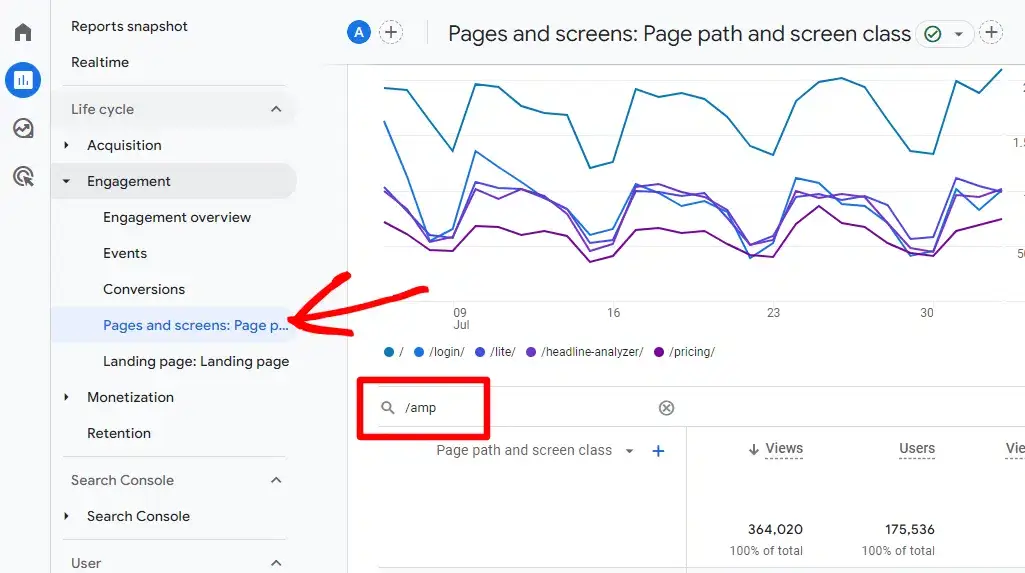
This will show all your AMP pages and you can quickly see which ones are sending the most traffic to your website and other key metrics.
With that, you’ve made it to the end of the guide!
We hope you liked our article on how to add Google Analytics to AMP pages. You can also check out our post on how to set up visitor tracking in WordPress.
Not using ExactMetrics yet? What are you waiting for?
Don’t forget to follow us on Twitter and Facebook to see all the latest reviews, tips, and Google Analytics tutorials.


