Are you looking for a way to allow your website visitors to upload files directly through your WordPress site? Accepting user-submitted files can be incredibly useful for many websites, but WordPress doesn’t include this functionality by default.
Don’t worry—with the powerful WPForms plugin, adding a file upload form to your WordPress site is easier than you might think!
In this step-by-step tutorial, we’ll walk you through creating a file upload form using WPForms. Let’s get started!
Why Use WPForms for Your File Upload Form?
WPForms is a top-rated WordPress form builder plugin that makes creating custom forms a breeze, even for beginners. With its user-friendly drag-and-drop interface and pre-built templates, you can create professional-looking forms in minutes without any coding knowledge.
Some key features of WPForms include:
- Intuitive drag-and-drop form builder
- Wide range of customizable form fields
- Over 1,500 pre-designed templates
- Built-in spam protection and security measures
- Integrations with popular marketing and payment tools
WPForms also offers excellent support if you need help, and their plans for more advanced form features are super affordable.
Let’s jump into our file upload form tutorial.
How to Create a WordPress File Upload Form
Step 1: Install and Activate WPForms
First, you’ll need to download and install the WPForms plugin at the Basic level or above to access their file upload form feature.
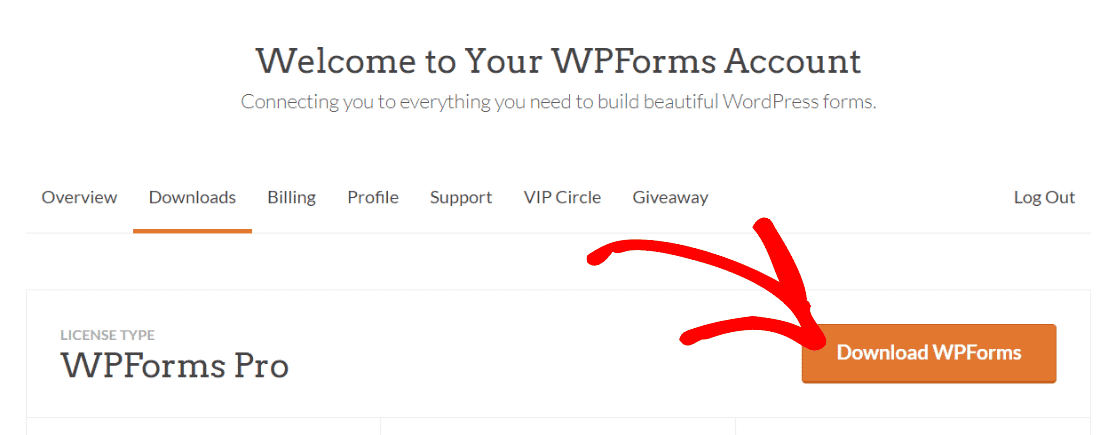
Once you’ve purchased the plugin, you’ll be able to download it from your account page:
Then, install the plugin in WordPress under Plugins » Add New:

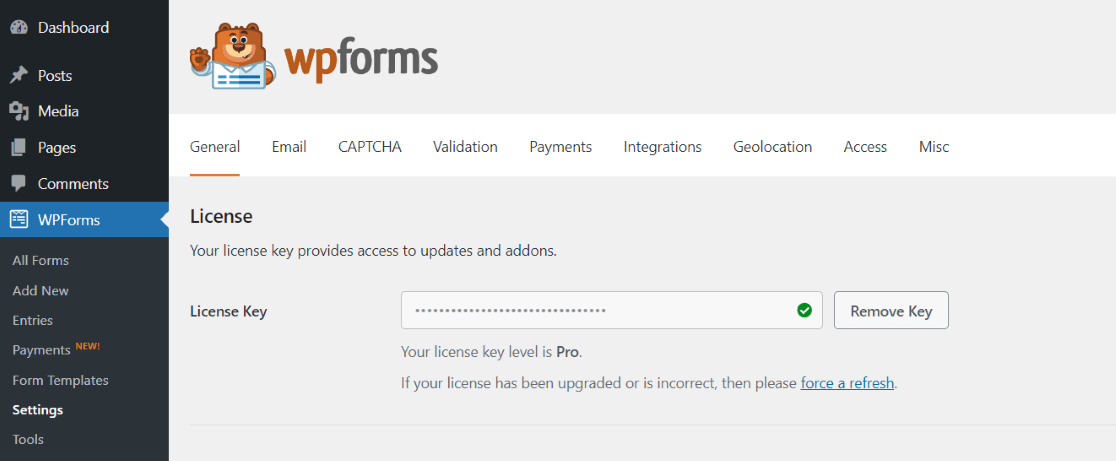
When it’s installed, locate the license key on your WPForms account page and paste it into WPForms » Settings » General:
Step 2: Create a New Form
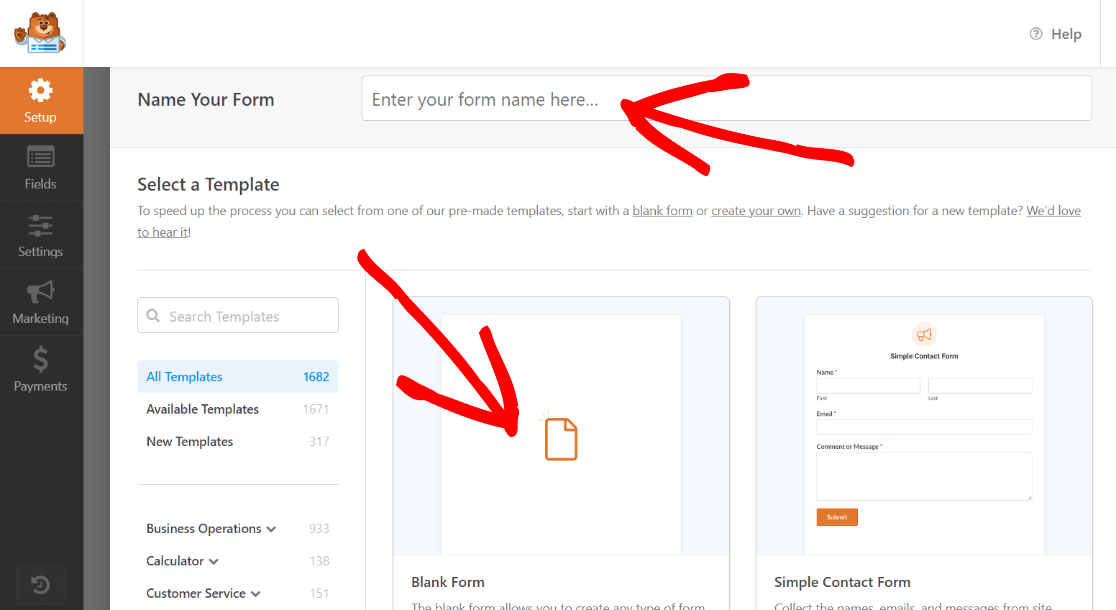
Next, head to WPForms » Add New to create a new form. Give it a name that’ll help you identify it at the top and select a template (like the File Upload form template), or start with a blank form:
Step 3: Build Your File Upload Form
Now the fun part – customizing your form! WPForms’ drag-and-drop builder makes it easy to add, remove, and rearrange form fields to fit your needs.
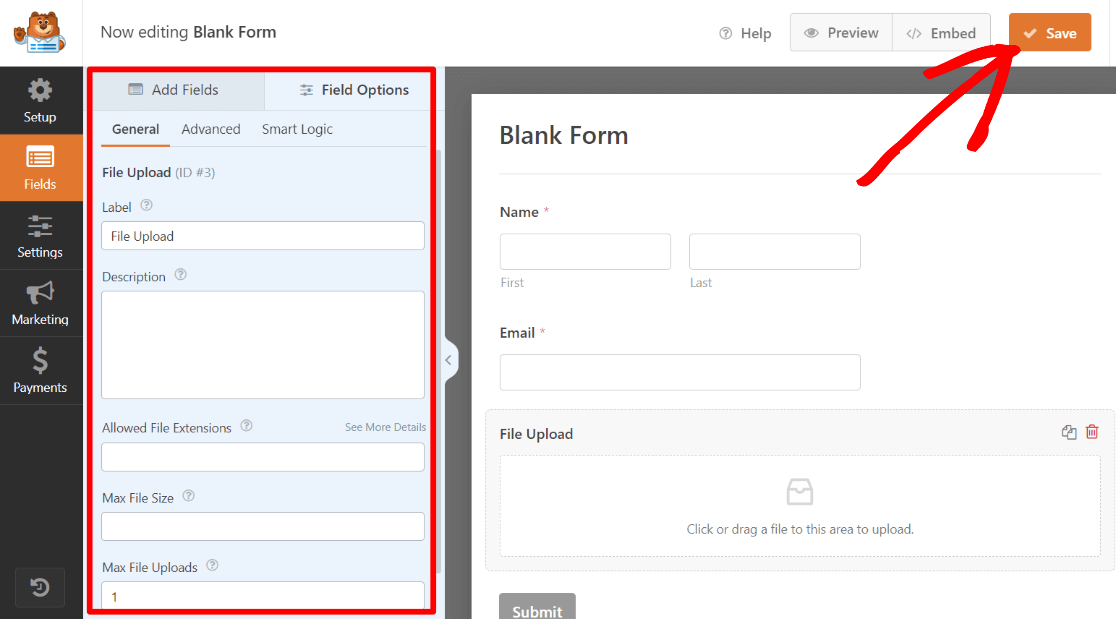
If you started with the File Upload template, you’ll have some automatically added fields. If you started with a blank template, find the File Upload field under Fancy Fields and drag it over to your form:
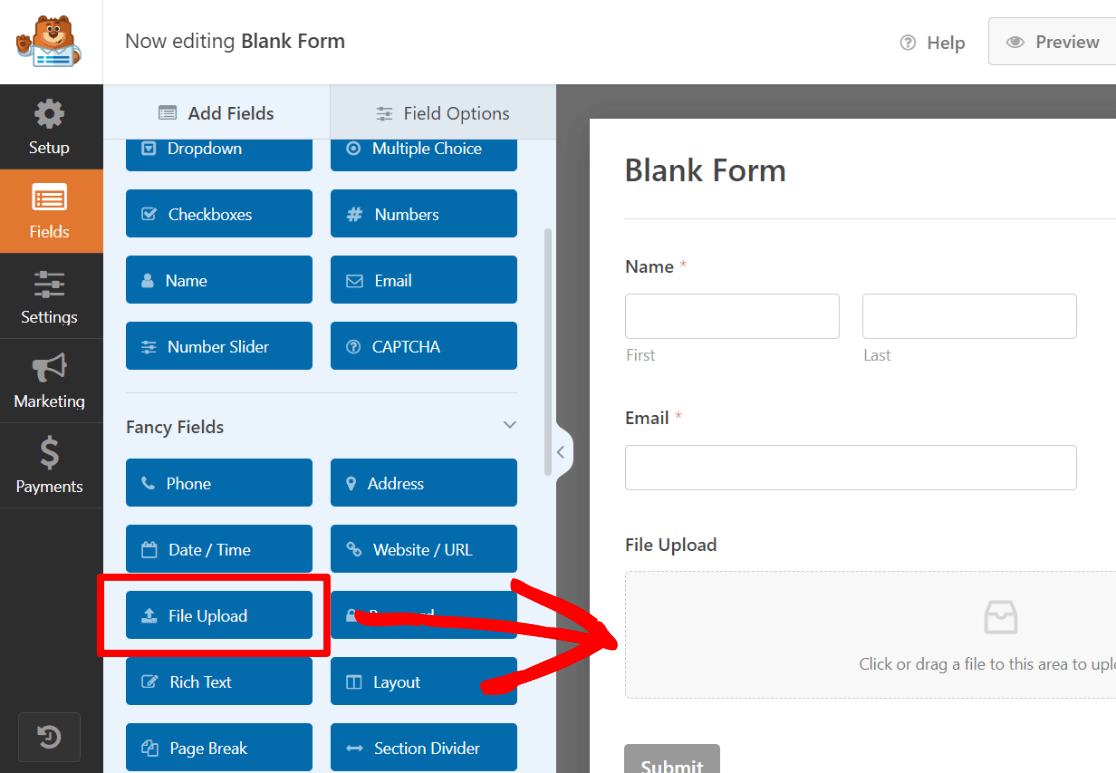
To add more fields, simply drag them from the left-hand panel and drop them where you want them to appear.
You can also click on any field to access its settings panel. For the file upload field, you can change the label, description, required file types, max file size, and more. Don’t forget to click Save after making changes.
Step 4: Configure Your Form Settings and Notifications
After customizing your form’s fields, go to the Settings tab to configure its behavior.
In the General settings, you can change the form name, description, submit button text, and enable anti-spam features.
Under Notifications, set up how you want to be notified when someone submits a file. You can customize the email subject line and message to easily identify file upload notifications.
Finally, choose what users will see after submitting a file in the Confirmations settings. You can display a success message, redirect to a specific page, or take them to a custom URL.
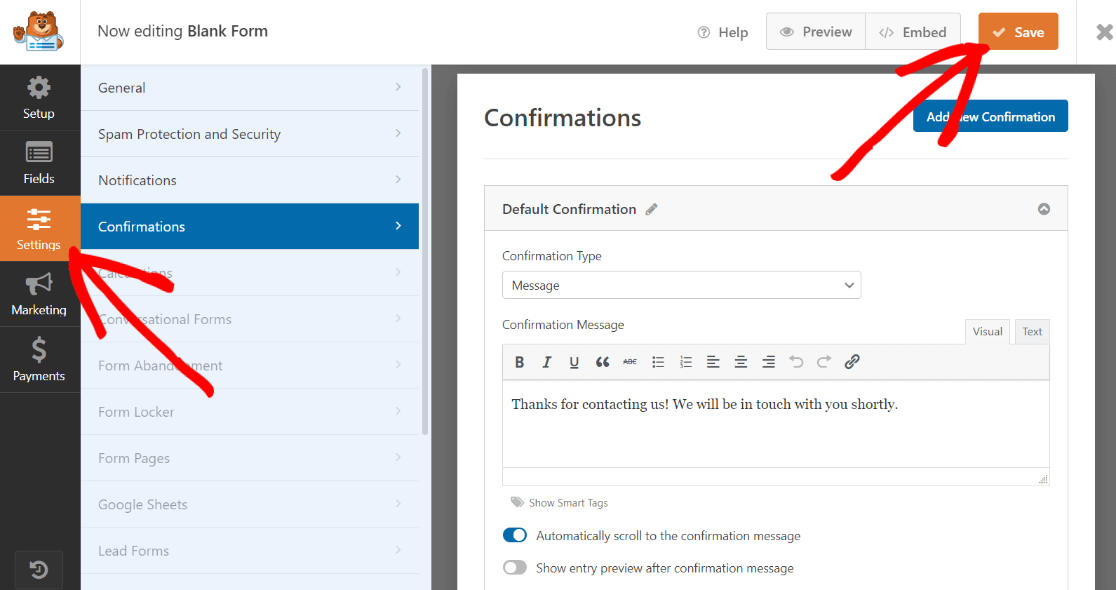
Click Save when you’re finished.
Step 5: Publish Your File Upload Form
You’re almost done! The last step is to publish your newly created file upload form on your WordPress site.
WPForms offers several easy ways to do this:
Click the Embed button in the form builder to copy the shortcode, then paste it into any post, page, or widget.
Or, use the WPForms block in the WordPress editor by searching for it in the block library and selecting your form from the dropdown.
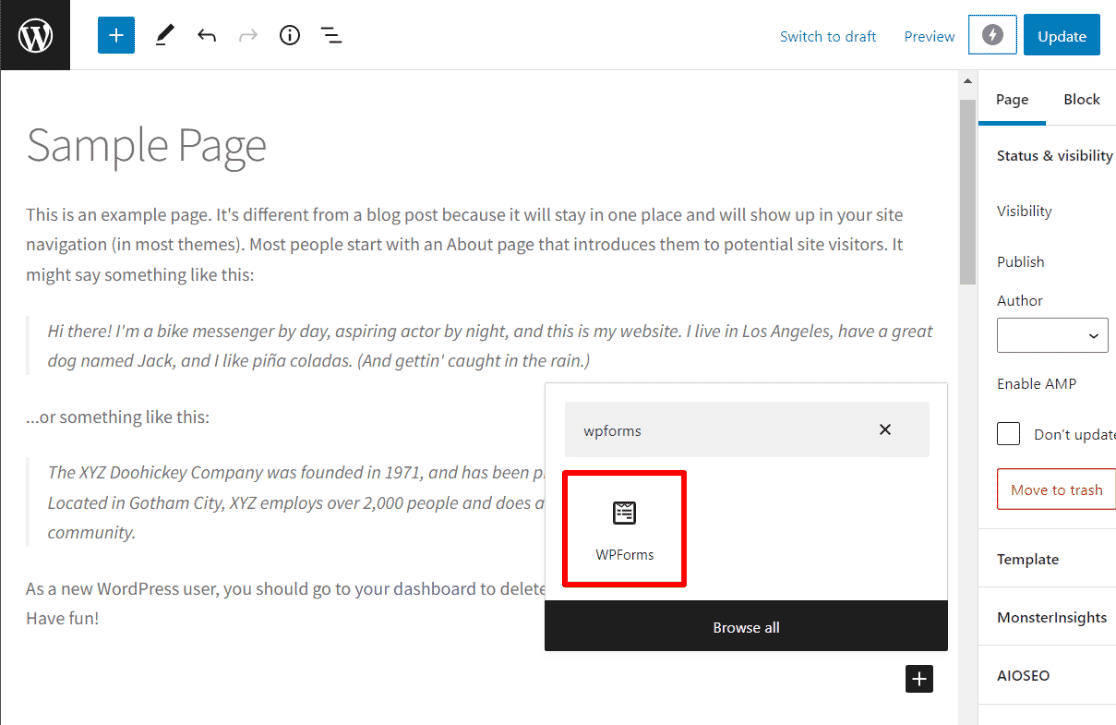
And there you have it! Your file upload form is now live and ready to collect submissions.
We hope this guide has helped you create your WordPress file upload form easily. For more tips on tracking, personalizing, and optimizing your WordPress site, be sure to check out our other tutorials on the ExactMetrics blog.
Here are a few articles you might like to check out:
How to Track Form Submissions in Google Analytics (Easy Way)
How to Create an Opt-In Form in WordPress (2 Easy Ways)
How to Easily Add a WordPress Landing Page
Ultimate Guide to WordPress Conversion Tracking (GA4)
Don’t forget to follow us on Twitter and Facebook to see all the latest Google Analytics tutorials.


