Are you looking for a quick and easy way to create contact forms for your WordPress website?
Contact forms are a simple yet powerful tool to have on your site. They help your visitors to get in touch with your brand and ask about your products and services.
But WordPress doesn’t come with a contact form by default. Which means you’ll have to create it by yourself. Now, this may look like a job for a developer, but what if we told you there’s an easier way.
In this article, we’ll show you how to add a contact form in WordPress without editing any code. Let’s start…
Why Should You Create a Contact Form?
Before we dive into the tutorial, you might be wondering – is it necessary to create a contact form?
Many website owners would mention their email addresses as a way of contacting them. But as convenient it may sound, it’s not the most efficient way.
So, here are some reasons why you need a contact form on your site:
- Spam Protection – By displaying your email address, you’re risking spam in your inbox. But with a contact form, you can prevent pesky spambots.
- Get Precise Information – With contact forms, you can specify the information you’re looking for from your readers and also narrow down their problems. This isn’t possible in emails as users would don’t send all the information you might need.
- Improve Communication – Contact forms are a great way to communicate with your audience and quickly reply to their queries.
- Save Time – At times users might send multiple emails for the same query. So, if you reply to each email, it will consume a lot of time. But with contact forms, you can specify a reply time (like we’ll get back to you within 24 hours).
With that, are you ready to create your contact form in WordPress?
How to Add a Contact Form in WordPress
When it comes to creating a contact form, many people think it’s too complex or they might have to hire a developer. But that’s not true!
Just follow these steps to add a contact form to your WordPress site without touching a single line of code…
Step 1: Select the Right Contact Form WordPress Plugin
The first step is to choose the right plugin for creating a contact form. And we recommend WPForms, as it’s the best contact form WordPress plugin you can use today.
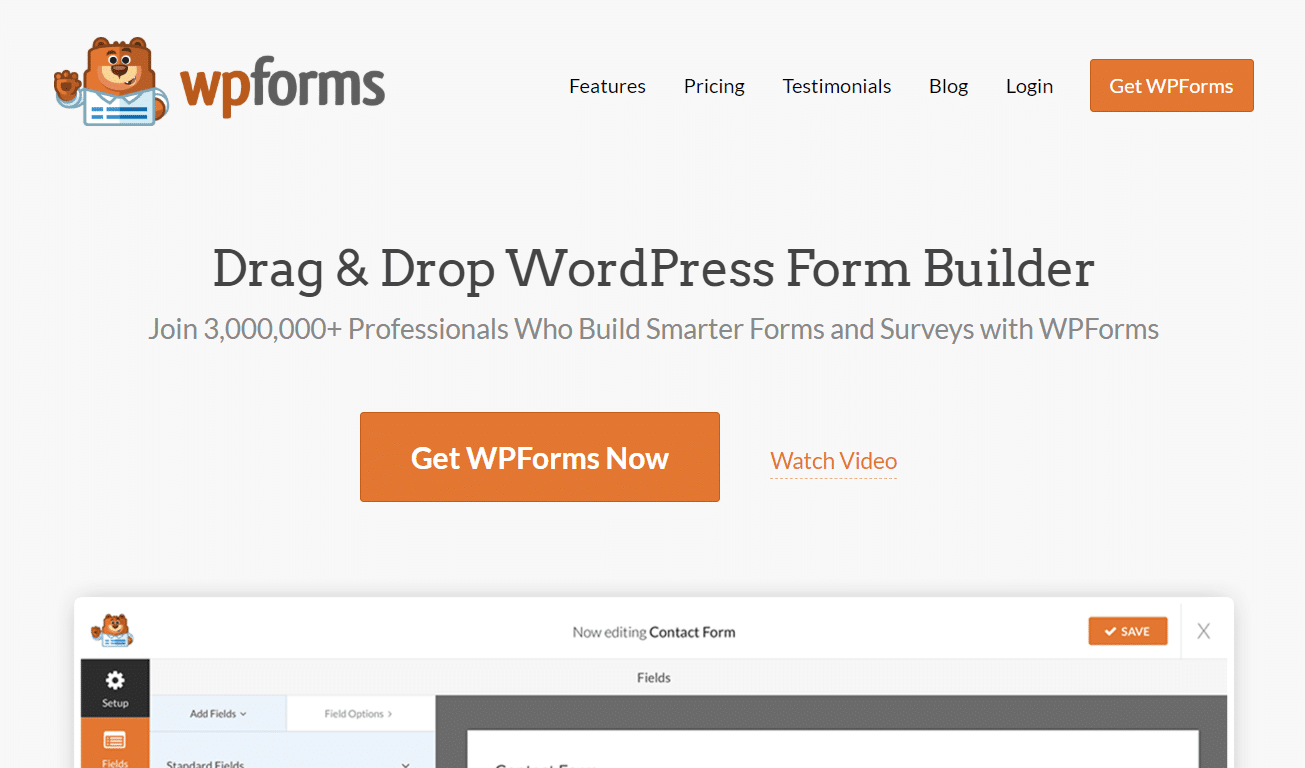
It offers loads of features and makes it super simple to create different types of forms, thanks to its drag and drop builder. Plus, you get pre-built templates to get started without any hassle.
You can even customize your form with multiple fields and also use conditional logic to show different fields based on your user’s responses.
WPForms is 100% free and you can start building your form using its Lite version. But if you want more features, then you can upgrade to its paid version anytime.
Step 2: Install WPForms Plugin on Your Site
Now that you’ve selected the best plugin to add a contact form in WordPress, let’s go ahead and install the plugin.
You can start by going to your WordPress dashboard and then navigating to Plugins » Add New. Next, lookup WPForms in the search bar and then click Install.
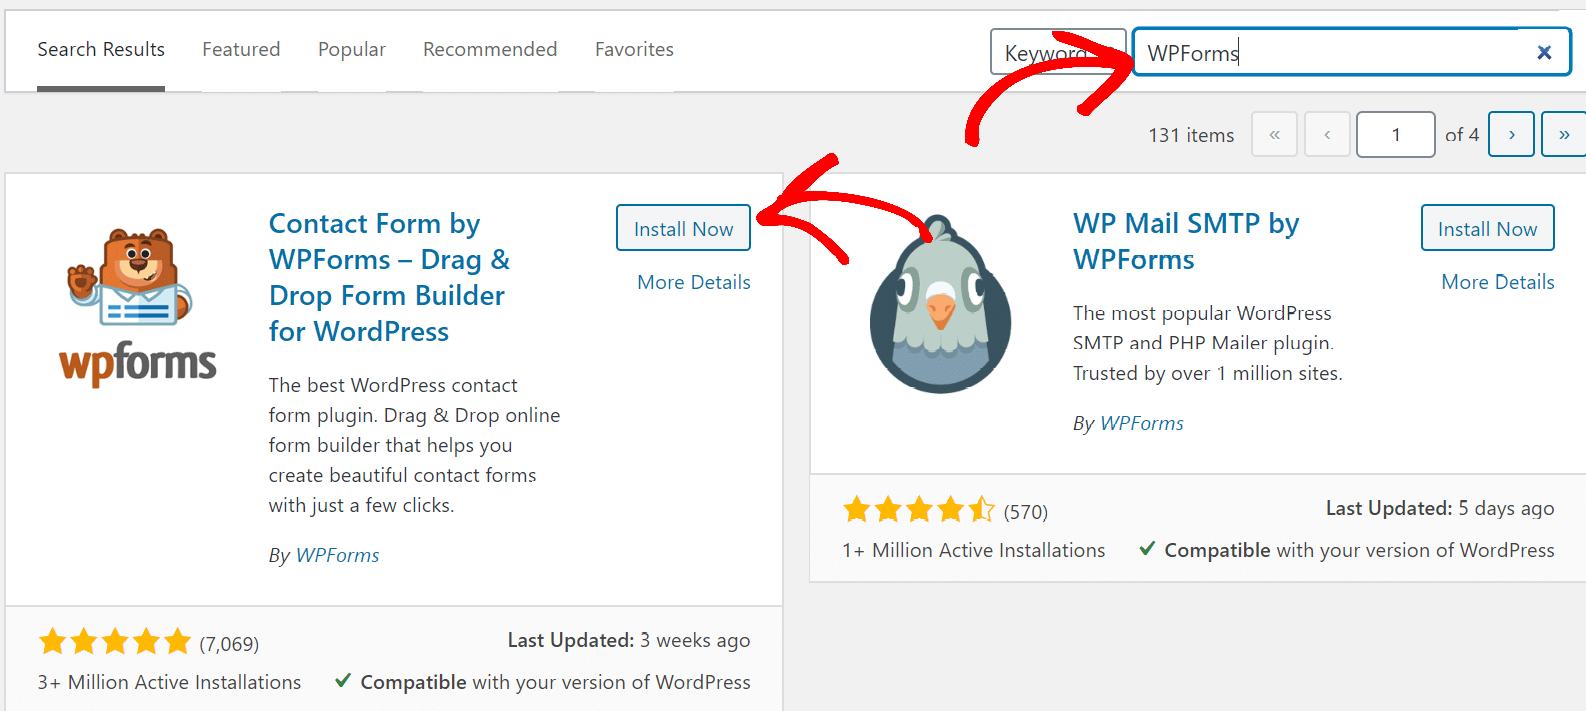
Now wait for a few seconds and then click Activate.
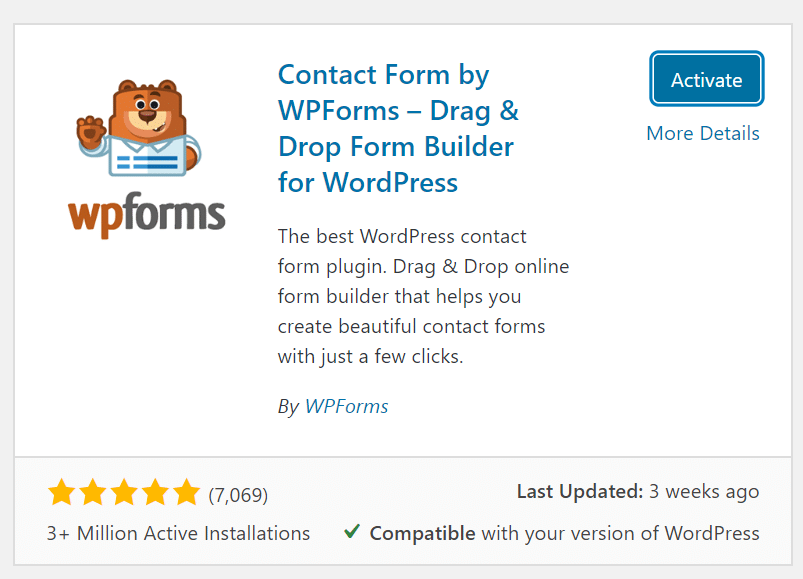
Once the plugin is active, you should see WPForms appear in your WordPress dashboard options on your left.
Step 3: Create a Contact Form on WPForms
Now go to WPForms and then click Add New to start building your contact form for your WordPress website.
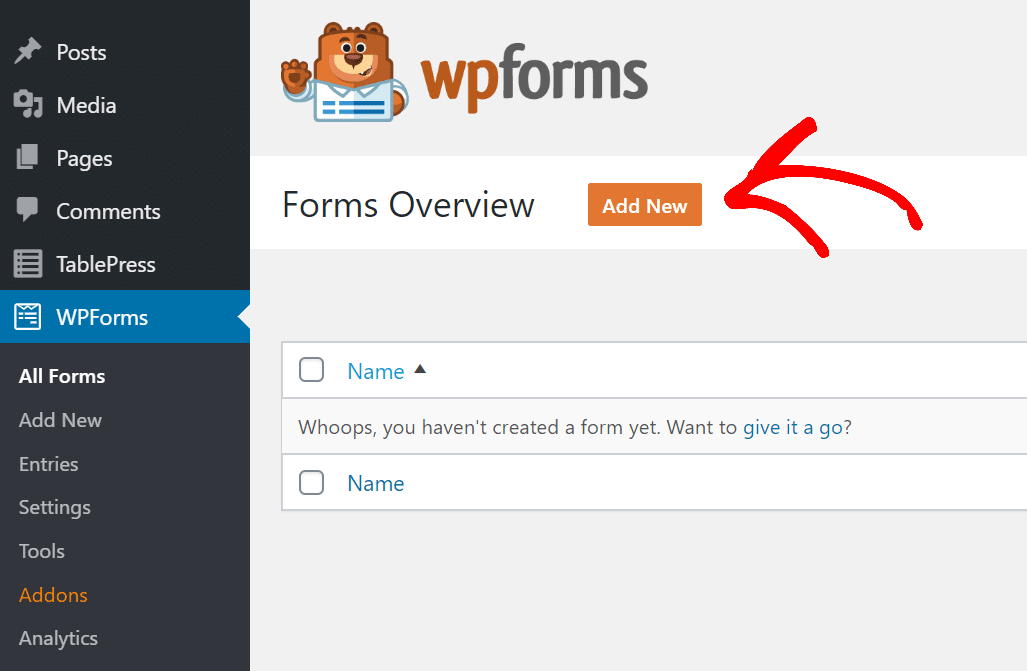
Next, give a name to your form and select the Simple Contact Form template to get started.

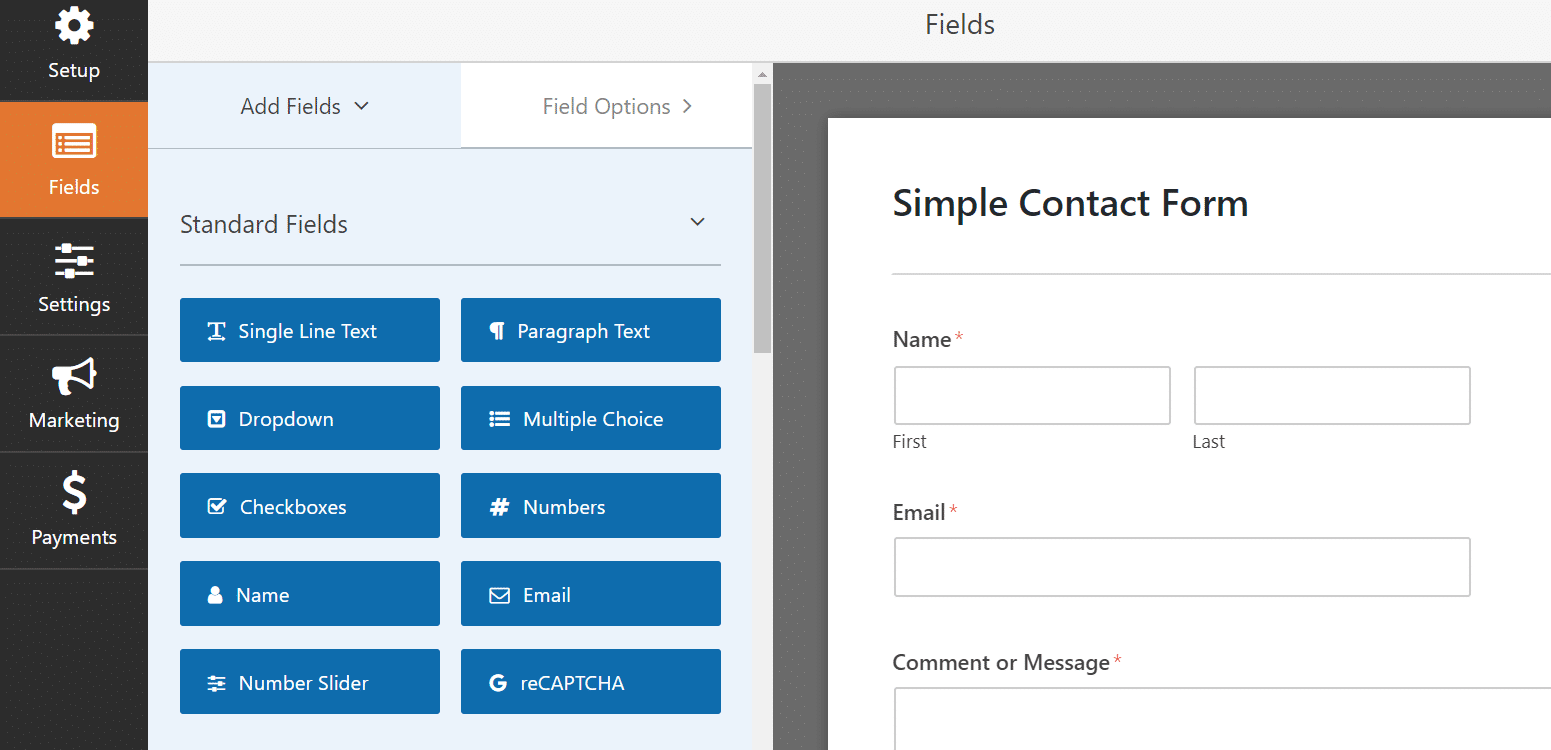
You can now edit the fields of your contact form. WPForms offers you a lot of features to choose from. For instance, you can add a checkbox, paragraph text, or a dropdown menu to your existing template.
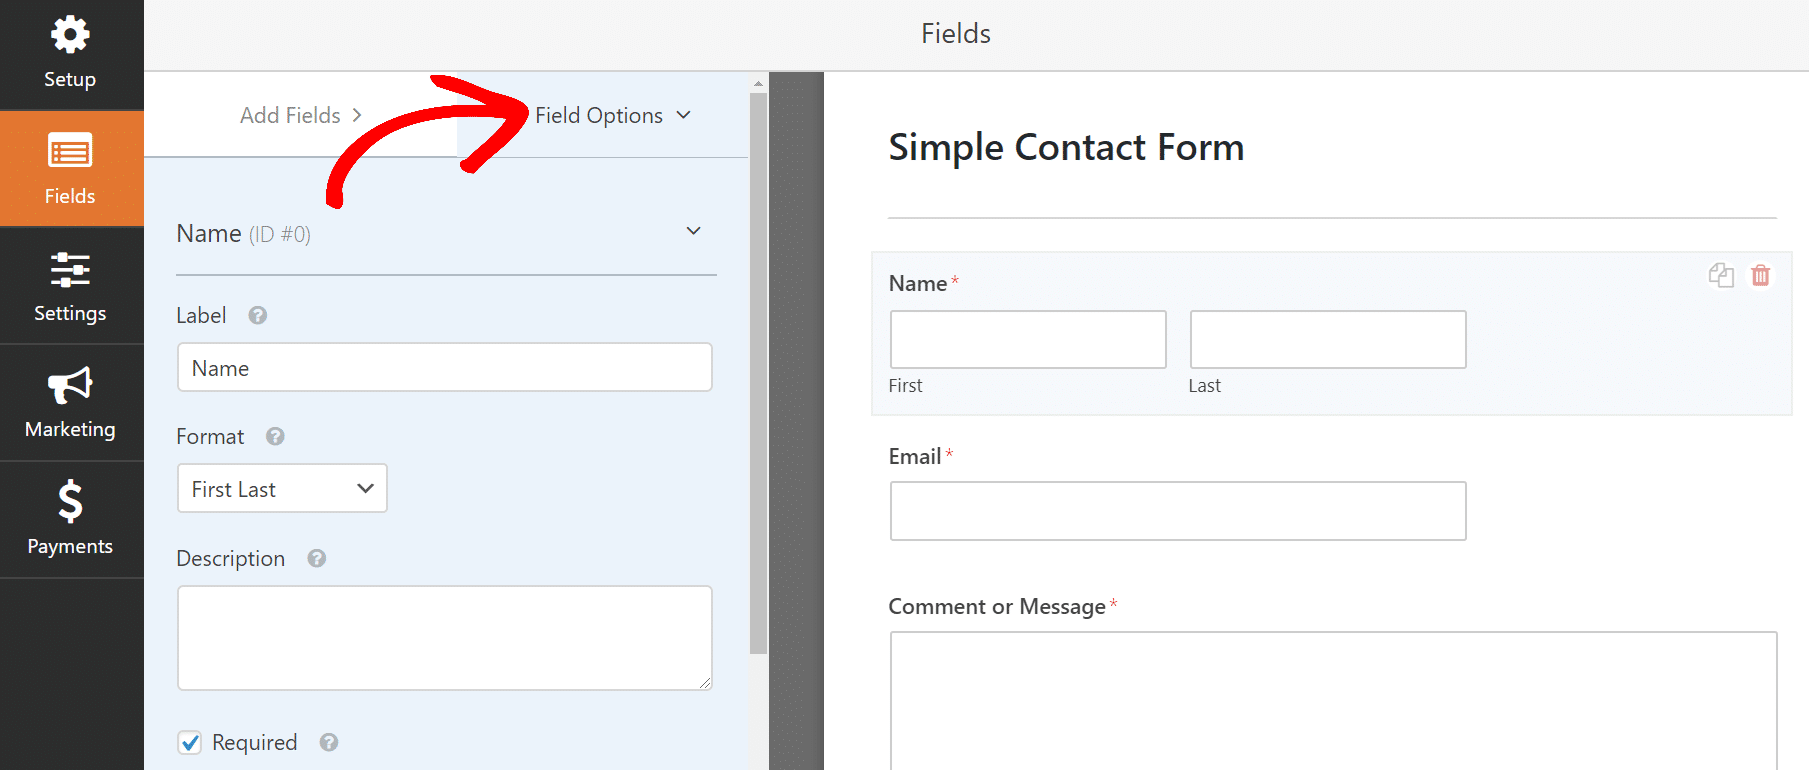
And you can further customize each field by going to the Field Options tab. Here you can change the label of the field, edit its format, add a description, and mention if the field is mandatory for users to fill.
There are more advanced options if you scroll down. They allow you to edit the size of the field, enter a placeholder, set a default value, hide labels and sub-labels, and enter CSS classes.
Step 4: Change Your Contact Form Settings
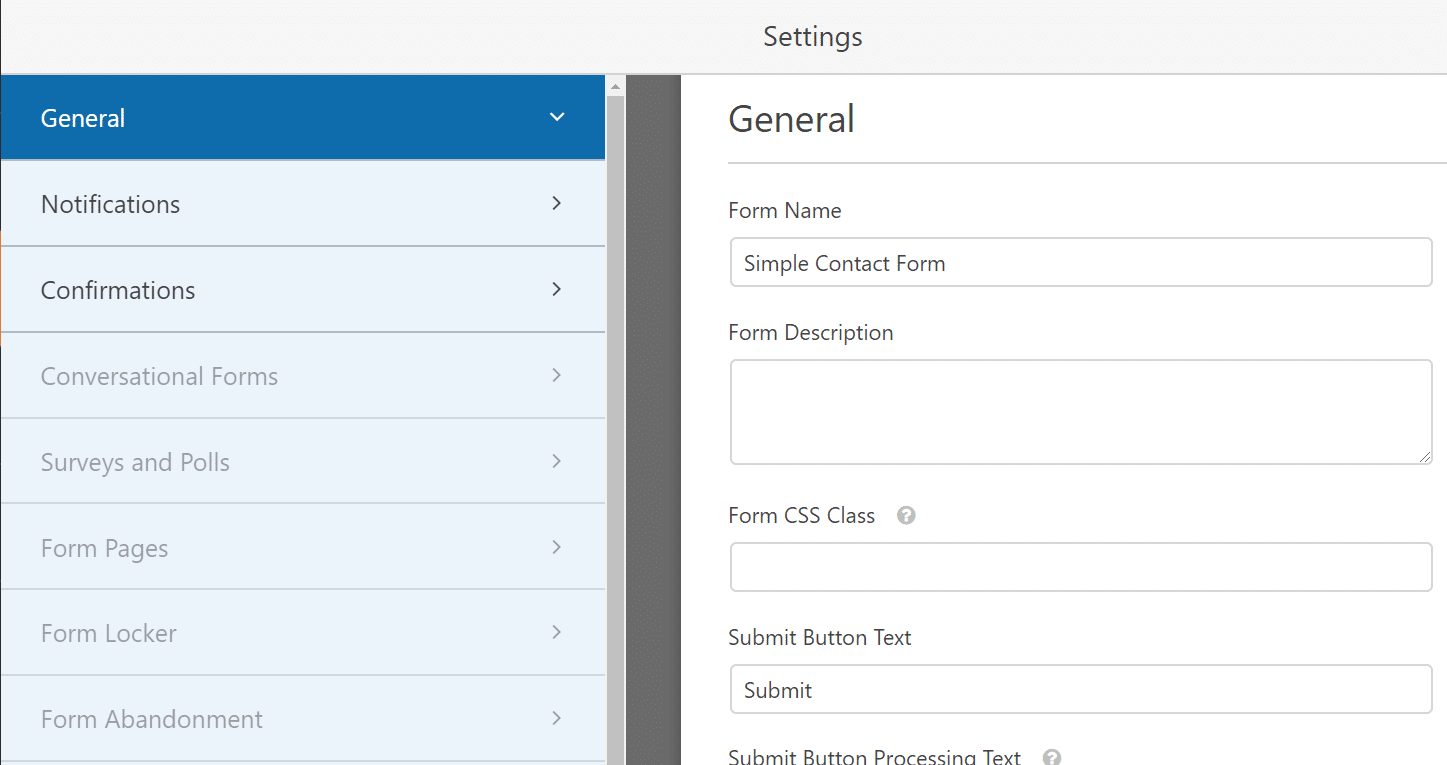
The next step is to change the settings of your contact form. Now under the settings tab, you’ll see 3 options. The first one is your form’s General settings.
Here you can edit the name of your form, add a description, change submit button text, and enable different options like an anti-spam honeypot, dynamic field population, or AJAX form submissions.
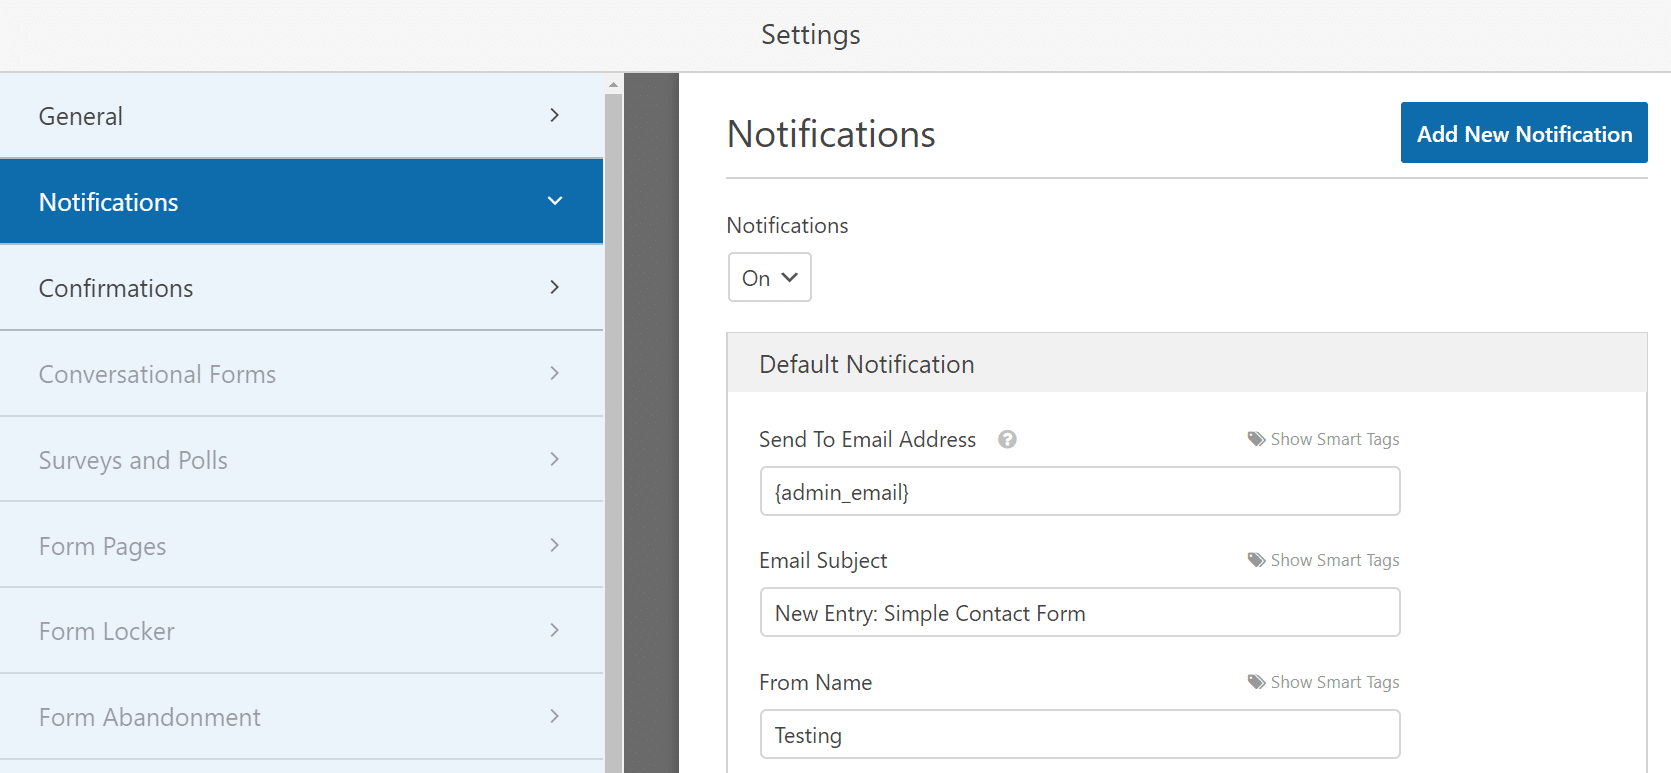
After you’re done with the General settings, you can then move to Notifications. If you want, you can leave the default settings as it is.
Or you can change them according to your need. For instance, you can edit the email subject line, from the name, from email, and even add a message. WPForms also gives you an option to add a new notification for your contact form.
And the last set of settings you can change is Confirmations. It allows you to show a message, show a page, or redirect to another URL when a visitor submits a form.
If you select Message as the confirmation type, then you can enter the text that people will see after submitting the form. As for the Show Page option, you can select which page you want to show from a dropdown menu.
And for Go to URL option, simply enter the link where you want to send your visitors after they hit the submit button.
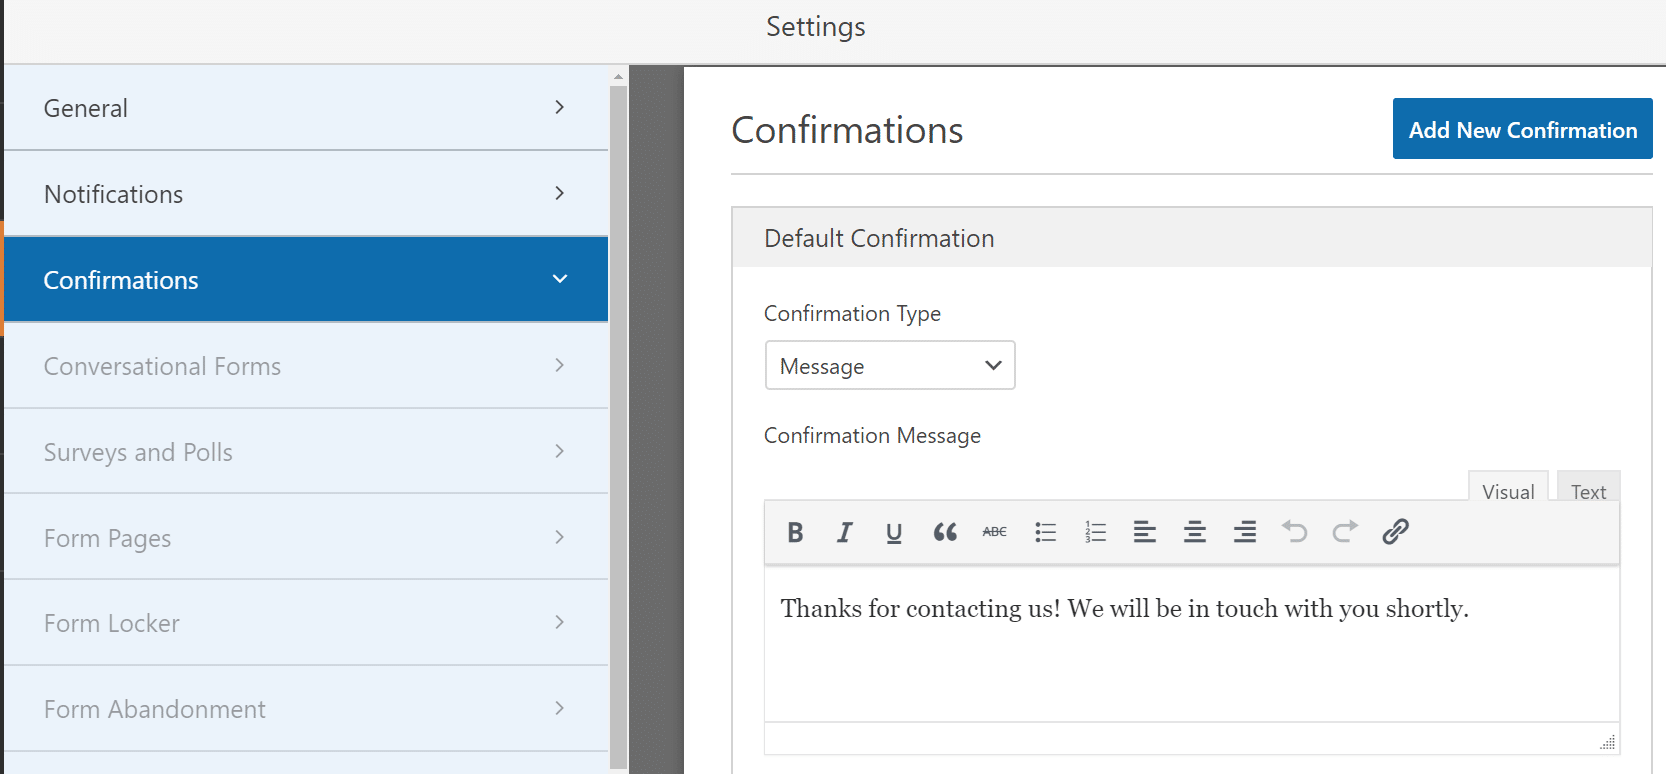
Once you’ve made these changes, click Save.
Step 5: Add Your Contact Form on Your Website
With your contact form now ready, it’s time to add it to your website. To do that, you’ll have to create a new page or add it to an existing one.
For this tutorial, we’ll create a new post and use the WPForms widget to add our contact form. So, in your page editor, click plus (+) sign on the top left corner and then scroll down and click on Widgets.
Now under Widgets, you’ll see WPForms. Click on it to add the form to your post.
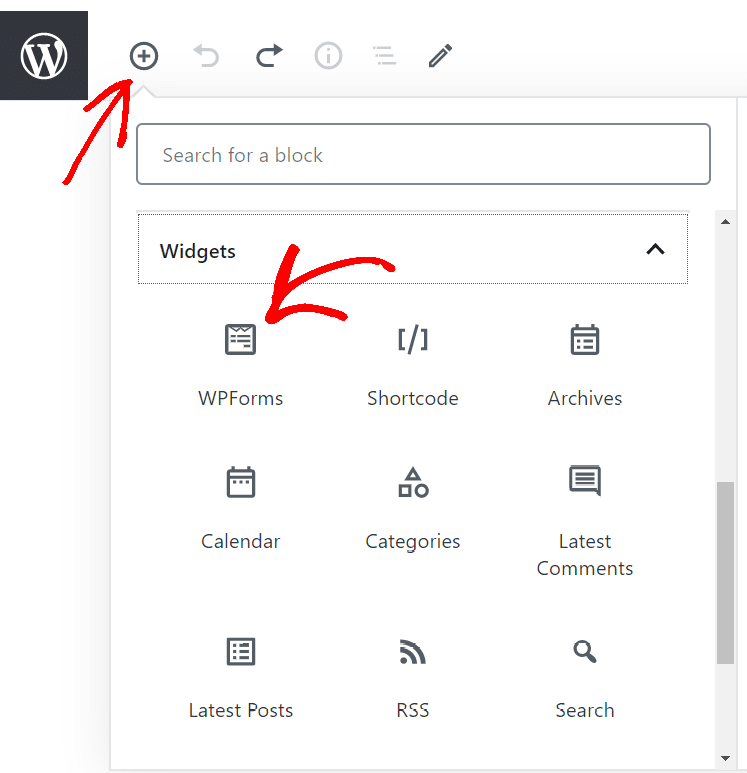
This will add WPForms to your post or page. Now from the dropdown menu, select the contact form you just created.
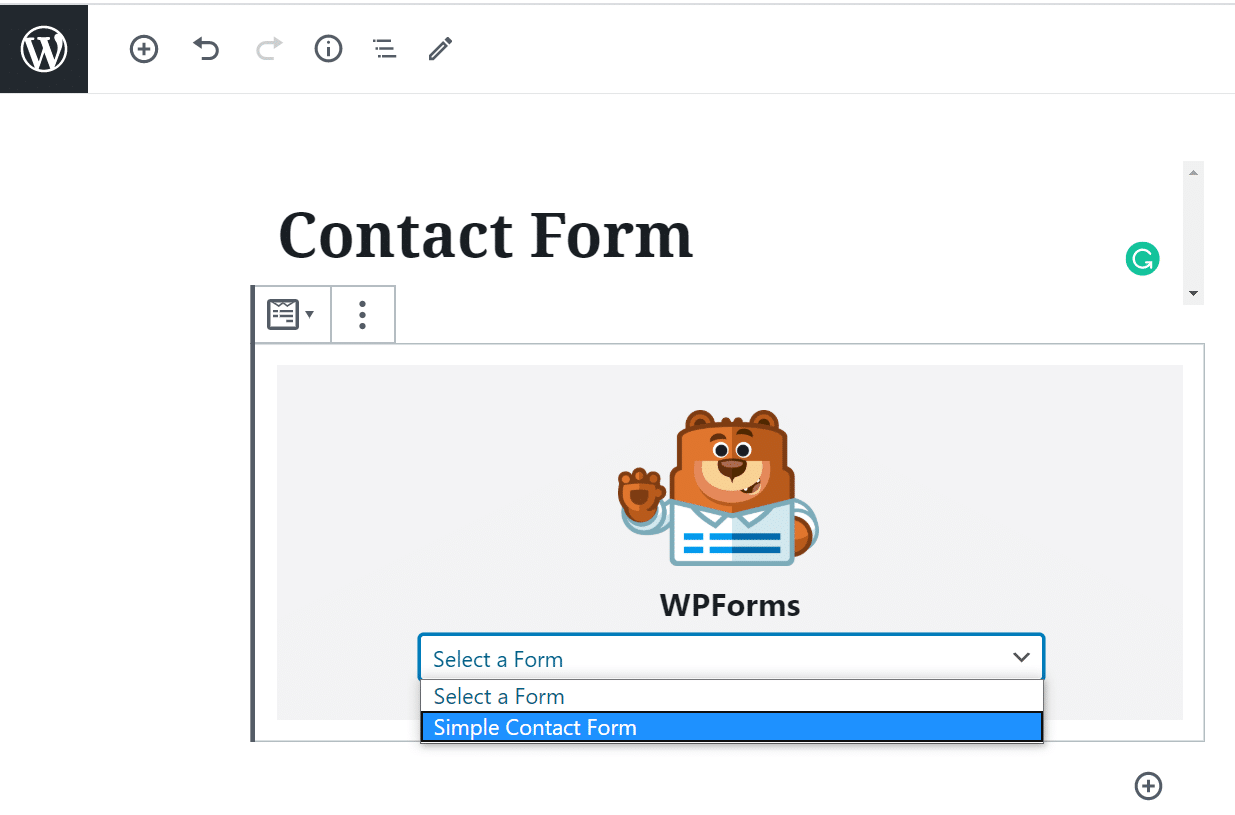
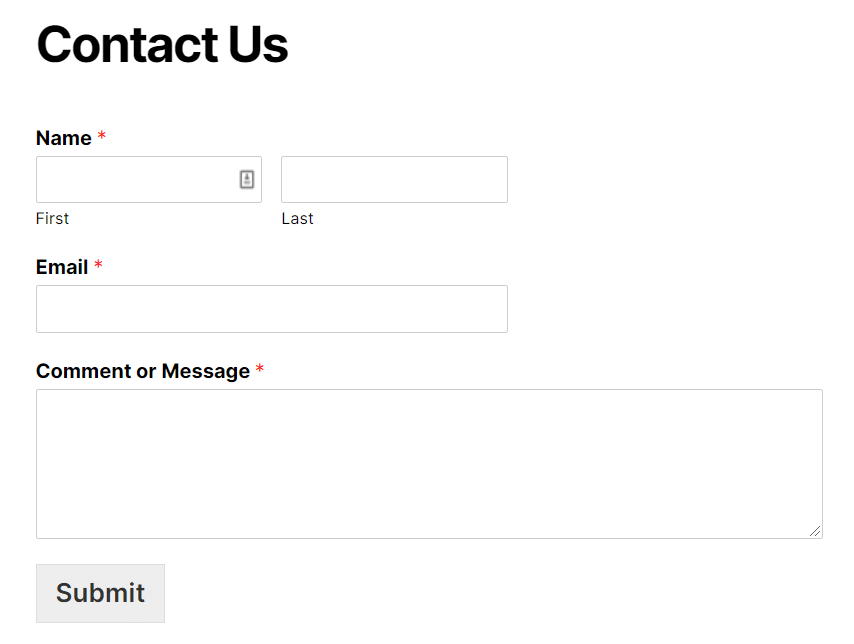
Your contact form will now appear on your page. You can go ahead and publish the form on your website.
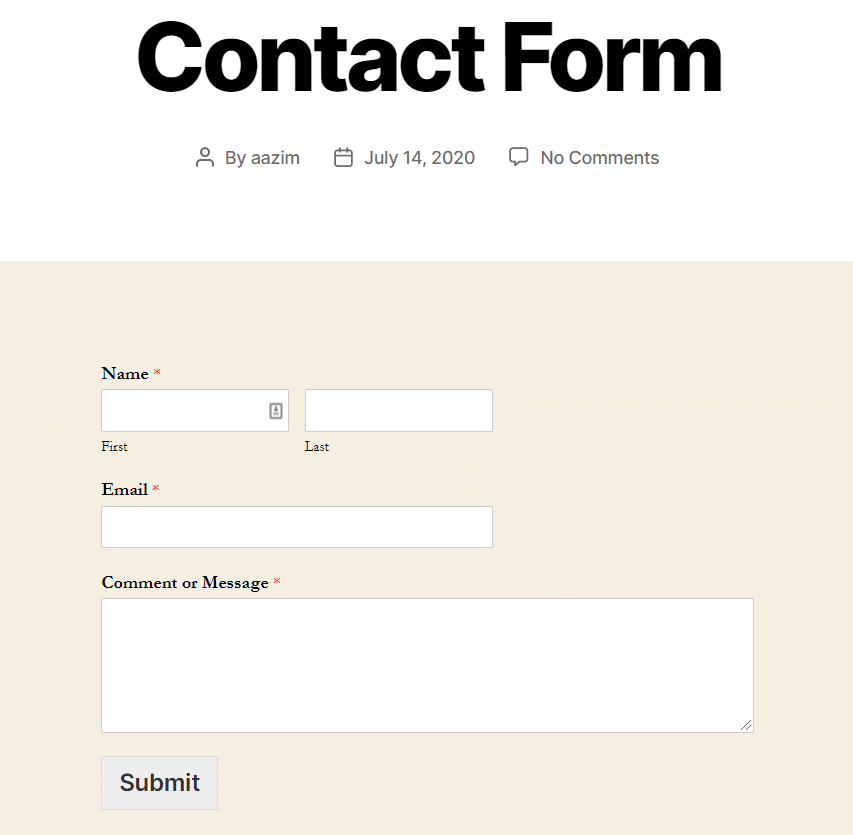
WPForms also allows you to add your contact form through shortcodes. So, if you go back to the plugin from your WordPress dashboard, you’ll see a shortcode for your contact form. Simply add the shortcode where you want on your website and your form will appear.
Step 6: Add Your Contact Form to Sidebar
You can even add your contact form in your WordPress website’s sidebar. WPForms comes with a widget that you can add to any widget-ready area on your theme.
To add the contact form to the sidebar, go to Appearance » Widgets. Then, simply drag and drop WPForms widget to your sidebar menu. Now give a title to your form and select the contact form from the dropdown menu. Click Save when you’re done.
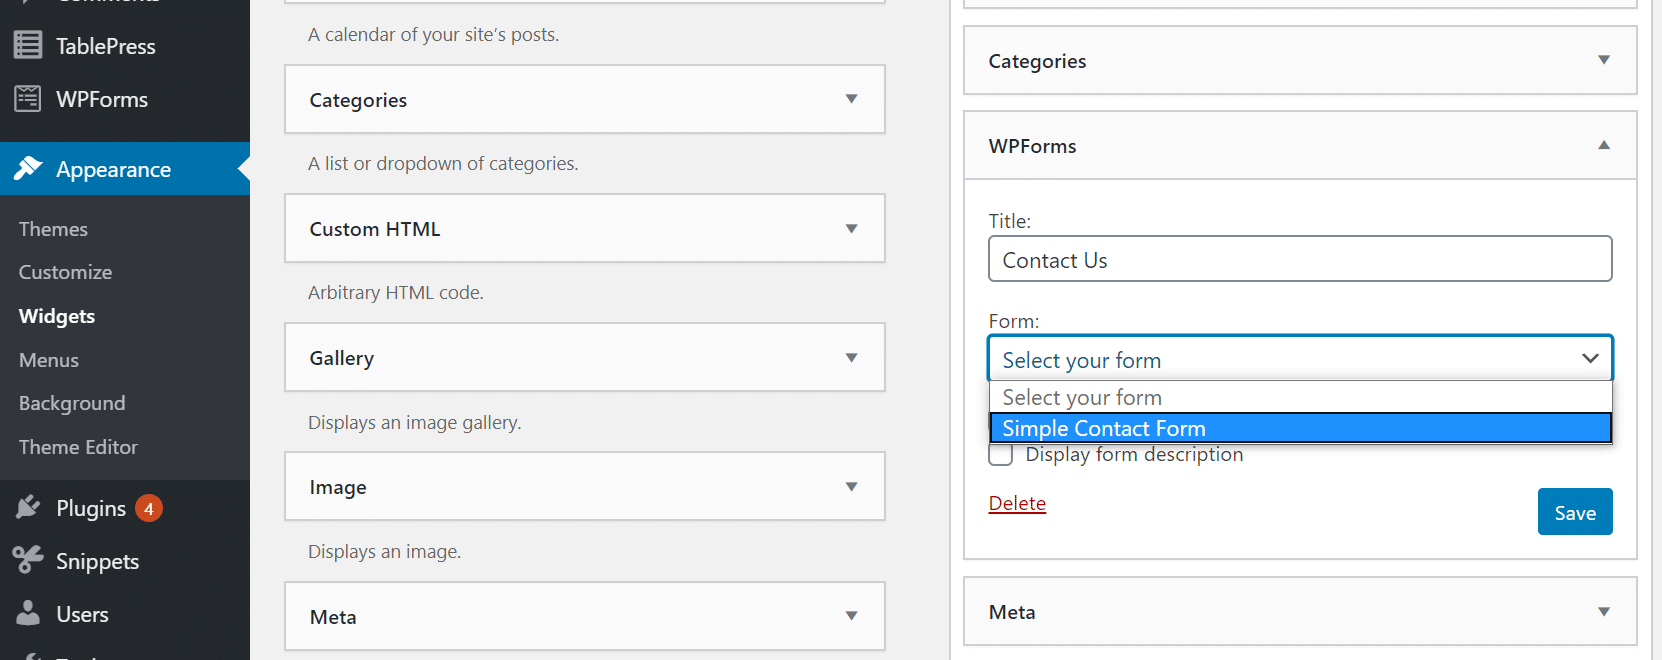
And there you have it! You can now see your contact form on your website’s sidebar.
Track Contact Form Conversions in WordPress
After you’ve successfully added a contact form to your WordPress website, do you know how is it performing?
This is where ExactMetrics can help you out. It’s the best premium Analytics plugin for WordPress and allows you to easily add Google Analytics to your WordPress without any coding.
With ExactMetrics Forms addon, you can automatically track your contact form conversions in WordPress. And you can view the report inside your WordPress dashboard.
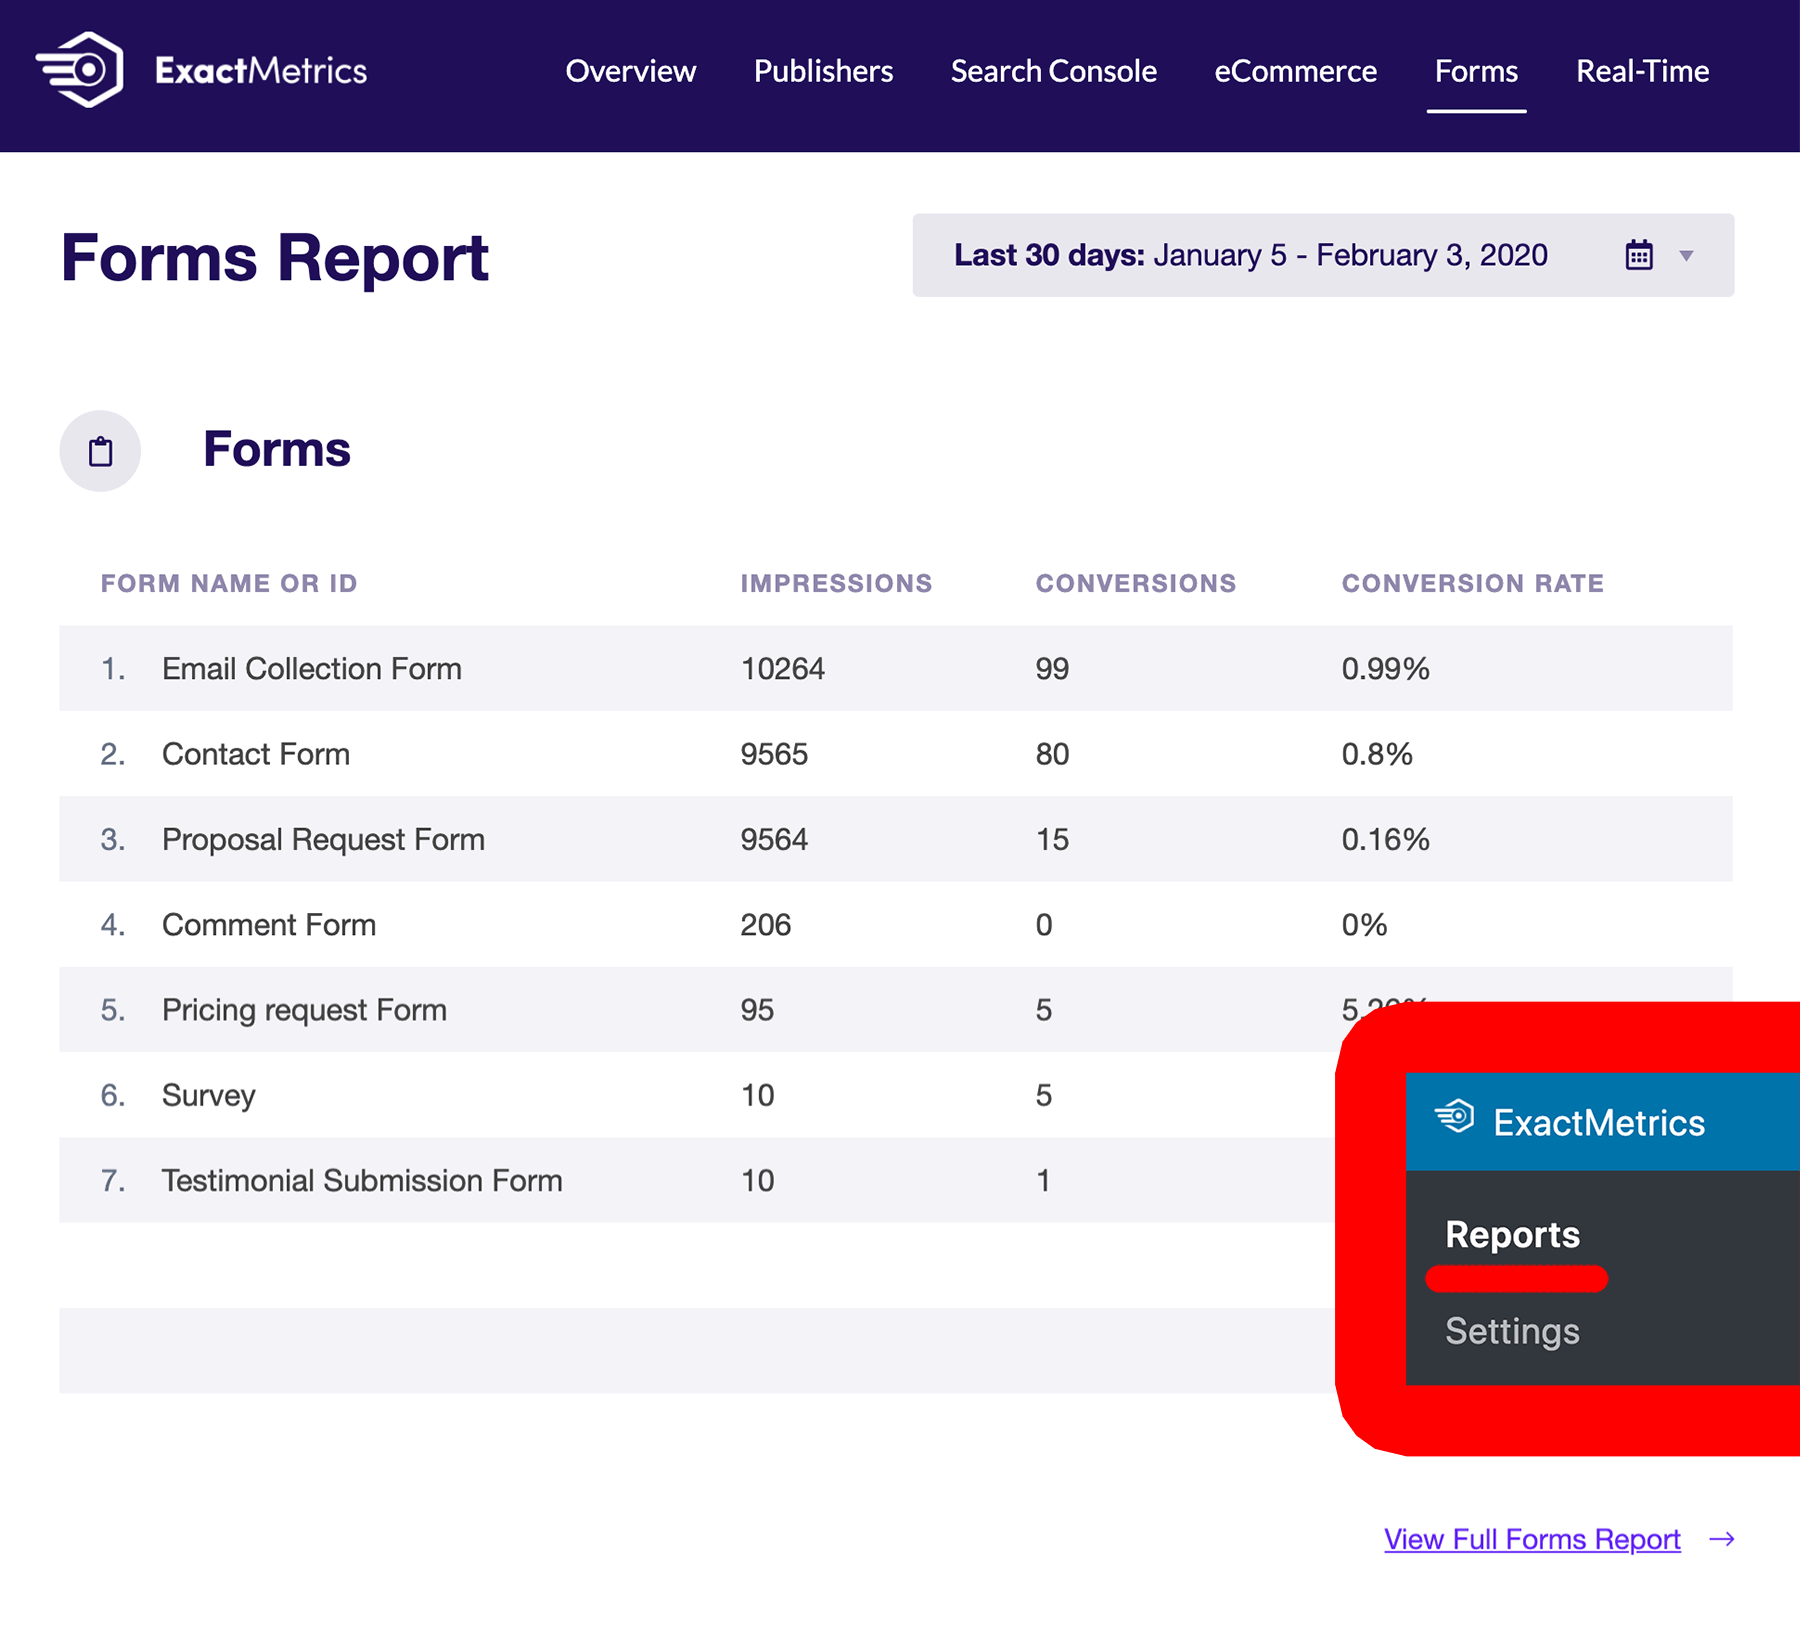
You can follow our detailed guide on how to track form submission in Google Analytics.
And that’s it!
We hope you like our article on how to add a contact form in WordPress. If you want, you can also go through our post on how does Google Analytics works.
Don’t forget to follow us on Twitter and Facebook to get to know the latest tutorials on Google Analytics.

