Are you looking to integrate a WordPress Instagram feed into your site?
Instagram is a powerful tool for connecting to and engaging with your audience. When you share your Instagram feed on your WordPress website, you boost your credibility, attract more visitors, grow your social community, enhance engagement, and potentially increase your sales!
In this guide, we’ll walk you through simple steps to embed an Instagram feed into your WordPress website. Let’s dive in and make your website more fun, colorful and engaging!
The Benefits of Embedding a WordPress Instagram Feed
Embedding a WordPress Instagram Feed on your site means your latest posts and stories from Instagram show up directly on your webpage. It adds a live update feature to your site without extra work. Here’s why it’s such a cool idea:
- Keeps your site fresh: Automatically updates your website with new content, encouraging visitors to keep coming back
- Engages your audience: Adds lively and dynamic content that captures the attention of your visitors
- Builds social proof: Showcase product reviews, relevant hashtags, or video testimonials right on your site
- Expand your Instagram following: Promotes your Instagram profile, helping you reach more people and grow your brand
- Boosts SEO: More content means more for Google to index, potentially improving your site’s search rankings
- Boost sales: An Instagram feed of customer reviews can directly boost product sales
And it’s not just about showing off your nice photos. With over 2 billion active users, Instagram is a goldmine for promoting your business. By embedding your feed in WordPress, you’re making your Instagram content visible to website visitors, not just your Instagram followers.
Now that you know the why, let’s move on to the how. Stay tuned to learn the easy way to embed a WordPress Instagram feed onto your site.
How to Embed a WordPress Instagram Feed
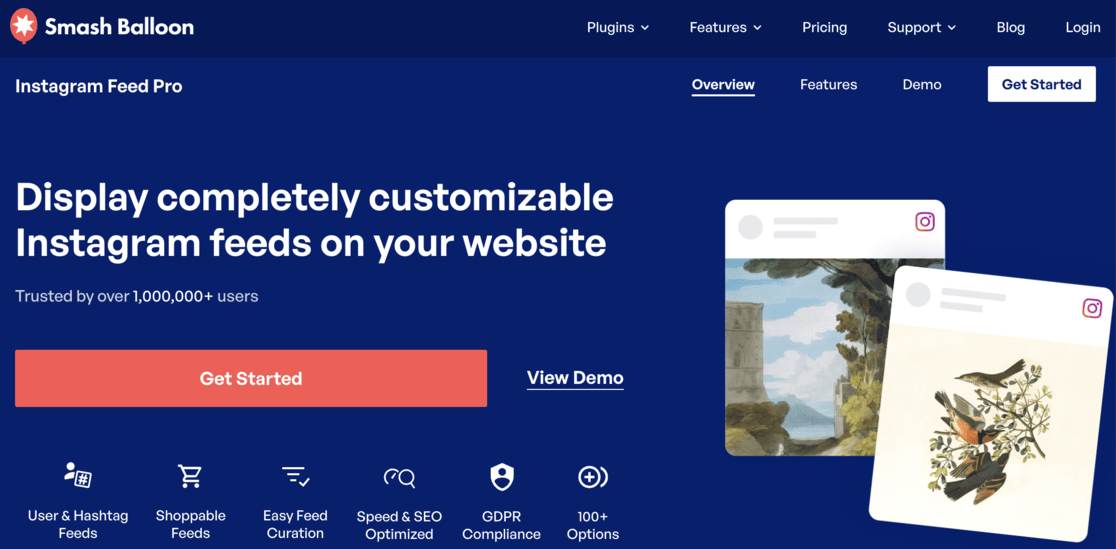
Embedding an Instagram feed into your WordPress site might seem complex, but it’s actually straightforward with the right tools. The easiest and most effective way to do this is by using the Instagram Feed Pro plugin by Smash Balloon.
Instagram Feed Pro is the most popular Instagram feed plugin available. It’s designed to be user-friendly, guiding you through a straightforward process to quickly add an Instagram photo feed to your WordPress site and display your content attractively.
One of the plugin’s standout features is its ability to adapt automatically to your site’s design so it fits seamlessly with your site’s style. It’s optimized for speed, promising ultra-fast loading times that contribute positively to your site’s overall user experience.
The need for coding skills is completely bypassed with Instagram Feed Pro. It directly connects with your Instagram API, making it super easy to set up without touching code. This makes it an ideal choice for those who may not be tech geniuses.
Moreover, the plugin is packed with features that allow for full customization. Whether you’re looking to display content from multiple Instagram accounts, hashtag feeds, stories, reels, videos, mentions, or even create a shoppable Instagram feed, Smash Balloon provides you with the tools to do so with ease and flexibility.
Ready to improve your website with your unique Instagram feed? Let’s move on to the step-by-step guide on how to make it happen:
- Step 1: Install and Activate Instagram Feed Pro
- Step 2: Create an Instagram Feed
- Step 3: Connect Your Profile to Your Website
- Step 4: Customize Your WordPress Instagram Feed
- Step 5: Embed Your Feed on Your Website
Step 1: Install and Activate Instagram Feed Pro
First, we need to install and activate the Instagram Feed Pro plugin.
If you’re unfamiliar with this, read this guide on installing a WordPress plugin.
For this walkthrough, we’re using the premium version of Smash Balloon, which offers a broader range of customization options and enhanced features. However, the free Smash Balloon Social Photo Feed is an excellent starting point if you’re just starting out or working within a tight budget.
After installing the plugin, the next step is activation. Navigate to the Instagram Feed » Settings section within your WordPress admin dashboard. This is where you’ll enter your license key. You can find your license key either in your purchase confirmation email or by logging into your Smash Balloon account.
Once you’ve located your license key, paste it into the designated field and click on Activate.

Remember to click Save Changes in the top right corner to secure your setup.
Completing these steps means you’ve successfully installed and activated Instagram Feed Pro on your WordPress site, setting the stage for creating your first WordPress Instagram feed.
Step 2: Create an Instagram Feed
The next step on the list is to create an Instagram feed for your website. To do this, navigate to Instagram Feed » All Feeds from the WordPress admin area. From there, click Add New:
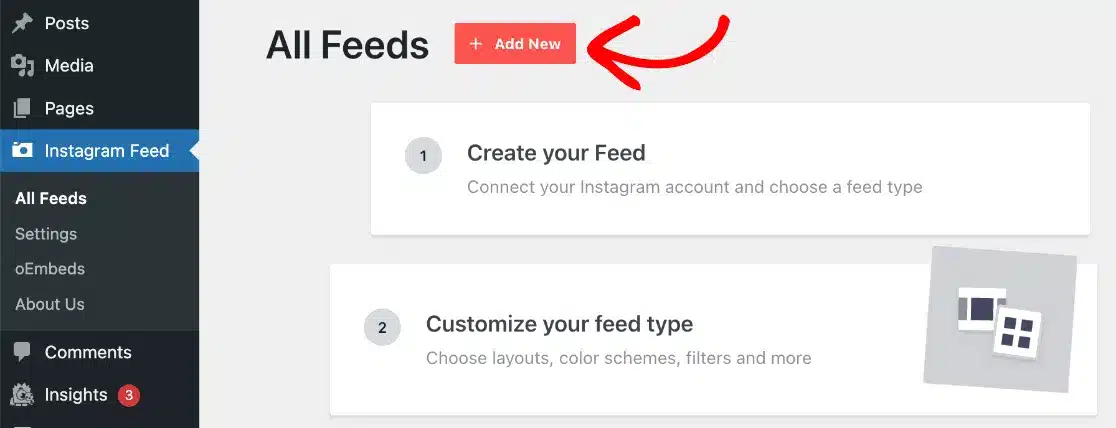
You will be presented with a few choices regarding the type of Instagram feed you want to embed:
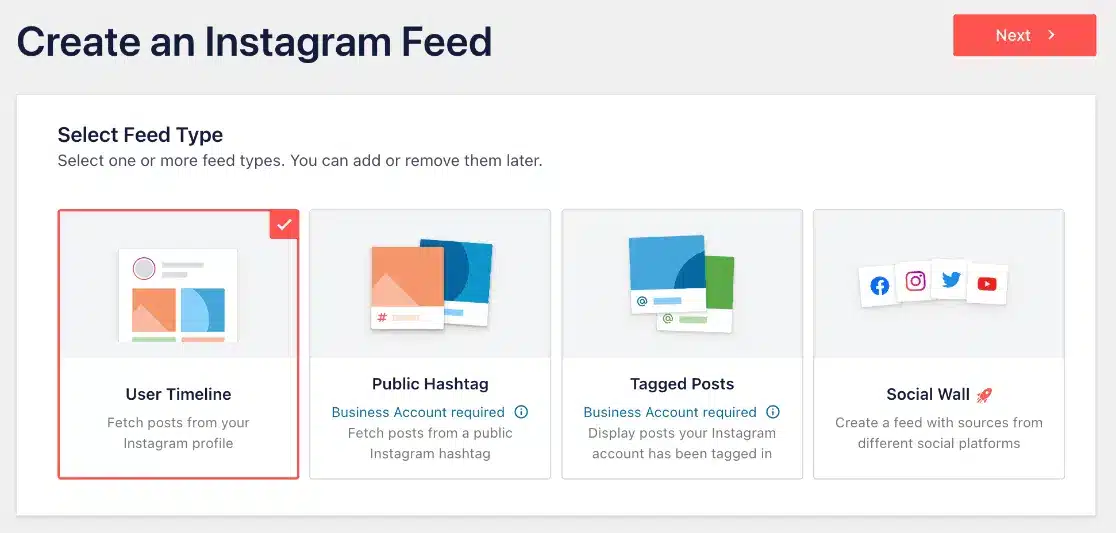
First, there’s the User Timeline option, which allows you to display the photos and videos you’ve posted on your Instagram profile. This is your only option if you’re using a free plan. It’s a great way to add a personal touch to your website.
Then, there’s the Public Hashtag option. This is ideal if you want to showcase posts from Instagram that use specific hashtags you’ve chosen, perfect for aligning with themes or marketing campaigns.
Lastly, the Tagged Posts option lets you feature content where other Instagram users have tagged your account. It’s a fantastic way to highlight community engagement or user-generated content on your site.
Lastly, the social wall option is for combining feeds from Smash Balloon’s different social media feeds; YouTube, Twitter, Instagram, Facebook, and Tiktok.
For this guide’s sake, we’ll choose the User Timeline. After selecting, click Next to continue the setup process.
Step 3: Connect Your Profile to Your Website
Whatever feed type you decide on, the next step involves connecting your new feed to your Instagram account. This is a crucial step, as it ensures that your feed pulls in content directly from Instagram, keeping your website’s display fresh and up-to-date with your latest posts.
You’ll see a blue button labeled + Add Source. This action will direct you to your Smash Balloon account, where you choose the type of Instagram account you’re looking to connect. Whether it’s a personal or business account, Smash Balloon accommodates both.
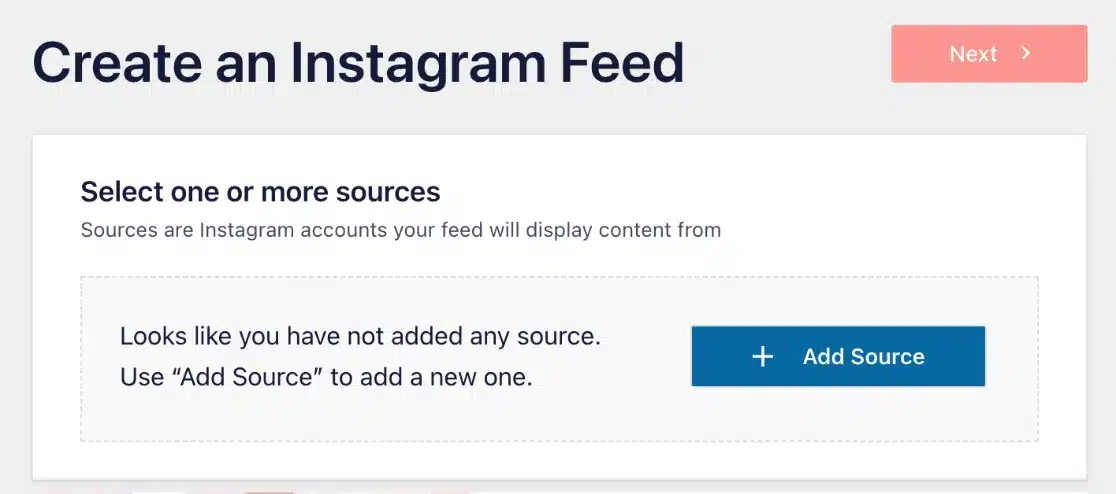
Next, click the Connect with Instagram button.
Following this, you’ll be redirected to Instagram’s official page, where the platform asks for permission to allow Smash Balloon to access your feed. It’s important here to ensure both permissions are enabled (indicated by them being highlighted in blue) before clicking Allow.
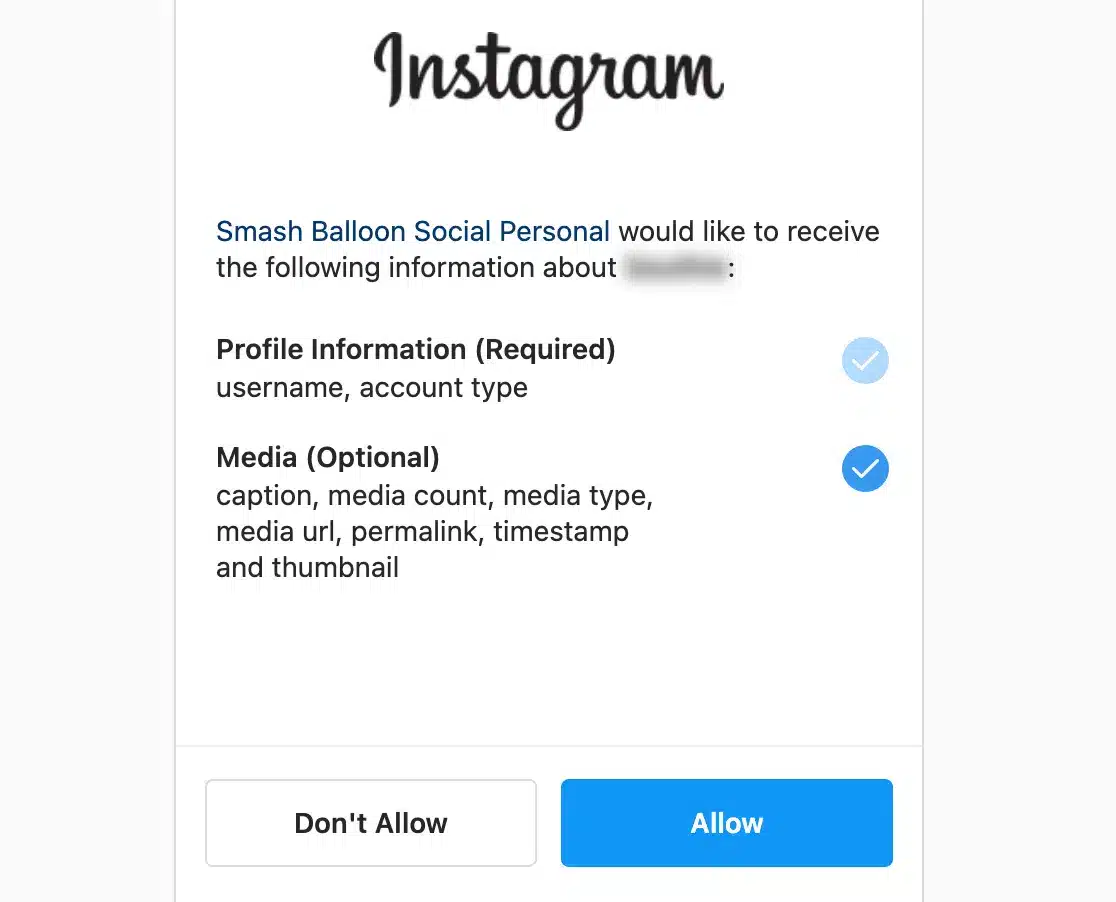
After granting the necessary permissions, you’ll be redirected back to your WordPress site. Here, you’ll select your newly connected Instagram feed source. With the source selected, click Next to proceed.
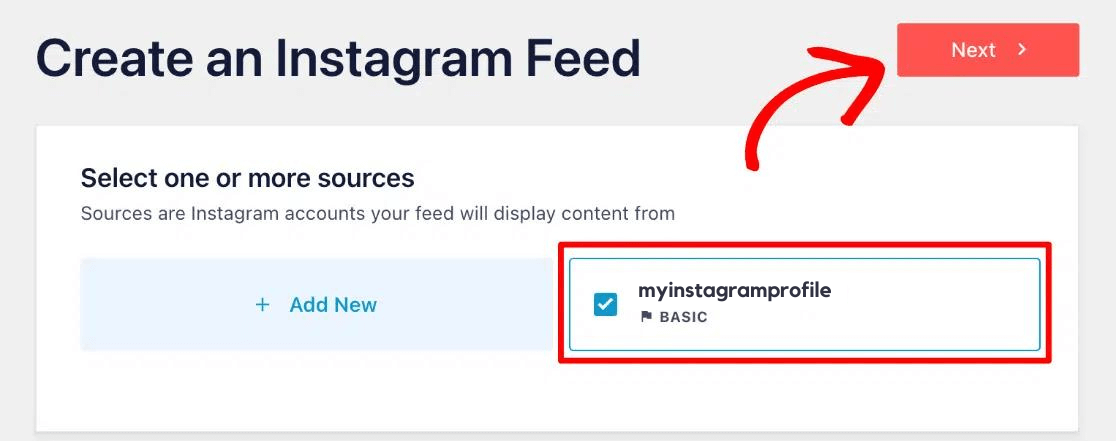
Now, you’ve successfully linked your Instagram feed to your WordPress website.
Step 4: Customize Your WordPress Instagram Feed
With the connection between your Instagram profile and your WordPress site established, the next phase is personalizing your WordPress Instagram feed. Starting off, you need to choose a template.
For this guide, let’s select the Default option. However, you have the flexibility to change this later in the editor.
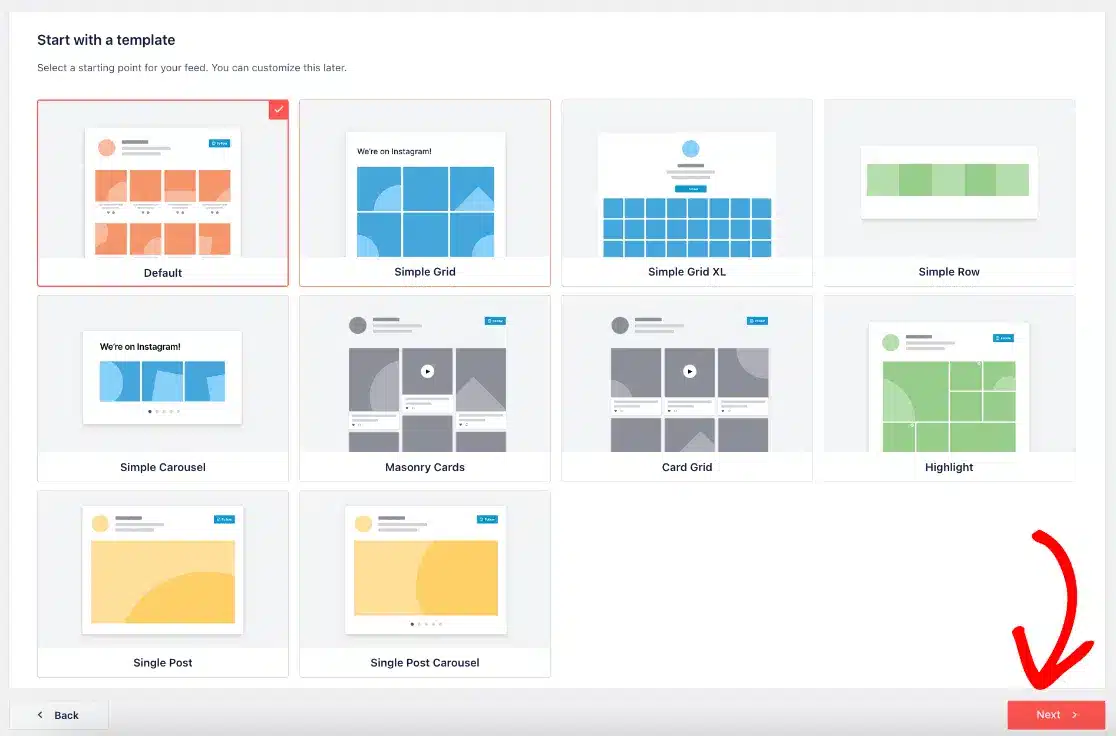
If you’re connecting to a personal account, a popup might suggest adding your profile photo and bio right away.
However, you can always add or adjust these details later by navigating to Instagram Feed » Settings and clicking on the settings icon next to your feed source, or you can fine-tune them for each feed directly in the editor.
After selecting a template, you’re introduced to the live editor. The editor is divided into two main sections: a sidebar with various customization options and a live preview area where your changes take shape in real time.
The sidebar on the left has everything you need to tailor your feed’s appearance, including layout choices, color schemes, header designs, and interactive elements like the lightbox feature, post styles, load more, and follow buttons.
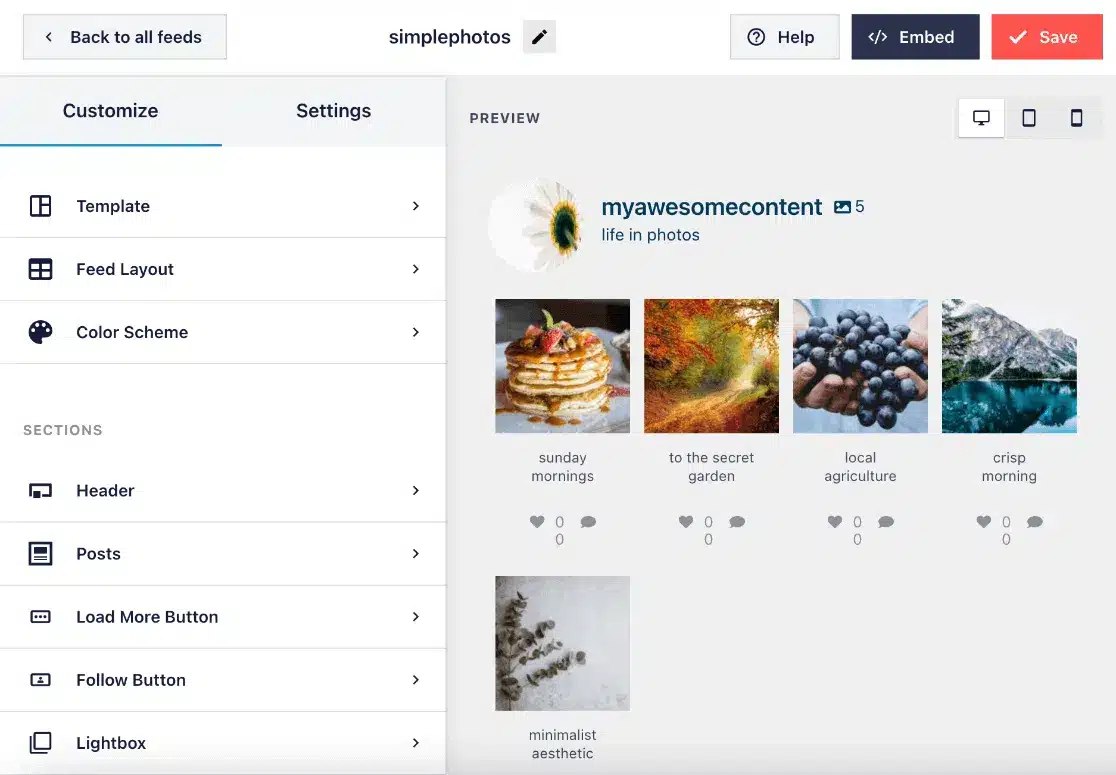
It’s worth mentioning that these extensive customization features are part of the Pro version. If you’re working with the free version, your options will be more limited, but you can always upgrade to unlock the full suite of features.
Dive into the customization process by exploring the different layouts such as Carousel, Masonry, Highlight, or Grid. Each layout offers unique advantages and settings like adjusting the number of rows in a carousel, the spacing between posts, or highlighting specific posts to capture your audience’s attention.
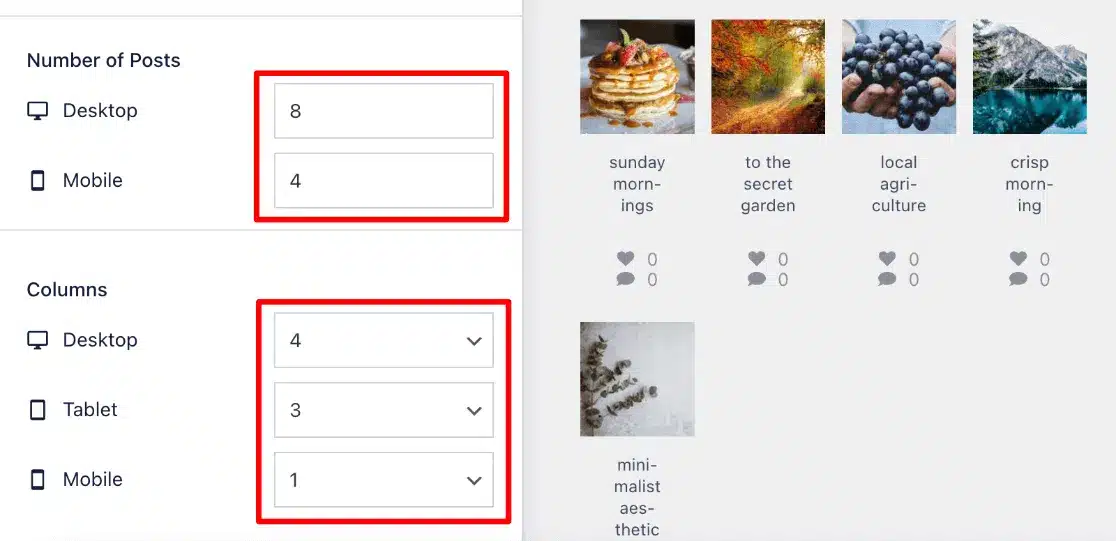
Feel free to experiment with these settings to discover what best suits your site.
Moreover, the live editor lets you preview your feed on various devices, ensuring your Instagram feed looks great regardless of how your visitors view your site. Adjusting the number of posts displayed or the column layout for different device types can significantly enhance the user experience, especially on smaller screens.
Additional settings available in the sidebar let you activate features like a Shoppable Feed, alter the sorting order of your posts, apply filters to manage which posts appear, and set up caching for your feed.
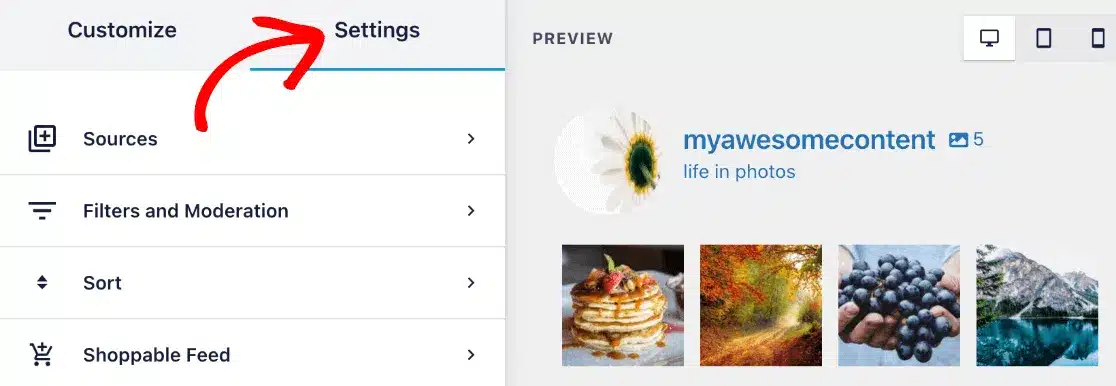
After customizing your feed and ensuring it aligns with your brand aesthetic, don’t forget to save your changes.
With your Instagram feed now personalized to your liking, you’re ready to move on to the final step: adding your beautifully customized Instagram feeds to your WordPress site.
Step 5: Embed Your Feed on Your Website
It’s time to embed your Instagram feed into your WordPress website. Click the Embed button, which presents you with three distinct methods for incorporating your Instagram feed into your site.

Embedding Using Shortcode:
The first method is by using a shortcode. Hit the Copy button to grab your Instagram feed’s shortcode and then paste it into any page or post.
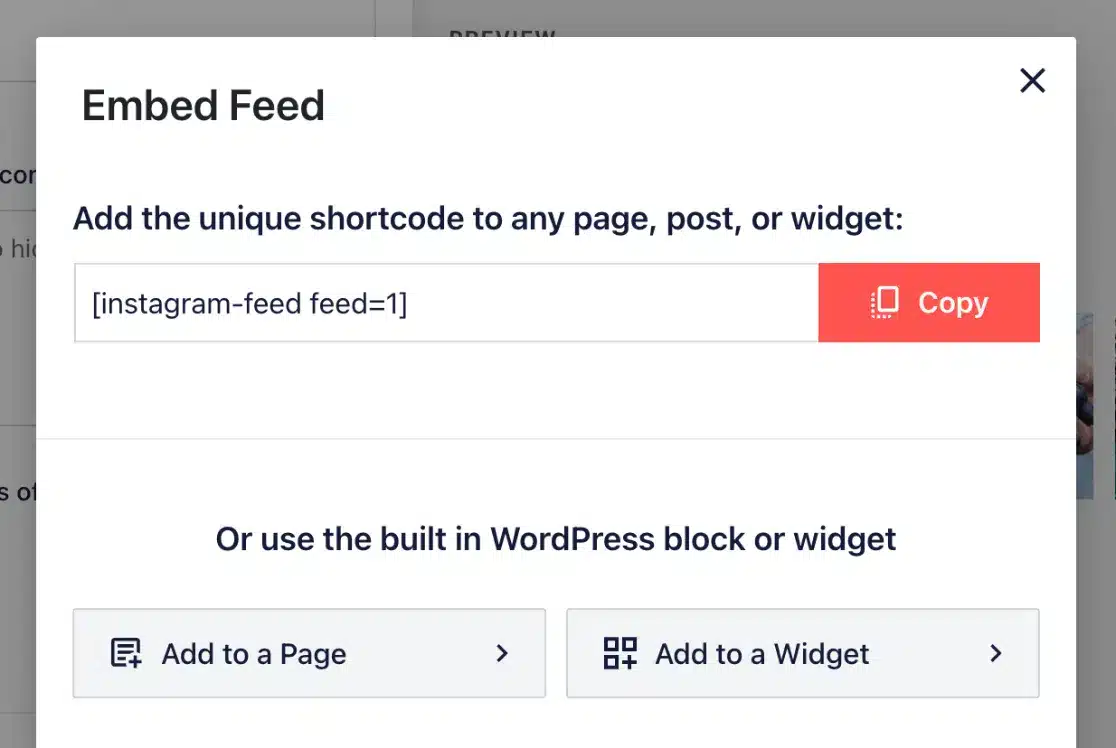
This is done through your WordPress shortcode block, making it a breeze to integrate your feed wherever you wish. To locate shortcodes for various feeds, navigate to the Instagram Feed » All Feeds, where each feed’s shortcode is readily visible.
Embedding Directly on a Page:
For those preferring to add their feed directly to a page, selecting Add to a Page shows a list of your pages. Choose your desired page, and you’ll be taken to the WordPress editor for that specific page.
Adding a new block is as simple as clicking the + icon, searching for the Instagram Feed block, and inserting it.
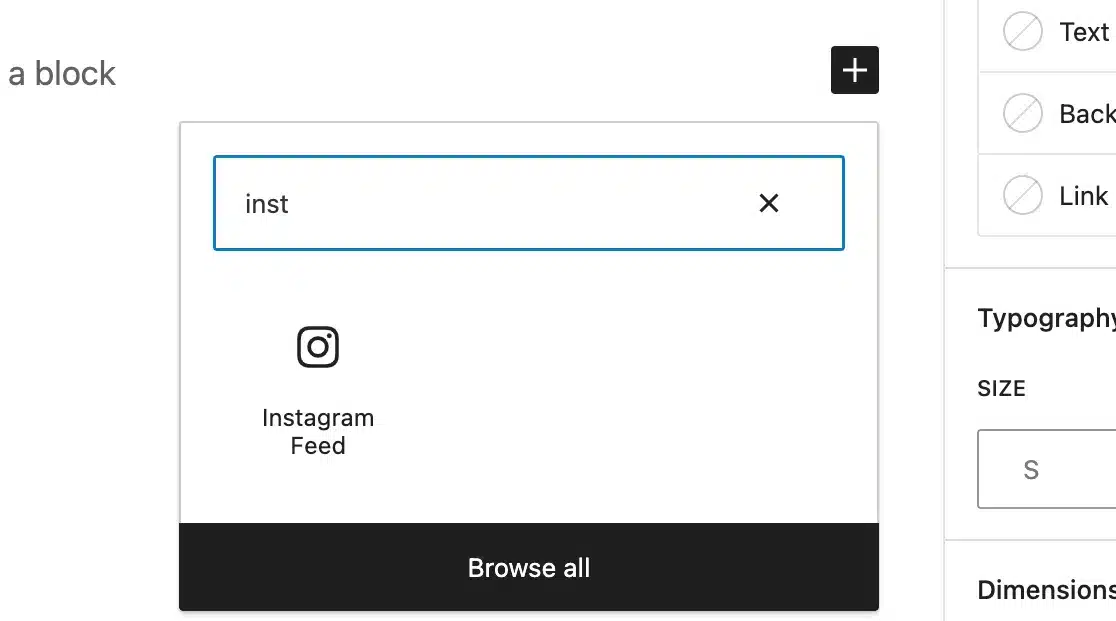
If managing multiple feeds, you’ll need to specify which one to display by adjusting the feed number in the Shortcode Settings and applying the changes.
3. Using a Widget:
Ideal for a site-wide display, like in sidebars or footers, the widget method allows for easy addition of your Instagram feed across your website.
Selecting Add to a Widget directs you to your site’s widget area (accessible also via Appearance » Widgets).
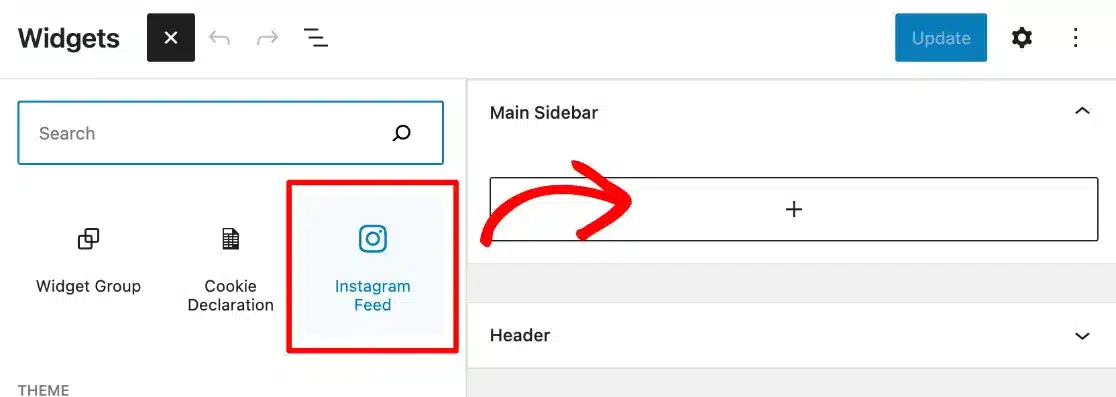
Add a new widget by clicking the blue + icon, searching for the Instagram Feed widget, and placing it in your desired location. Adjust the specific feed you wish to display by modifying the feed number in the Shortcode Settings.
Ensure your WordPress theme supports widget areas to utilize the widget embedding option effectively.
And that’s it!
You’ve now successfully embedded your Instagram feed into your WordPress website.
Remember to track your traffic and engagement with ExactMetrics!
If you liked this article, be sure to check out 11 Social Media Plugins for WordPress to Download Now.
Don’t forget to follow us on Twitter and Facebook to see all the latest Google Analytics tips and tutorials.


