If you want to collect and analyze data that Analytics doesn’t automatically track, you can create custom dimensions.
Custom dimensions are like default Analytics dimensions. They allow you to attribute additional information to hit, session, user, and product data.
Follow this guide to learn how to set up custom dimensions.
Prerequisites:
- You are a Pro license user or higher.
- Your ExactMetrics is installed and activated.
- Google Analytics is already authenticated on your website.
- You’ve already installed and activated the Custom Dimensions Addon.
Step 1: Add Custom Dimensions in ExactMetrics
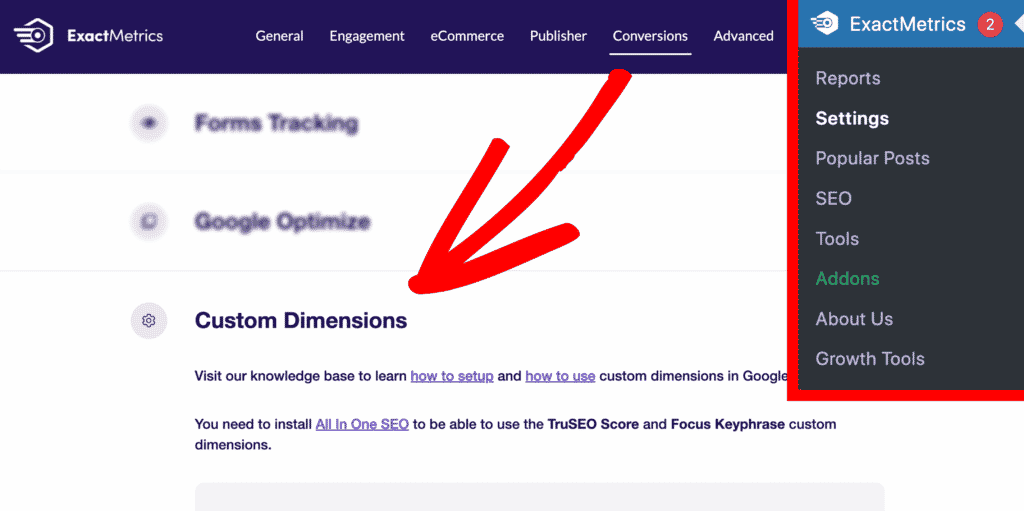
Go to ExactMetrics » Settings » Conversions and find the Custom Dimensions area:

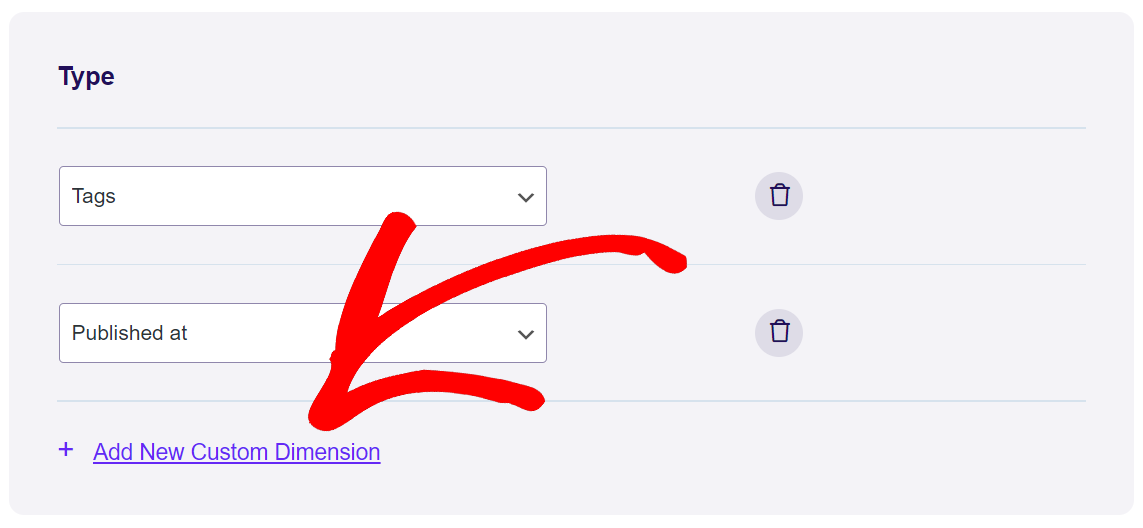
Click on + Add New Custom Dimensions, choose the dimension type from the dropdown and add all the custom dimensions you’ll need.

About Custom Dimensions
ExactMetrics provides several custom dimension types to choose from:
- Logged in
- User ID
- Post Type
- Author
- Category
- Published at
- Tags
- SEO Score
- Focus Keyword
1. Logged In
Track whether your visitors are logged in or not.
2. User ID
Track each individual logged-in user’s activity. Recommend for eCommerce or membership sites use.
3. Post Type
Track performance of each custom post type.
4. Author
Track authors and their content performance on your blog.
If you cannot find the Author custom dimension as an option, it’s most likely because you have the EU Compliance addon installed and activated. Author tracking is automatically disabled for customers to avoid issues with GDPR while the addon is active.
5. Category
Track the performance of your categories, see which topics are the most popular amongst your visitors.
6. Published at
Track your post performance according to when your post was published on your site.
7. Tags
Tags give you more detailed metrics about what specific topics work best on your site.
8. SEO Score
Analyze the SEO score of your posts and pages if you’re using the Yoast plugin for SEO.
9. Focus Keyword
Analyze the Focus Keywords of your posts and pages if you’re using the Yoast plugin for SEO.
Create the custom dimensions you want to track and Save Changes to finish.
Step 2: Set Up Custom Dimensions in Google Analytics
Once you’ve added custom dimensions within your WordPress site, you’ll need to configure your Google Analytics in the same way.
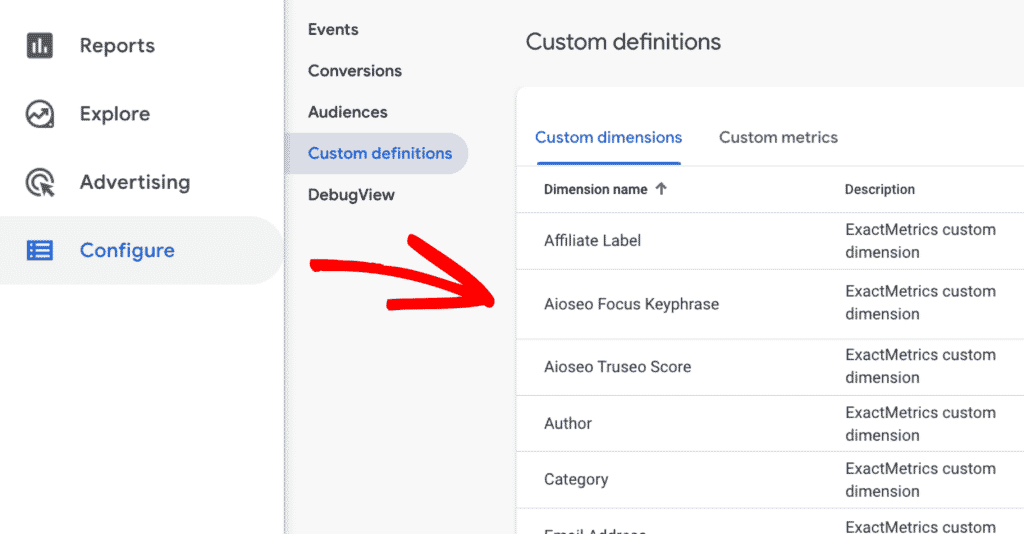
Once you’ve connected ExactMetrics to your GA4 property, ExactMetrics will automatically create all of the needed custom definitions within your GA4 settings at analytics.google.com » Configure » Custom definitions.

If you are able to see a list of ExactMetrics custom dimensions, then no further steps are needed and you’ll soon begin to track data for your custom dimensions.
If the list is completely blank, you’ll need to go to ExactMetrics » Settings and reconnect ExactMetrics to your GA4 property. The custom dimensions will automatically be generated during authentication.
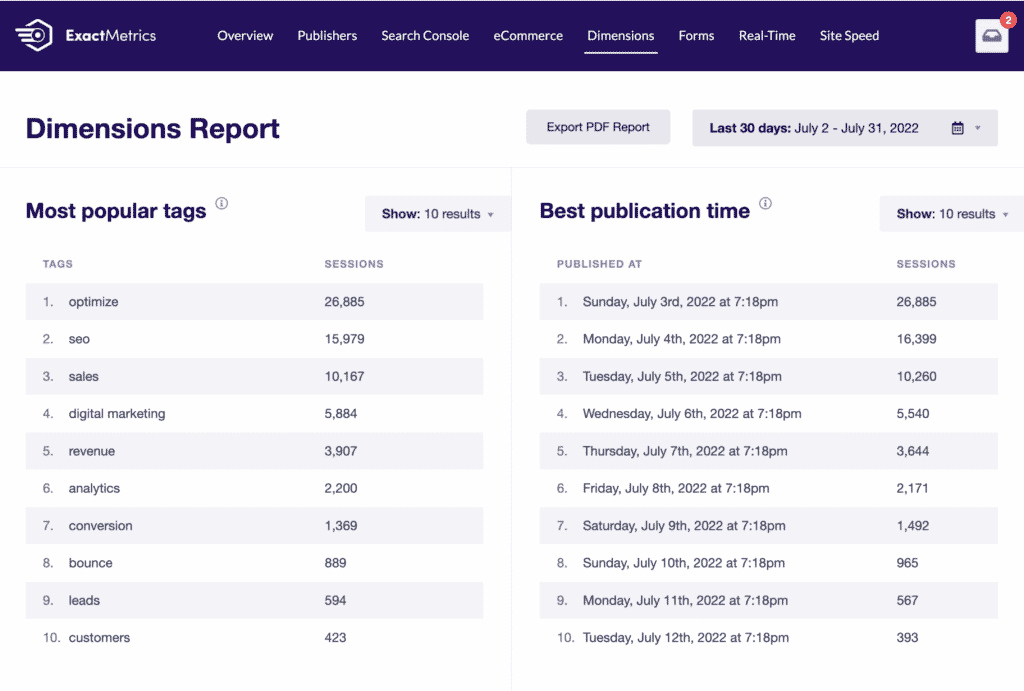
Once your custom dimensions are set up you’ll be able to view your reports within WordPress at ExactMetrics » Reports » Dimensions:

You should begin to see data in your reports within 24-48 hours.
You did it! You learned how to set up custom dimensions on your WordPress site.
What’s next? Learn how to track sales on your site the easy way: Google Analytics eCommerce Tracking plugin.
