Today’s website owners face an important challenge: balancing user experience with privacy compliance. One key aspect of this balance is the implementation of a cookie consent banner on your website.
If you’re wondering why these cookie banners and popups have become common across the internet, and you want to know how to add one to your WordPress site, you’ve come to the right place. In this article, we’ll go over why so many of today’s websites feature these banners, and then we’ll take a look at how to add one to your own WordPress website in two different ways.
Why Do I Need a Cookie Consent Banner?
Cookies, those small pieces of data stored in users’ browsers, play a crucial role in enhancing website functionality. They can remember login information, store website preferences, and help site owners understand user behavior. However, with the introduction of stricter privacy laws, particularly across the European Union, obtaining user consent before setting cookies has become a legal requirement.
This shift isn’t just about legal compliance; it’s about building trust with your audience. By setting up a cookie consent banner, you demonstrate transparency and respect for user privacy, which can enhance your site’s (and your business’s) credibility.
So, it’s a good idea for any and all websites that use a tool like Google Analytics to set up a cookie consent banner, at least for their visitors in the European Union.
Two Methods for Adding a Cookie Consent Banner
We recommend two top plugins for creating a WordPress cookie consent banner: Cookie Notice and Cookiebot. Both can be used for free, or you can upgrade for more features.
Plus, both of these privacy plugins integrate seamlessly with ExactMetrics Pro and our EU Compliance addon, so you can be sure that users who choose to block tracking are opted out of your Google Analytics tracking.
Let’s take a look at how to set up both of these cookie plugins.
Use Cookie Notice to Create a Cookie Consent Banner
Cookie Notice is broken down into two distinct functions: a cookie notice banner and a cookie compliance application. So, you can use one or both depending on your needs. In this tutorial, we’re just looking at the free banner plugin.
To get started with Cookie Notice, head to your WordPress dashboard and go to Plugins » Add new. Search for Cookie Notice and install the Cookie Notice & Compliance for GDPR/CCPA plugin:
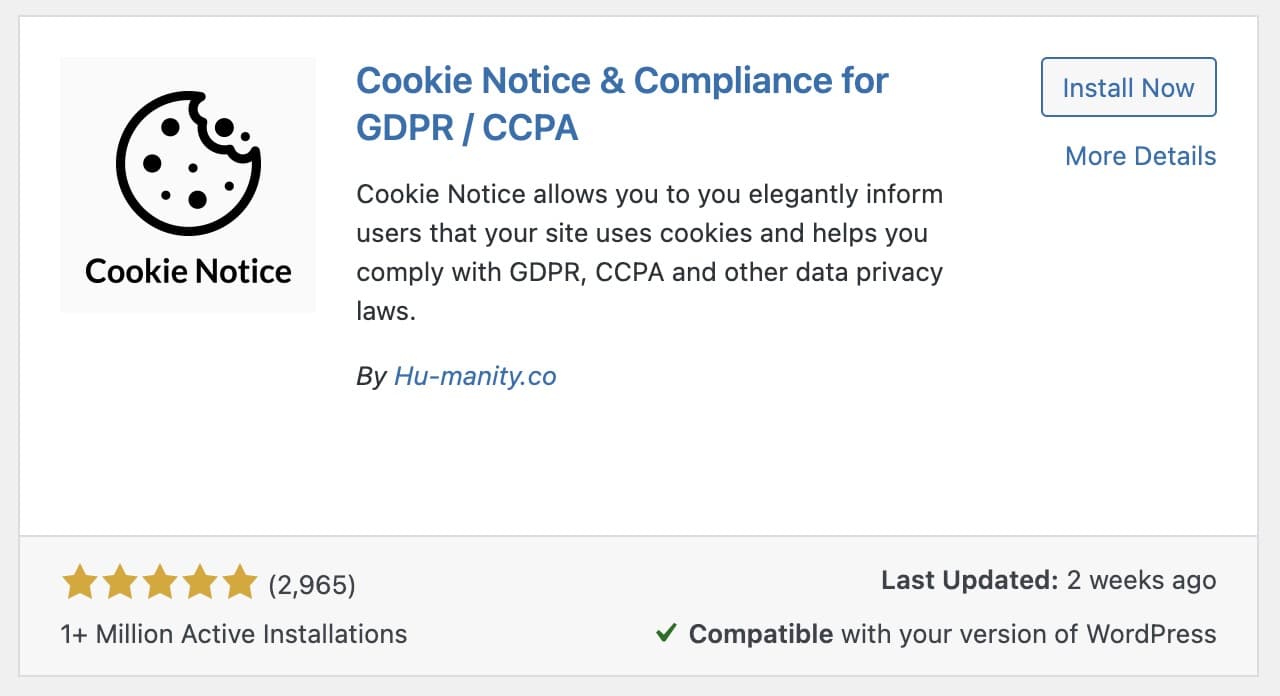
Upon activation, a basic cookie banner will automatically appear on your site.
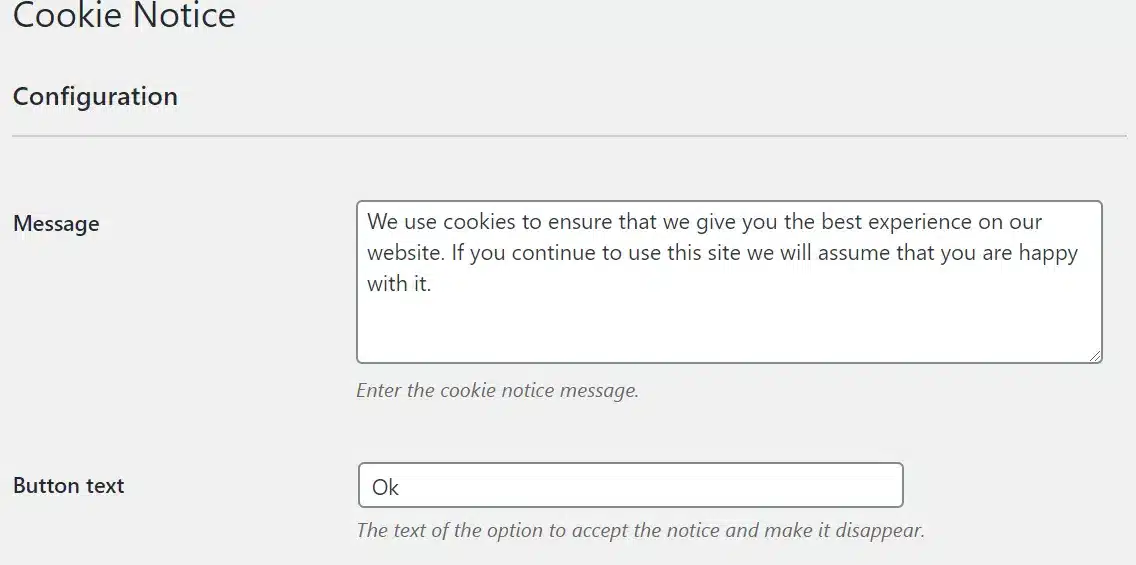
To refine your banner’s message and button text, navigate to Cookies » Settings and scroll down to the Notice Settings area:
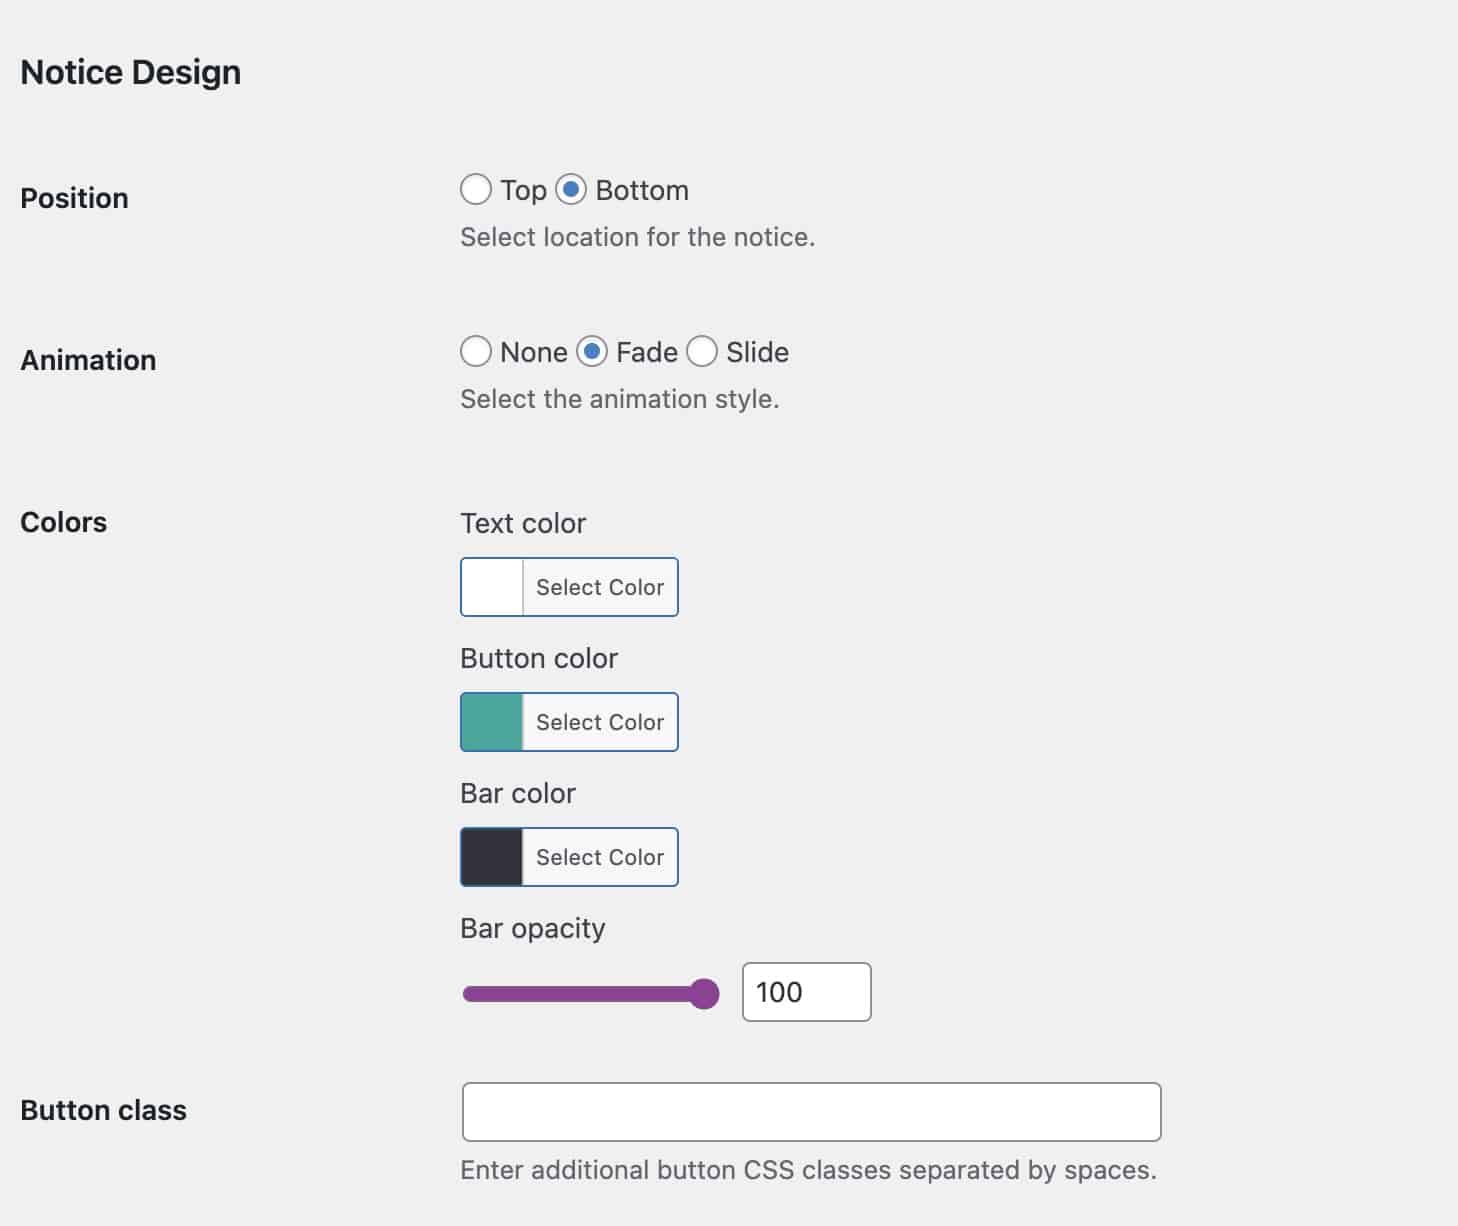
Scroll down to the options in the Notice Design section to adjust the design of your banner, such as where it appears, the animation, and the colors.
For full transparency, check the next box to enable the Privacy policy link option. Then, if you want users to be able to refuse consent, you’ll need to check the Refuse consent box. You can also choose if you want users to be able to revoke their consent:

Make sure to scroll through the rest of the settings, set them up however you desire, and click Save Changes at the bottom.
You’ll notice that there’s a box where you can choose to block scripts from running if a user chooses to block cookies. If you’re an ExactMetrics user, you don’t have to worry about that! Jump down to learn more about how ExactMetrics works with Cookie Consent.
Use Cookiebot to Create a Cookie Consent Banner
Cookiebot is an easy-to-use cookie compliance plugin for WordPress that can display a cookie notice and ask visitors to accept tracking.
With Cookiebot enabled, you can both ask visitors to accept tracking and give them the “do not sell my personal information” option to comply with both GDPR and CCPA.
To get started with Cookiebot, install the Cookiebot plugin on your WordPress site. To start with the free version, head to Plugins » Add new, then search for Cookiebot and click Install Now.
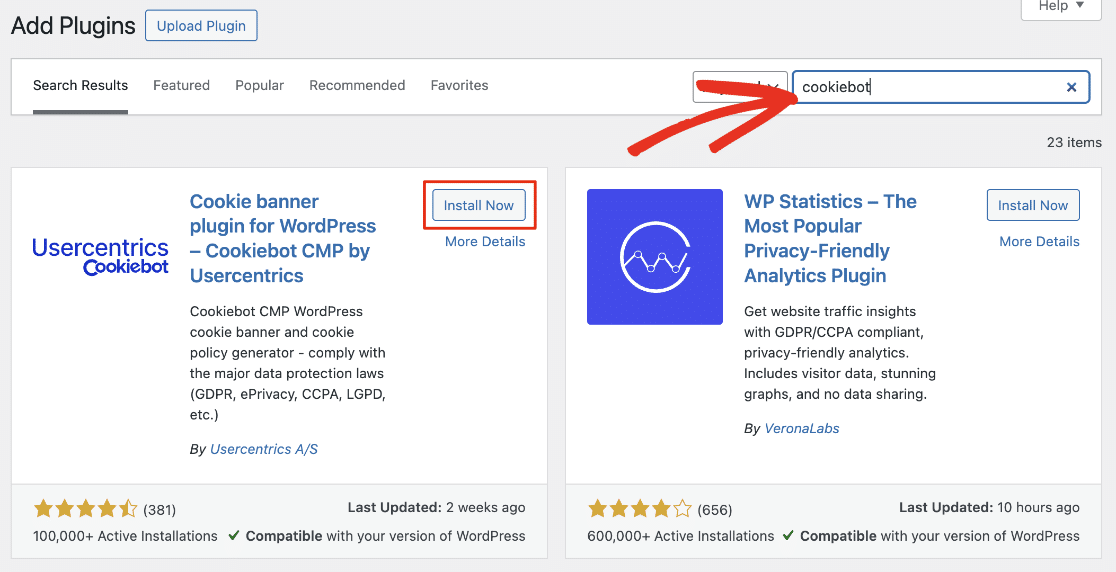
If you need more than 50 subpages and more features, check out the features you can get with Cookiebot’s paid versions.
Once the plugin is installed and activated, navigate to Cookiebot » Settings. If you don’t have an account yet, the first step in setting up Cookiebot is to create one:
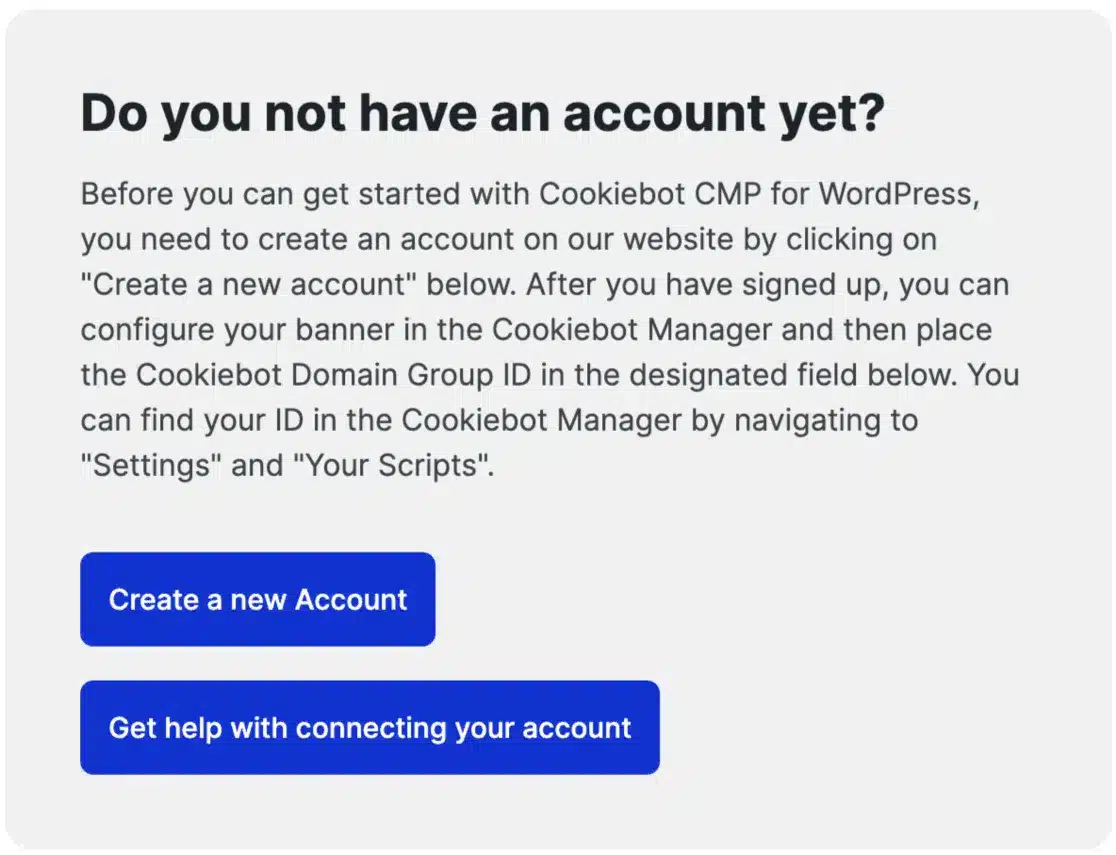
After creating your free Cookiebot account, you’ll be guided through setting up how you want your cookie notice bar or popup to look and which cookie options it should have.
Once you’ve set up the appearance options, it’ll go over installation instructions. You’ll need to click on Other Installation Guides:
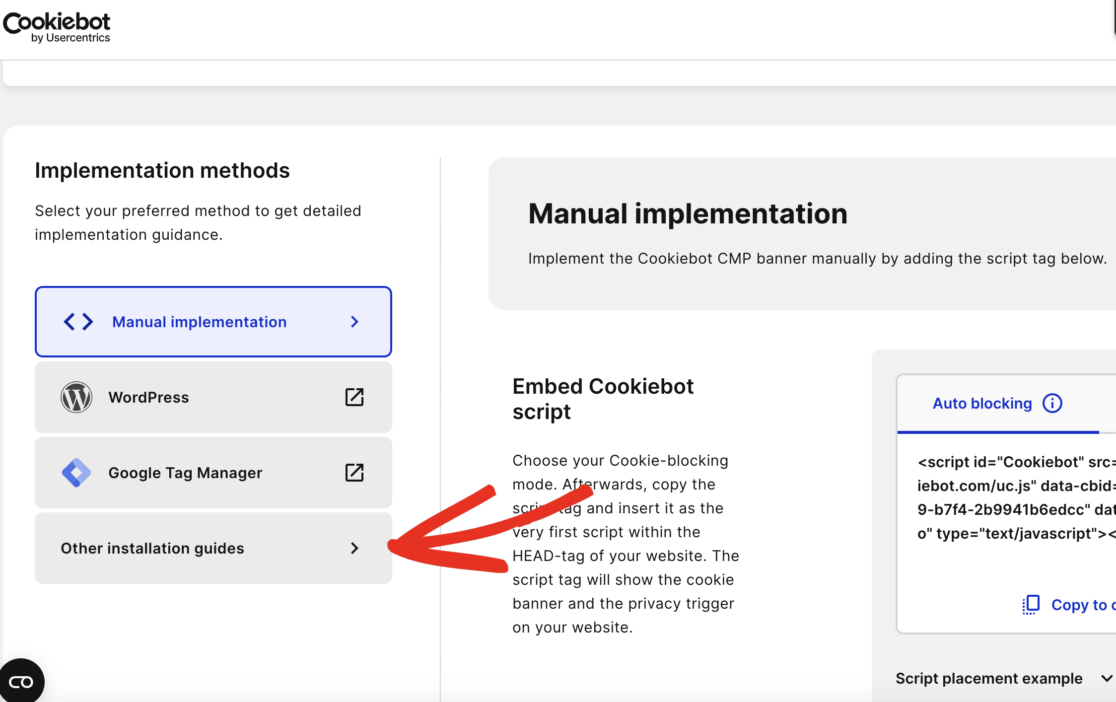
Then, copy your Domain Group ID:
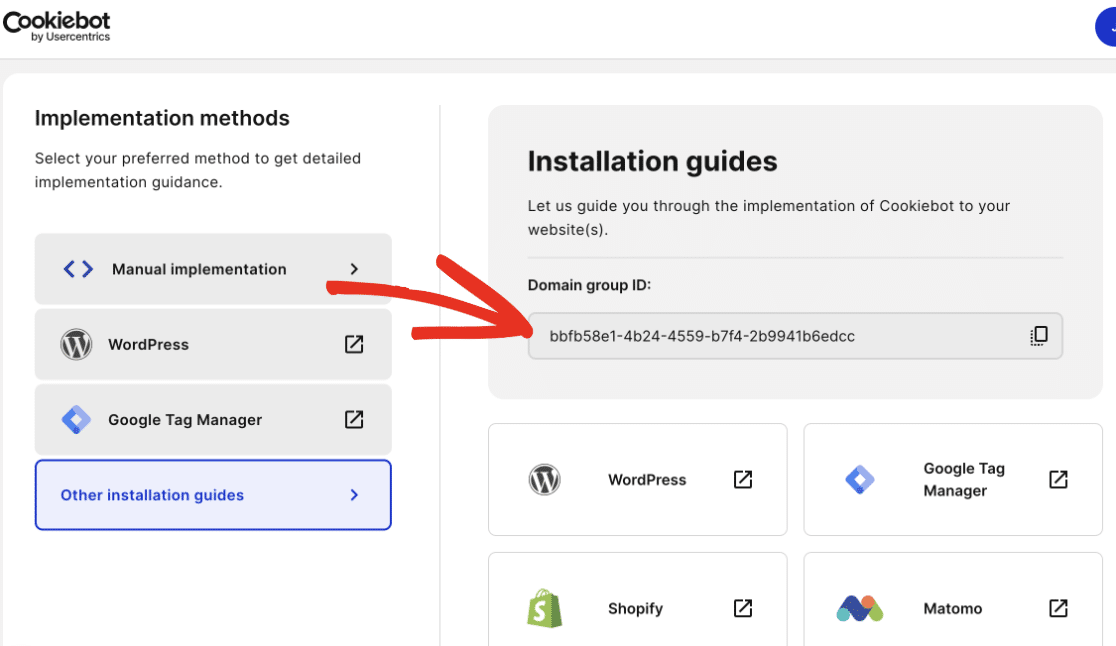
Paste this ID into your Cookiebot settings back in your WordPress dashboard:
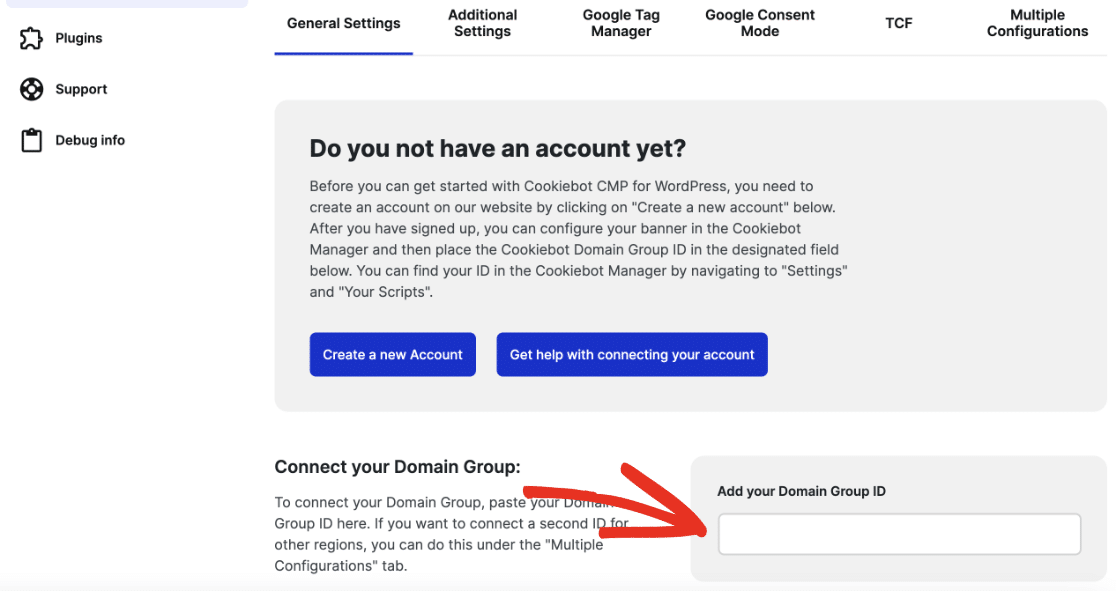
Make sure to click the green Save Changes button at the top of the page after pasting the ID.
Finally, scroll through all of the settings and make sure they’re set to your liking. Pay special attention to the Cookie-blocking mode settings:
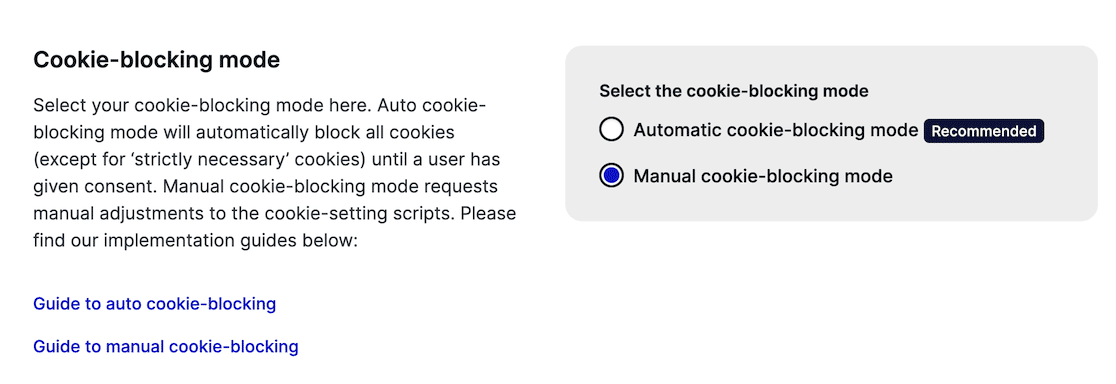
If you’re using the ExactMetrics plugin, make sure to leave the setting in Manual mode. ExactMetrics integrates with Cookiebot to take care of blocking the Google Analytics script for you!
That’s it! Your WordPress cookie banner should now be showing for the audience you chose in your Cookiebot account.
Easier GDPR Compliance with ExactMetrics
If you’re looking for an easy way to work toward GDPR compliance, take a look at ExactMetrics and the EU Compliance addon.
ExactMetrics is the best premium WordPress analytics plugin. Not only does our EU addon make working toward GDPR compliance much easier, but the plugin also comes with a whole bunch of features that make Google Analytics setup and tracking easy. Install ExactMetrics Pro now to take advantage of:
- Form submission tracking
- eCommerce tracking
- Media tracking
- Top outbound links and affiliate links
- Author tracking
- And much more
With ExactMetrics, you’ll get a whole dashboard full of reports that can help you track and understand your audience and ultimately grow your business. On top of that, you can install our EU compliance addon to make sure you’re excluding anyone who doesn’t want to be tracked, in compliance with GDPR and other privacy laws. The addon integrates with both of the cookie banner plugins mentioned in this article, plus Complianz and CookieYes.
Get started with ExactMetrics now!
Implementing a cookie consent banner on your WordPress site is more than just a legal obligation; it’s an opportunity to build trust with your audience. Whether you opt for Cookie Notice, Cookiebot, or another WordPress cookie banner plugin, you’re taking a crucial step toward privacy compliance.
Then, by integrating ExactMetrics into your strategy, you elevate your approach to data collection and analysis. This powerful tool not only helps with compliance but also provides valuable insights while respecting user privacy preferences.
That’s it!
If you liked this article, you might also want to check out:
8 Best WordPress Cookie Consent Plugins for GDPR Compliance
GDPR and Google Analytics 4: How to Make Your Site Compliant
How to Set Up Google Analytics: Beginner’s Guide
Finally, don’t forget to follow us on Twitter and Facebook to see all the latest Google Analytics tutorials.

